Rock painting is one of the most accessible, satisfying, and creative DIY crafts. Transforming smooth, river-washed stones into vibrant pieces of art allows you to blend nature with personal expression. Hand-painted rocks make delightful garden markers, cozy desk decor, paperweights, pocket talismans, and thoughtful handmade gifts that bring warmth and artistic flair to any living space.
If you are looking for fresh, Pinterest-worthy inspiration, this comprehensive guide explores 20 aesthetic solid rock painting ideas. Each concept breaks down what makes the design special, step-by-step instructions for painting it on stone, key tips and creative variations, and a list of essential supplies needed to turn ordinary stones into lasting, beautiful artwork.



1. Intricate Dot Mandala Stone
What This Idea Means
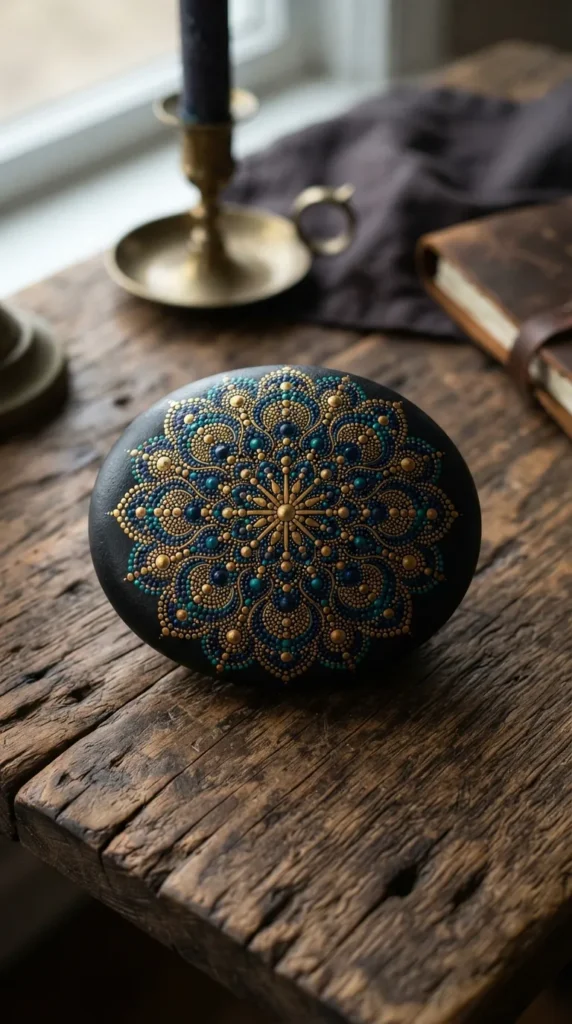
Dot mandala rock painting is a meditative practice that produces mesmerising, symmetrical geometric patterns radiating outward from a central focal point. The rhythmic placement of colorful paint dots creates a tactile, mosaic-like finish that feels both modern and deeply relaxing.
How to Make It
- Prepare the Rock: Wash a smooth, rounded river stone with warm soapy water to remove dirt and oils. Once completely dry, paint the entire rock in a solid coat of matte black or dark navy acrylic paint to establish high contrast.
- Find the Center: Mark the exact center of the rock with a soft graphite pencil. Use a flexible circular stencil or compass to lightly draw concentric guide rings.
- Paint the Center Dot: Dip the largest acrylic dotting rod into bright white or teal paint and press firmly onto the center mark.
- Build Concentric Rings: Using progressively smaller dotting tools or stylus tips, place uniform dots in alternating colors around the central ring. Maintain equal spacing between each dot.
- Add “Walking” Dots: Enhance the design by “walking” tiny white dots around larger color dots to create intricate teardrop arches.
- Seal: Allow the rock to cure for 24 hours, then apply a thick, high-gloss clear varnish or resin topcoat to bring out the depth of the colors.
Tips & Variations
- Ombré Gradient: Choose a single color family (e.g., dark royal blue to pale ice blue) and transition through the shades as you move outward from the center.
- Metallic Pops: Incorporate liquid gold or silver metallic paint into every third ring to give your mandala a shimmering, jewel-like quality.
Needs & Materials
- Smooth black river rock or dark beach stone
- Acrylic paints (Navy, Teal, Cyan, White, Liquid Gold)
- Acrylic dotting rods and double-ended ball stylus tools
- Soft pencil and flexible circle stencil
- High-gloss varnish or UV resin
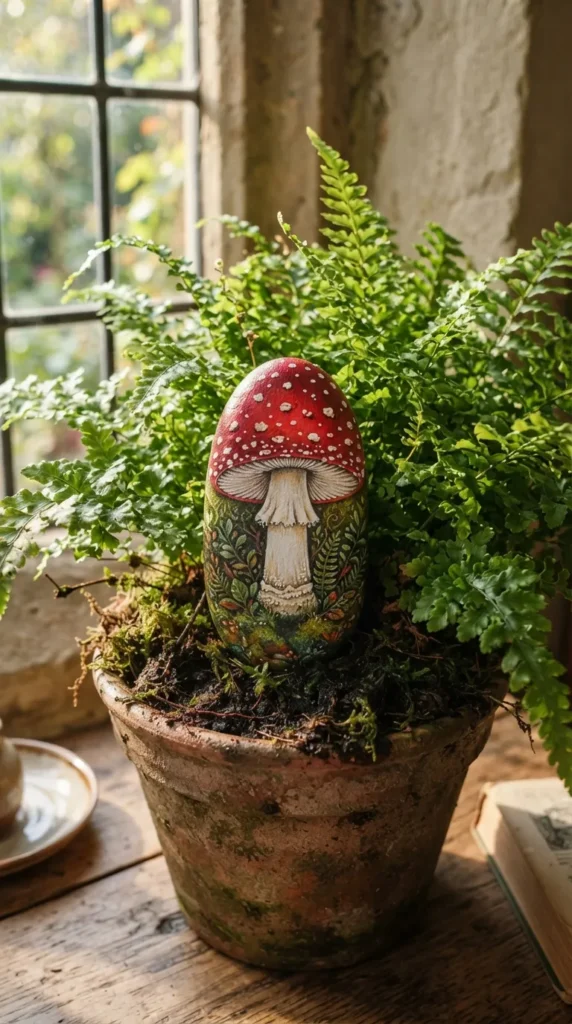
2. Cottagecore Amanita Mushroom Family
What This Idea Means
Rooted in cozy countryside nostalgia, this cottagecore theme turns smooth oval rocks into fairytale toadstools (Amanita muscaria). With vibrant crimson caps, delicate white speckles, and soft green mossy bases, these painted stones bring a touch of woodland magic to garden beds and potted plants.
How to Make It
- Clean and Prime: Wipe down a tall, oval-shaped river rock. Apply a warm cream or off-white acrylic base coat over the bottom half to form the mushroom stems.
- Paint the Caps: Paint the top curved dome of the rock in a rich cardinal red or warm terracotta acrylic paint. Apply two to three coats for solid, vibrant coverage.
- Stipple the Mossy Base: Dip a small sea sponge or stiff bristle brush into moss green and forest green paint. Stipple around the bottom edge of the stone to create a natural, grassy soil texture.
- Add Cap Speckles: Using the rounded end of a paintbrush handle or a dotting stylus dipped in opaque white paint, stamp irregular dots across the red cap. Vary the dot sizes for a natural look.
- Detail the Stems: Use a fine liner brush with light taupe paint to add subtle vertical shadow lines along the cream stem area.
- Seal: Protect with a matte or satin exterior sealer spray if placing the stones outdoors.
Tips & Variations
- Cluster Stones: Paint three different-sized rocks in matching colors and arrange them together in a potted fern as a mushroom family.
- Pastel Fairy Mushrooms: Swap the classic red cap for soft dusty pink, lavender, or sage green caps for a gentler fairytale palette.
Needs & Materials
- Oval river stone
- Acrylic paints (Crimson Red, Off-White, Moss Green, Taupe)
- Small sea sponge or stiff brush
- Fine detail brush and dotting stylus
- Outdoor-grade matte or satin sealer
3. Celestial Crescent Moon & Nebula Sky
What This Idea Means
This dreamlike concept captures the mysteries of the night sky on a single stone. Blending swirling galactic purple and indigo tones with a brilliant metallic gold crescent moon and delicate star constellations, it serves as an enchanting desk accessory or pocket stone.
How to Make It
- Base Color Wash: Clean a flat, smooth stone. Paint the entire surface with deep midnight blue or charcoal acrylic paint.
- Sponge the Nebula Cloud: Dip a damp sea sponge into vibrant magenta, violet, and sky blue paints. Lightly dab the colors across the center of the rock in an organic, swirling path to form a deep-space nebula.
- Trace the Crescent Moon: Place a coin or circular object near one side of the rock and trace a bold crescent moon shape using a soft pencil.
- Fill with Gold: Fill the crescent moon with two coats of rich metallic gold fabric or ceramic acrylic paint.
- Add Stars and Constellations: Flick diluted white paint across the stone using a toothbrush to create a field of distant stars. Use an ultra-fine detail brush (#000) to draw bright four-point starbursts and dotted constellation lines.
- Seal: Coat with a ultra-gloss sealer to give the celestial nebula rich visual depth.
Tips & Variations
- Glow-in-the-Dark Accents: Mix a small amount of phosphorescent glow pigment into the white star dots so your celestial stone glows softly in the dark.
- Full Moon Texture: Paint a detailed, cratered full moon using stippled shades of grey, cream, and silver.
Needs & Materials
- Flat, smooth dark stone
- Acrylic paints (Midnight Blue, Violet, Magenta, Sky Blue, Metallic Gold, White)
- Natural sea sponge and toothbrush
- Ultra-fine detail brush (#000)
- Ultra-gloss sealer spray
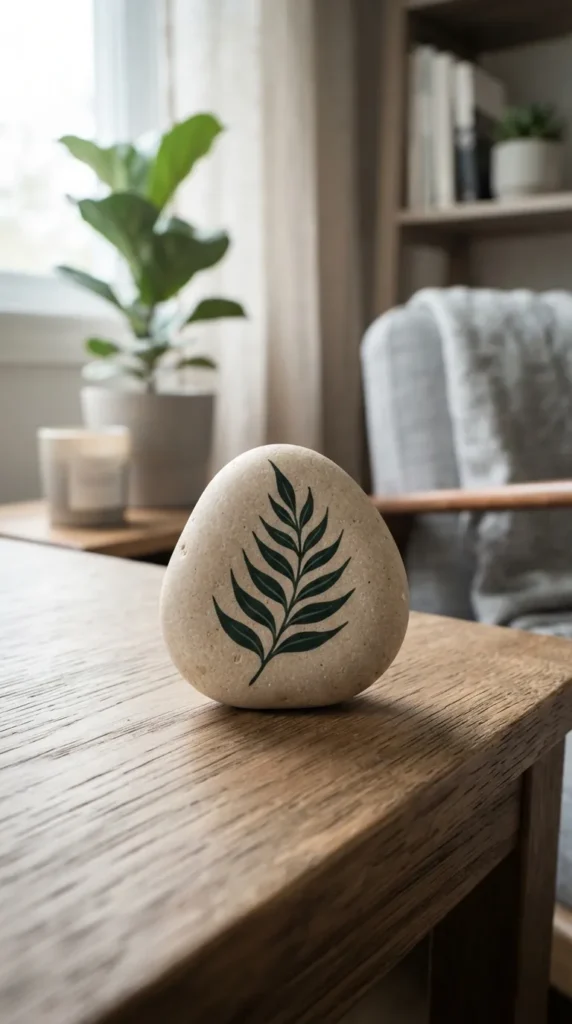
4. Minimalist Botanical Leaf Silhouettes
What This Idea Means
Sleek, Scandinavian-inspired, and effortlessly chic, this design pairs clean line art with organic botanical forms. Painting delicate eucalyptus branches, fern fronds, or monstera leaves over a neutral background creates a tranquil piece of modern home decor.
How to Make It
- Apply Neutral Base: Coat a smooth river rock in two coats of warm beige, oatmeal, or light taupe chalk paint. The matte finish provides a perfect Scandinavian backdrop.
- Draft the Botanical: Lightly sketch a sweeping stem with pairs of oval leaves or delicate fern fronds using a light graphite pencil.
- Paint the Silhouette: Using a fine liner brush (#0) dipped in rich forest green, sage, or dark charcoal acrylic paint, trace the stem and fill in the leaf shapes.
- Add Contrast Highlights: Once the dark silhouette is dry, use an ultra-thin brush with cream paint to add a single fine line down the center of each leaf for a subtle midrib detail.
- Seal: Protect the artwork with a velvety matte varnish coat to preserve the soft chalk-paint aesthetic.
Tips & Variations
- Negative Space Leaf: Paint the entire rock in deep sage green, leaving the leaf shape raw and unpainted in the center.
- Gold Leaf Stem: Trace the central stem line with liquid gold leaf for an elevated, elegant contrast against the dark green foliage.
Needs & Materials
- Smooth river rock
- Matte chalk or acrylic paint (Oatmeal/Beige, Forest Green, Sage, Cream)
- Fine detail liner brush (#0, #00)
- Graphite pencil
- Matte clear varnish
5. Sun-Kissed Amalfi Lemon Slice
What This Idea Means
Evoking the sun-drenched Italian coast, this bright, cheerful concept turns flat, circular stones into vibrant lemon cross-sections and juicy citrus branches. It brings instant summer energy and Mediterranean charm to any space.
How to Make It
- Select and Clean Stone: Choose a flat, rounded stone that resembles a citrus fruit disk. Clean and dry it thoroughly.
- Paint the Rind: Paint a thick border around the outer edge of the stone using vibrant canary yellow acrylic paint. Add a thin inner ring of pure white paint to represent the pith.
- Divide Segments: Use a soft pencil to lightly sketch 8 to 10 triangular wedge segments radiating from the center of the stone.
- Fill Fruit Pulp: Fill each segment with bright lemon yellow paint. While the paint is still slightly damp, blend a tiny drop of warm ochre or orange near the outer edges of each segment to create dimensional depth.
- Add Pith and Texture: Draw thin white lines separating the segments and add small tear-drop seeds near the core. Use a fine tool to stipple tiny white highlights into the pulp for a glistening look.
- Seal: Apply a glossy varnish to give the lemon slice a wet, freshly cut appearance.
Tips & Variations
- Citrus Trio: Paint a matching set of stones as a lime slice, blood orange, and grapefruit for a colorful citrus trio.
- Leafy Stem Backdrop: Paint a whole lemon attached to a dark olive branch with delicate white citrus blossoms.
Needs & Materials
- Flat, round river stone
- Acrylic paints (Canary Yellow, Warm Ochre, White, Soft Orange)
- Fine round brushes (#1, #3)
- High-gloss clear topcoat
6. Cozy Hygge Sweater Knit Texture
What This Idea Means
Inspired by Nordic winters and hygge comfort, this cozy concept uses dimensional glass paint or heavy-body acrylics to build raised cable-knit sweater patterns across smooth stones, creating a piece of art that is as satisfying to touch as it is to look at.
How to Make It
- Apply Base Coat: Paint a smooth stone in a soft, cozy shade such as warm cream, pastel dusty pink, or muted sage green. Let dry completely.
- Map the Knit Grid: Lightly pencil vertical parallel guidelines across the top face of the rock.
- Apply Dimensional Paint: Fill a fine-tip squeeze bottle or piping tool with thick, heavy-body acrylic paint or dimensional fabric paint in the same color shade as your base coat.
- Pipe Cable Braids: Trace along your guidelines, piping interlocking “S” curves and figure-eight loops to mimic raised cable-knit yarn braids.
- Add Ribbed Edges: Pipe short, parallel horizontal lines along the top and bottom borders to simulate sweater cuffs.
- Dry and Seal: Allow the dimensional paint to dry for 24 hours until fully hardened. Spray with a soft matte varnish.
Tips & Variations
- Tonal Contrast: Use cream base paint and pipe pale taupe knit lines over it to make the cable pattern stand out visually as well as physically.
- Winter Snowflake Overlay: Stipple a few delicate white star flakes across the sweater pattern for a festive touch.
Needs & Materials
- Smooth river stone
- Heavy-body acrylic or dimensional glass/fabric paint (Cream, Dusty Pink, or Sage)
- Precision tip applicator bottle
- Soft pencil and ruler
- Matte clear sealer


7. Moody Dark Academia Stack of Books
What This Idea Means
Perfect for bibliophiles and lovers of dark academia, this aesthetic turns rectangular, blocky rocks into stacks of vintage leather-bound books complete with ornate gold spines, weathered pages, and gothic flourishes.
How to Make It
- Select a Blocky Stone: Find a stone with flat sides and defined edges that resembles a thick book or a small stack of volumes.
- Paint Page Edges: Paint three side edges of the stone in soft cream or tea-stained tan. Draw thin parallel horizontal lines using a fine brown pen to simulate individual paper pages.
- Paint the Leather Covers: Paint the front, back, and spine surfaces in rich mahogany brown, deep forest green, or burgundy acrylic paint.
- Detail Spine Ribs: Draw raised horizontal bands across the spine area using thick paint.
- Add Gold Filigree: Using an ultra-fine metallic gold paint pen or detail brush, draw ornate corner flourishes, intricate spine decorations, and faux classic titles (e.g., Poetry, Botany).
- Age the Edges: Gently rub dark brown ink or watered-down black paint along the corners to create an antique, weathered patina.
- Seal: Finish with a satin or antique-rub sealer.
Tips & Variations
- Bookmark Ribbon: Paint a thin red or gold ribbon hanging out from the bottom “pages” of the book stack.
- Single Tome: Paint a flat rock as a single open grimoire or leather journal with a bookmark lying across the open pages.
Needs & Materials
- Flat-sided or rectangular river stone
- Acrylic paints (Mahogany, Forest Green, Burgundy, Cream, Black)
- Metallic gold paint pen or fine detail brush
- Brown distressing ink or wash
- Satin sealer
8. Japanese Koi Pond Waterscape
What This Idea Means
Capturing the serene beauty of a traditional Zen garden, this project paints elegant red and orange koi fish swimming through translucent turquoise waters surrounded by lily pads and soft water ripples.
How to Make It
- Paint the Water Base: Clean a smooth stone. Paint the top face with a gradient of deep ocean blue blending out to bright turquoise and teal near the edges.
- Draft the Koi Fish: Pencil two curving “S”-shaped fish silhouettes swimming in a circular path around each other.
- Paint Fish Bodies: Fill the fish shapes with opaque white acrylic paint. Once dry, layer vibrant orange, vermilion, and black spots across their backs.
- Add Fins and Tails: Use a fine liner brush with translucent white paint to draw delicate, feathery fins and flowing tails.
- Paint Lily Pads: Add flat oval lily pads in deep emerald green, placing tiny pink blossom dots on top of them.
- Add Water Ripples: Paint fine, arching white lines around the koi and lily pads to create the illusion of movement across the water surface.
- Seal: Apply a crystal-clear epoxy resin topcoat to give the rock a glass-like depth that mimics real water.
Tips & Variations
- Layered 3D Resin Effect: Paint the water and lily pads first, apply a layer of clear resin, paint the fish on top of the cured resin, and seal with a final resin coat for true 3D depth.
- Golden Koi: Paint the koi fish entirely in metallic gold and copper shades for a symbolic talisman of luck and prosperity.
Needs & Materials
- Smooth river stone
- Acrylic paints (Navy, Turquoise, White, Bright Orange, Emerald Green, Pink)
- Fine liner brush (#00)
- Two-part clear epoxy resin or UV resin
9. Modern Terracotta Geometric Arch
What This Idea Means
Rooted in mid-century modern design and desert bohemian palettes, this aesthetic features clean geometric arches, sun disks, and half-moons painted in warm earth tones like rust, mustard, sand, and terracotta.
How to Make It
- Prepare Base: Clean a flat stone and paint it in a smooth, solid coat of warm sand or nude beige chalk paint.
- Draft Arches: Use a flexible curve stencil or compass to pencil a large central arch shape on the stone. Add a smaller, overlapping arch or circle off to one side.
- Paint Geometric Blocks: Fill the large arch with rich terracotta paint and the overlapping circle with warm mustard yellow. Use flat, steady brushstrokes.
- Add Linear Accents: Use a fine detail brush dipped in white or dark charcoal paint to draw clean, radiating sunburst lines or dotted borders framing the arches.
- Refine Edge Lines: Touch up any shaky edges using a fine detail brush dipped in your background base color.
- Seal: Apply a flat matte sealer spray to maintain an authentic earthy ceramic look.
Tips & Variations
- Tonal Clay Palette: Use three varying shades of warm brown (tan, terracotta, deep chocolate) for a sophisticated tonal composition.
- Dotted Border Overlay: Trace along the outer curve of the terracotta arch with tiny, evenly spaced white stipple dots.
Needs & Materials
- Flat river stone
- Chalk or acrylic paints (Sand/Nude, Terracotta, Mustard, Rust, Charcoal, White)
- Flat synthetic brush and detail liner brush
- Flexible stencil or compass
- Matte clear sealer spray
10. Whimsical Fairytale Cottage Door
What This Idea Means
Turning an upright, arched rock into a charming fairytale door creates an enchanting decor piece for garden paths or fairy gardens. Featuring wooden planks, climbing ivy, stone archways, and a tiny brass handle, it sparks imagination and wonder.
How to Make It
- Choose an Arched Stone: Select a stone that naturally stands upright and features a rounded top edge resembling an arched doorway.
- Outline Door Frame: Pencil a border around the perimeter of the rock face to mark a stone or brick archway frame.
- Paint Wood Planks: Fill the inner door space with rich teal, dusty blue, or warm brown paint. Draw vertical wood grain lines and plank seams using dark brown paint and a fine liner brush.
- Paint Stone Archway: Paint the outer frame border using alternating light grey and charcoal blocks to resemble laid cobblestones.
- Add Hardware Details: Paint a metallic gold or black iron door handle, keyhole, and strap hinges on the wooden door.
- Add Climbing Ivy: Paint delicate green ivy vines with tiny leaves creeping up the cobblestone archway and around the door base.
- Seal: Protect with an exterior-grade gloss or satin varnish.
Tips & Variations
- Glowing Window Lantern: Paint a small hanging lantern beside the door with a bright yellow light glow spreading across the wood.
- Stone Welcome Mat: Paint a small, flat “Welcome” mat or a cobblestone path extending forward at the base of the door.
Needs & Materials
- Upright arched river stone
- Acrylic paints (Teal/Blue, Brown, Grey, Charcoal, Gold, Leaf Green)
- Fine detail liner brushes (#0, #00)
- Outdoor-grade varnish
11. Vibrant Retro 70s Psychedelic Waves
What This Idea Means
Channeling mid-century pop art and groovy seventies nostalgia, this eye-catching style covers smooth stones in bold, sweeping ribbons of warm, contrasting colors like burnt orange, avocado green, mustard, and magenta.
How to Make It
- Clean Stone Surface: Wipe down a smooth, rounded stone to ensure proper paint adhesion.
- Sketch Fluid Waves: Pencil flowing S-curves and overlapping arching bands across the entire surface of the stone.
- Prepare Color Palette: Mix bright, opaque acrylic colors in vintage seventies shades.
- Paint Ribbon Bands: Using a small flat brush, carefully fill each wavy ribbon band with a solid, opaque coat of paint.
- Layer Neighboring Shades: Alternate contrasting colors side-by-side (e.g., orange next to mustard, followed by cream and avocado green).
- Clean Edges: Use a fine liner brush with black or cream paint to outline each band, making the colors pop.
- Seal: Apply a high-gloss topcoat to give the groovy design a shiny, polished finish.
Tips & Variations
- Checkerboard Wave: Paint a black-and-white checkerboard grid inside one of the central wavy ribbons for an extra pop-art twist.
- Monochrome Waves: Use five varying shades of a single color family (e.g., dark magenta to pale blush pink) for a modern ombré wave.
Needs & Materials
- Smooth river stone
- Acrylic paints (Burnt Orange, Mustard, Avocado Green, Magenta, Cream, Black)
- Small flat synthetic brush and detail liner brush
- High-gloss clear sealer
12. Delicately Detailed Monarch Butterfly
What This Idea Means
Transforming a flat, triangular or wing-shaped stone into a realistic Monarch butterfly creates an elegant piece of nature art. The brilliant orange wings, intricate black vein networks, and crisp white dots capture nature’s finest geometry.
How to Make It
- Select Wing-Shaped Stone: Find a flat stone with a natural symmetry that suits a butterfly form. Clean and dry it thoroughly.
- Sketch Butterfly Outline: Lightly draw the central body tube and symmetrical forewings and hindwings filling the rock face.
- Paint Orange Base: Fill the wing interiors with bright pumpkin orange acrylic paint. Apply two coats for vibrant opacity.
- Add Yellow Highlights: Blend a touch of bright yellow paint into the central areas of the wing cells to simulate glowing sunlight.
- Paint Black Veins and Borders: Use a fine liner brush (#0) with jet black paint to outline the wings and draw the intricate branching vein structure across the orange wing cells.
- Stipple White Border Dots: Dip a fine stylus or toothpick into opaque white paint and stamp tiny, crisp dots along the thick black outer wing borders.
- Seal: Finish with a crystal-clear gloss coat to make the colors pop with lifelike realism.
Tips & Variations
- Blue Morpho Swap: Replace the orange palette with brilliant iridescent metallic blue and turquoise to paint a breathtaking Blue Morpho butterfly.
- Double Butterfly Stone: Paint two smaller butterflies resting on a bed of painted green leaves on a larger river stone.
Needs & Materials
- Flat river stone
- Acrylic paints (Pumpkin Orange, Bright Yellow, Jet Black, Opaque White)
- Fine detail liner brush (#0, #00) and ball stylus
- High-gloss clear varnish
13. Ocean Beach Shoreline & Foaming Waves
What This Idea Means
Bringing the sea directly into your hands, this realistic landscape technique paints a tranquil coastline scene where sandy beaches meet turquoise ocean waters and foaming white tide crests.
How to Make It
- Paint the Sand Base: Paint the bottom third of a smooth stone in a textured warm beige or sand shade. Mix in a drop of dark brown to create subtle pebble variations.
- Paint the Ocean Gradient: Paint the upper two-thirds of the stone in deep royal blue at the top, blending smoothly into brilliant turquoise and light seafoam green where the water meets the sand.
- Create Sea Foam Texture: Dip a small, dry sea sponge or stiff bristle brush into opaque white acrylic paint. Dab lightly along the shoreline boundary where the water washes over the sand to create realistic foam bubbles.
- Add Lapping Wave Crests: Paint thin, arching white lines further back in the turquoise water to represent gentle swell crests approaching the beach.
- Add Wet Sand Reflection: Paint a thin, translucent coat of gloss varnish over the sand near the water line to mimic wet, reflective shore sand.
- Seal: Apply a high-gloss topcoat over the entire stone.
Tips & Variations
- Real Sand Mix: Mix a teaspoon of fine real beach sand into your beige acrylic paint to give the shore section physical texture.
- Tropical Shell Accents: Paint tiny, detailed sea shells or starfish resting on the sandy shore.
Needs & Materials
- Smooth oval river rock
- Acrylic paints (Beige, Raw Umber, Royal Blue, Turquoise, White)
- Natural sea sponge and fine detail brush
- High-gloss clear topcoat


14. Sweet Strawberry Fruit Stones
What This Idea Means
Turning small, heart-shaped or triangular stones into realistic sweet strawberries is a fun, joyful craft. Painted strawberries look adorable gathered in a small wooden berry bowl as a kitchen centerpiece or placed among garden beds.
How to Make It
- Select Heart-Shaped Stones: Gather small, tapered river stones that naturally taper at the bottom like a strawberry. Wash and dry them.
- Paint Red Base: Coat the entire body of the stone in vibrant crimson or cardinal red acrylic paint. Apply two coats for rich coverage.
- Paint Green Leaves: Paint 4 to 5 pointed leaf caps fanning outward from the top top edge of the stone using forest green paint.
- Add Seed Texture: Using an ultra-fine detail brush (#00) or toothpick dipped in soft pastel yellow or cream paint, stamp small tear-drop seed dots across the red body in uniform, alternating rows.
- Add Seed Shadows: Add a tiny crescent stroke of dark red or brown right beside each yellow seed to give the impression that the seeds are indented inside the fruit skin.
- Seal: Coat with a ultra-gloss sealer to give the strawberries a fresh, juicy sheen.
Tips & Variations
- Pastel Pink Strawberries: Paint soft pastel pink “Pineberries” with white leaves for a trendy pastel aesthetic.
- Fruit Basket Mix: Combine painted strawberry rocks with blueberry-painted round stones and peach-painted oval rocks for a mixed fruit bowl.
Needs & Materials
- Small tapered river stones
- Acrylic paints (Crimson Red, Forest Green, Pastel Yellow, Cream)
- Ultra-fine detail brush (#00) or toothpick
- Ultra-gloss clear sealer spray
15. Classic Delftware Blue & White Porcelain
What This Idea Means
Nodding to historic 17th-century Dutch and Chinese porcelain art, this elegant concept relies exclusively on vivid cobalt blue paint applied over crisp white stones to showcase intricate floral flourishes and ceramic motifs.
How to Make It
- Apply Opaque White Base: Paint a smooth, rounded stone in two coats of bright, crisp white acrylic or ceramic chalk paint. Let dry completely.
- Sketch Delft Motifs: Lightly pencil ornate Dutch floral vines, windmills, or classic rose medallions in the center of the stone.
- Paint Primary Outlines: Using a fine liner brush (#0) with cobalt blue paint, trace the delicate vine outlines and flower petal borders.
- Build Tonal Shading: Dilute cobalt blue paint with a drop of water or glazing medium to paint softer, lighter blue washes inside petal centers. Use pure, un-diluted cobalt blue for deep shadow accents.
- Add Border Flourishes: Paint fine blue line borders and teardrop dots framing the edges of the stone.
- Seal: Apply a thick, high-gloss clear varnish or resin to replicate the glossy shine of glazed porcelain.
Tips & Variations
- Modern Delft Geometric: Replace traditional floral vines with modern abstract geometric patterns painted entirely in cobalt blue over white.
- Delft Animal Portraits: Paint a detailed songbird or bunny silhouette in cobalt blue framed by floral scrolls.
Needs & Materials
- Smooth river stone
- Acrylic or ceramic paint (Bright White, Cobalt Blue)
- Acrylic glazing medium
- Fine liner brush (#0) and pointed round brush (#2)
- High-gloss clear varnish or resin
16. Terrazzo Flecked Stone Pattern
What This Idea Means
Embracing modern interior design trends, this aesthetic covers smooth rocks in colorful, irregular geometric stone chips, giving ordinary river pebbles the stylish look of polished terrazzo composite marble.
How to Make It
- Base Coat Application: Paint a clean stone in a solid neutral shade, such as oatmeal beige, soft cream, or pale blush pink.
- Prepare Color Palette: Prepare 3 to 4 complementary paint colors (e.g., rust orange, sage green, mustard, dark charcoal).
- Paint Terrazzo Chips: Using a small flat square brush, randomly paint small, irregular polygon shapes scattered across the entire stone surface.
- Vary Scale and Spacing: Ensure the shapes vary in size—mix tiny flecks with medium angular chips. Maintain equal spatial distribution without colors touching directly.
- Add Fine Speckles: Flick a toothbrush dipped in diluted charcoal paint across the stone to add fine mineral dust texture.
- Seal: Finish with a high-gloss topcoat to emulate the smooth, polished surface of real terrazzo stone.
Tips & Variations
- Gold Leaf Chips: Apply tiny flecks of genuine gold leaf among the painted terrazzo shapes for a luxurious metallic shimmer.
- Dark Slate Terrazzo: Use a dark slate charcoal base coat and paint pastel white, mint green, and coral terrazzo chips over it.
Needs & Materials
- Smooth river stone
- Acrylic paints (Cream base, Rust, Sage, Ochre, Charcoal)
- Small flat synthetic square brush
- Toothbrush for speckling
- High-gloss clear varnish
17. Abstract Line Art & Color Blocks
What This Idea Means
Sleek, graphic, and art gallery-inspired, this project pairs bold, flat color shapes with minimal black line art portraits or continuous line abstract faces over a clean ceramic-like background.
How to Make It
- Paint Background Blocks: Clean a flat stone. Paint 2 to 3 organic, blob-like background shapes in warm, muted tones (e.g., terracotta, ochre, olive green, dusty rose). Allow to dry.
- Practice Your Line Art: Practice drawing a single continuous line face profile or abstract hand line on paper to build muscle memory.
- Sketch Line Art: Lightly pencil your continuous line drawing overlapping the painted background color blocks.
- Ink the Line Work: Using an ultra-fine black acrylic paint marker or fine liner brush with jet black paint, trace your line drawing smoothly.
- Clean Boundaries: Touch up any wobbly lines to keep the stroke weight crisp and uniform.
- Seal: Apply a satin or matte varnish spray for a modern exhibition feel.
Tips & Variations
- Gold Line Art: Swap jet black ink for a liquid gold metallic marker over dark navy and emerald background color blocks.
- Botanical Line Art: Draw minimalist monstera or palm leaf line art over the color blocks instead of a face profile.
Needs & Materials
- Flat, smooth stone
- Acrylic paints (Terracotta, Ochre, Olive Green, Dusty Rose)
- Ultra-fine black acrylic paint pen (0.7mm) or detail brush
- Satin or matte clear varnish
18. Whimsical Owl in Birch Forest
What This Idea Means
Turning an upright oval rock into a wise, watchful owl perched among white birch trees makes for a captivating piece of woodland art. The detailed feather patterns, glowing golden eyes, and textured bark create rich visual storytelling.
How to Make It
- Outline Composition: Clean an upright oval stone. Pencil a large central owl silhouette sitting on a branch, framed by vertical birch trunks on either side.
- Paint Birch Trees: Paint vertical white tree trunks along the outer edges of the stone. Add short, horizontal black notches and line slashes to create birch bark texture.
- Paint Owl Base: Fill the owl silhouette with warm taupe and brown paint. Paint two large circular eyes in bright golden yellow.
- Detail the Feathering: Use a fine liner brush with white and dark brown paint to stipple short “V”-shaped feather strokes across the chest and wings.
- Detail the Eyes: Draw sharp black pupils inside the yellow eyes, adding tiny white highlight dots to bring the owl to life.
- Seal: Coat with a protective satin finish.
Tips & Variations
- Night Owl Crescent: Paint a glowing crescent moon and starry night sky behind the birch trees.
- Snowy Owl: Paint the owl entirely in white and light grey feather tones for a winter snowy owl aesthetic.
Needs & Materials
- Upright oval river rock
- Acrylic paints (White, Black, Taupe, Dark Brown, Golden Yellow)
- Fine detail liner brush (#00)
- Satin clear sealer
19. Translucent Water Drop Illusion
What This Idea Means
This fascinating 3D optical illusion technique uses clever shading, highlights, and drop shadows to make flat painted water droplets look like real, 3D liquid beads sitting on the stone surface.
How to Make It
- Paint Stone Background: Clean a smooth stone. Paint it in a solid color or smooth two-tone gradient (e.g., deep blue to teal). Let dry completely.
- Draft Oval Water Drops: Pencil several clear, irregular oval and teardrop shapes scattered across the rock surface.
- Paint Crescent Shadows: Using a fine brush with dark navy or black paint, shade a soft crescent shadow inside the top inner edge of each droplet.
- Paint Lower Glow: Fill the bottom half inside each droplet with a lighter, bright shade of turquoise or ice blue to mimic light refracting through liquid.
- Cast Outer Shadow: Paint a soft, dark crescent shadow on the rock surface right outside the bottom edge of each drop.
- Add Crisp Highlight: Place a single, crisp white highlight dot on the dark top inner edge of each droplet where light enters.
- Seal: Spray with a high-gloss clear varnish to amplify the liquid sheen.
Tips & Variations
- Leaf Base Drop: Paint a detailed green leaf on the stone first, then add translucent water drops sitting on top of the leaf veins.
- Dew Drop Cluster: Paint a cluster of varying droplet sizes gathered together like morning dew.
Needs & Materials
- Smooth river stone
- Acrylic paints (Background color, Dark Charcoal/Navy, Bright Turquoise, White)
- Fine detail liner brush (#00)
- High-gloss clear varnish spray
20. Gothic Dark Floral & Golden Vines
What This Idea Means
Full of moody, dramatic elegance, this gothic-inspired concept features lush, dark burgundy roses, plum peonies, and winding metallic gold vines painted over a rich black or charcoal stone backdrop.
How to Make It
- Paint Dark Base: Clean a smooth stone and coat it in solid matte black or deep charcoal acrylic paint. Allow to dry.
- Block Rose Bases: Paint dark plum or deep burgundy circular bases where main flower heads will sit.
- Build Layered Petals: Using a fine round brush, build overlapping petals working from outer edges inward using lighter crimson, dusty rose, and blush pink shades.
- Paint Metallic Gold Vines: Use a fine liner brush with liquid gold metallic paint to draw sweeping, delicate vines with sharp thorns and tiny leaves wrapping around the flowers.
- Highlight Flower Centers: Add tiny golden stamen dots inside the central flower folds.
- Seal: Finish with a satin or gloss topcoat for a rich gallery finish.
Tips & Variations
- Gold Leaf Accents: Apply small patches of genuine gold leaf onto select leaf tips for a rich 3D metallic contrast.
- Gothic Skull Overlay: Paint a small off-white skull resting among the dark roses for a classic memento mori aesthetic.
Needs & Materials
- Smooth black river rock
- Acrylic paints (Matte Black, Plum, Burgundy, Crimson, Blush Pink)
- Liquid gold metallic paint or gel pen
- Fine round brushes (#0, #2)
- Satin or gloss clear topcoat
Summary Overview & Quick Comparison
| Idea # | Style / Theme | Primary Color Palette | Difficulty Level | Recommended Rock Shape |
| 1 | Intricate Dot Mandala | Navy, Teal, White, Gold | Intermediate | Smooth Flat Round Rock |
| 2 | Cottagecore Mushroom | Crimson, Off-White, Moss Green | Beginner | Tall Oval River Stone |
| 3 | Celestial Crescent Moon | Midnight Blue, Violet, Gold, White | Intermediate | Flat Smooth Dark Stone |
| 4 | Minimalist Botanical Leaf | Beige, Forest Green, Sage, Cream | Beginner | Smooth Oval River Rock |
| 5 | Sun-Kissed Lemon Slice | Canary Yellow, Ochre, White | Beginner | Flat Circular Stone |
| 6 | Hygge Knit Texture | Cream, Dusty Pink, Sage | Intermediate | Smooth Rounded Rock |
| 7 | Dark Academia Book Stack | Mahogany, Forest Green, Gold | Advanced | Blocky / Rectangular Stone |
| 8 | Japanese Koi Pond | Navy, Turquoise, White, Orange | Advanced | Smooth Flat Stone |
| 9 | Boho Geometric Arch | Terracotta, Mustard, Sand | Beginner | Flat River Stone |
| 10 | Fairytale Cottage Door | Teal, Brown, Grey, Gold | Intermediate | Upright Arched Stone |
| 11 | Retro 70s Waves | Burnt Orange, Mustard, Magenta | Beginner | Smooth Rounded Stone |
| 12 | Monarch Butterfly | Pumpkin Orange, Black, White | Intermediate | Flat Wing-Shaped Stone |
| 13 | Ocean Beach Shoreline | Beige, Royal Blue, Turquoise, White | Intermediate | Smooth Oval River Rock |
| 14 | Sweet Strawberry Stones | Crimson Red, Forest Green, Yellow | Beginner | Small Heart-Shaped Stone |
| 15 | Delftware Blue & White | Bright White, Cobalt Blue | Intermediate | Smooth Rounded Stone |
| 16 | Terrazzo Flecked Pattern | Cream, Rust, Sage, Ochre, Charcoal | Beginner | Smooth River Stone |
| 17 | Abstract Line Art | Terracotta, Ochre, Olive, Black | Beginner | Flat Smooth Stone |
| 18 | Owl in Birch Forest | White, Black, Taupe, Yellow | Intermediate | Upright Oval River Rock |
| 19 | Translucent Water Drop | Background Color, Charcoal, Turquoise, White | Advanced | Smooth Flat River Stone |
| 20 | Gothic Dark Floral | Black, Burgundy, Crimson, Liquid Gold | Advanced |


Leave a Reply