20 Colorful Throw Pillow Ideas

Transforming a living space does not always require a massive renovation, new furniture, or a complete room overhaul. Often, the secret to breathing new life into a tired room lies in the smallest details. Throw pillows are the ultimate secret weapon in interior design. They offer an effortless, versatile, and budget-friendly way to inject color, texture, and personality into your living room, bedroom, or cozy reading nook. Whether you lean toward a vibrant maximalist aesthetic or a sophisticated jewel-toned sanctuary, the right throw pillow arrangement can completely anchor your decor style.

This comprehensive guide explores 20 elegant, amazing, and colorful throw pillow ideas. For each idea, you will discover what the concept means, a thorough introduction, a practical guide on how to make it yourself, expert tips, and creative variations to make the piece uniquely yours.
1. Velvet Jewel-Tone Block Pillows

Introduction

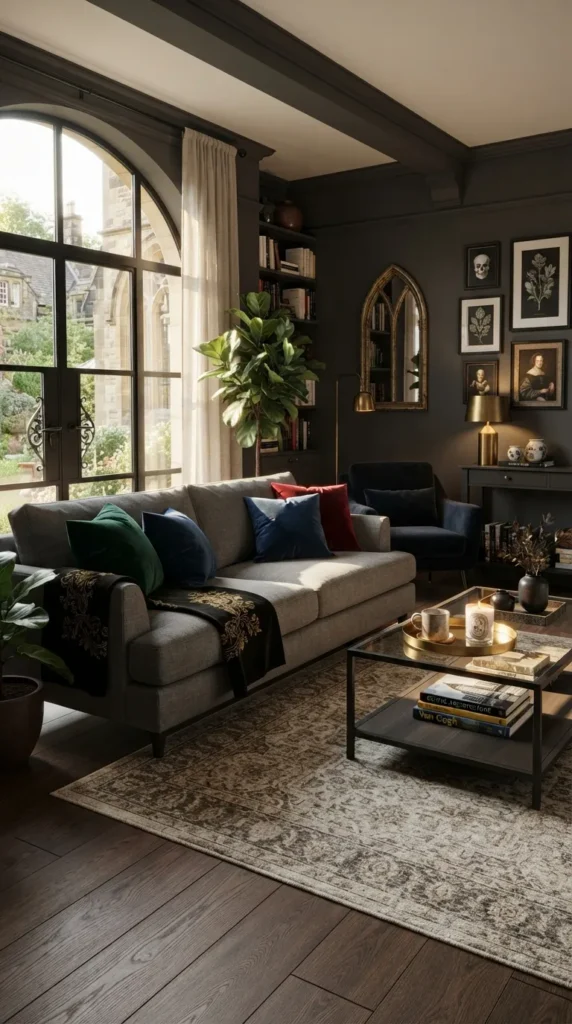
Velvet is the undisputed king of tactile luxury. When paired with rich, saturated jewel tones like emerald green, sapphire blue, ruby red, and amethyst purple, velvet creates an instant sense of opulence and depth. These pillows catch the light in a way that creates subtle highlights and shadows, adding a multi-dimensional layer of color to neutral sofas or velvet armchairs.

What This Idea Means

This concept focuses on celebrating rich, deep gemstone colors rendered entirely in plush, soft velvet fabric. It is designed to create a focal point of refined elegance without feeling overly formal, bridging the gap between cozy comfort and high-end interior styling.

How to Make It

  1. Materials Needed: 1 yard of velvet fabric in your chosen jewel tone (e.g., emerald green), matching polyester sewing thread, a sewing machine, pins, fabric scissors, a pillow insert (size 20×20 inches), and a hidden zipper (16 inches).
  2. Cutting: Cut two squares of velvet fabric measuring 20.5 x 20.5 inches to account for a half-inch seam allowance.
  3. Inserting the Zipper: Pin the hidden zipper along the bottom edge of the two fabric pieces and sew it securely using a zipper foot.
  4. Sewing the Edges: Unzip the zipper slightly (this is crucial so you can turn the pillow right-side out later). Place the right sides of the fabric together, pin the remaining three sides, and sew around the perimeter with a 0.5-inch seam.
  5. Finishing: Clip the corners to reduce bulk, turn the pillow cover right-side out through the open zipper, press lightly with a low-heat iron (or steam) if needed, and insert your pillow form.

Tips and Variations

  • Tip: Always use a walking foot on your sewing machine when sewing velvet to prevent the fabric layers from shifting.
  • Variation: Combine two different jewel tones on the front face—such as half emerald and half sapphire—using a sleek diagonal color-block seam.

2. BoHo Macrame Fringe Cushion

Introduction

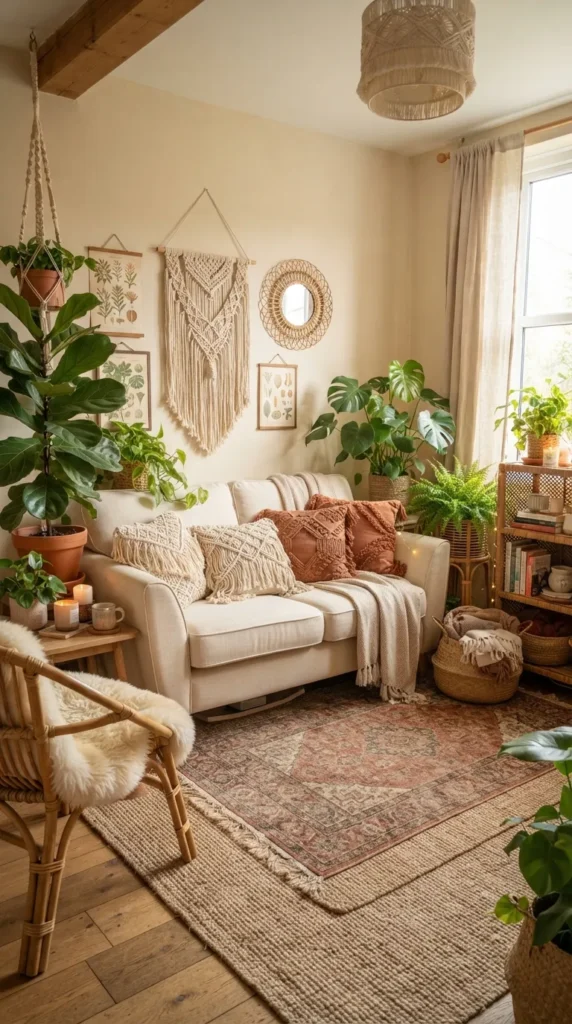
Bohemian design thrives on texture, organic materials, and artisanal craftsmanship. A macrame fringe cushion introduces intricate knotting techniques and tactile dimension to your decor. The neutral or colored cotton cords combined with playful, swinging fringe create an earthy, relaxed vibe that is both modern and timeless.

What This Idea Means

This style honors slow-craft traditions by incorporating woven fiber art directly into functional home decor. It celebrates imperfections, tactile warmth, and an inviting, worldly aesthetic that pairs beautifully with leather, rattan, and houseplants.

How to Make It

  1. Materials Needed: A pre-made canvas pillow cover (neutral beige or cream), a spool of 3mm cotton macrame cord, fabric glue or a needle and thread, sharp scissors, and a comb for brushing out fringe.
  2. Designing the Pattern: Decide on your macrame knot design (such as diagonal double half-hitch knots) and cut cords measuring roughly twice the length needed for the pattern.
  3. Attaching to the Cover: If working directly on the cover, you can either tie and knot pre-woven macrame panels directly onto a backing fabric before sewing it into a cover, or glue/sew pre-made braided strips onto the face of a finished canvas pillow.
  4. Creating the Fringe: Attach individual strands of cord along the bottom edge using larks head knots to form a thick, lush fringe.
  5. Grooming: Trim the fringe evenly with sharp scissors and use a fine-toothed comb to gently brush out the cord ends for a soft, bohemian tassel effect.

Tips and Variations

  • Tip: Dip-dye the bottom cotton fringe in a terracotta or indigo dye bath before attaching it to add a stunning ombre splash of color.
  • Variation: Use colored cotton cords in muted terracotta, sage green, or mustard yellow instead of traditional off-white for a colorful boho twist.

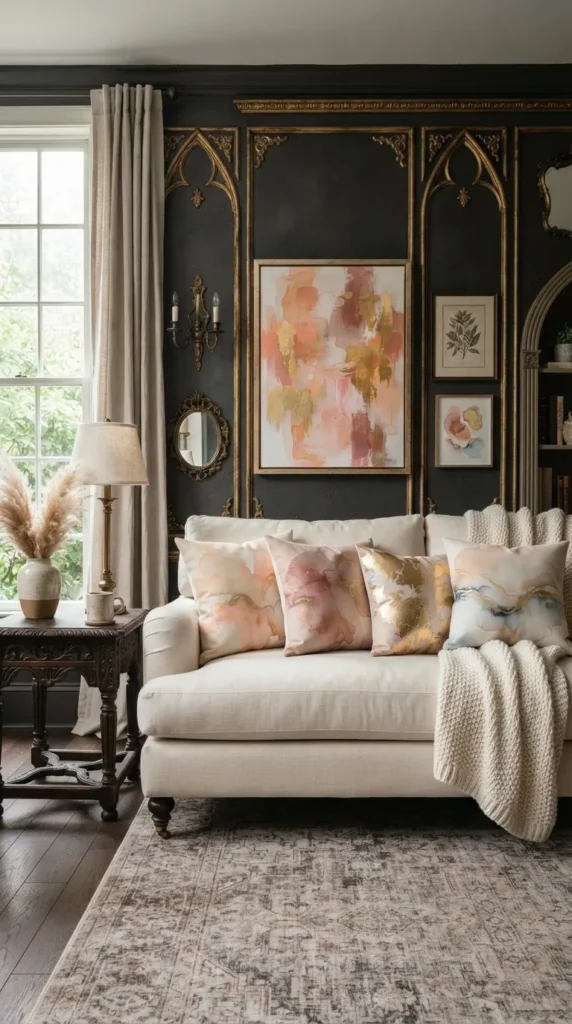
3. Abstract Watercolor Painted Canvas Pillow

Introduction

Art is no longer confined strictly to the walls. Translating abstract watercolor techniques onto fabric allows you to introduce fluid, expressive splashes of color directly onto your seating arrangements. Each painted pillow acts as a miniature, one-of-a-kind canvas that brings an artistic, gallery-like feel to your living space.

What This Idea Means

This concept embraces fluid movement, bleeding colors, and organic transitions. It moves away from rigid geometric prints in favor of soft, dreamy color washes that evoke serene skies, blooming florals, or tranquil seascapes.

How to Make It

  1. Materials Needed: A plain white or off-white heavy cotton canvas pillow cover, fabric paint or acrylic paint mixed with a textile medium, soft watercolor paintbrushes, a spray bottle of water, and cardboard to place inside the cover to prevent bleed-through.
  2. Prep Work: Slip a piece of cardboard inside the pillow cover so the paint does not seep through to the back side.
  3. Wet-on-Wet Technique: Lightly mist the canvas surface with water using your spray bottle.
  4. Applying Color: Load your brush with diluted fabric paint in shades like dusty rose, peach, and gold. Touch the wet brush to the damp canvas and watch the pigments bloom and bleed organically.
  5. Drying and Heat Setting: Let the cover dry completely for 24 hours. Once dry, press the back of the painted area with a hot iron for 3 to 5 minutes to permanently heat-set the fabric paint.

Tips and Variations

  • Tip: Keep a paper towel handy to dab away excess water or paint if a pool gets too large.
  • Variation: Paint bold geometric gold leaf borders over top of the dried watercolor wash for a stunning contrast between soft painting and sharp metallic lines.

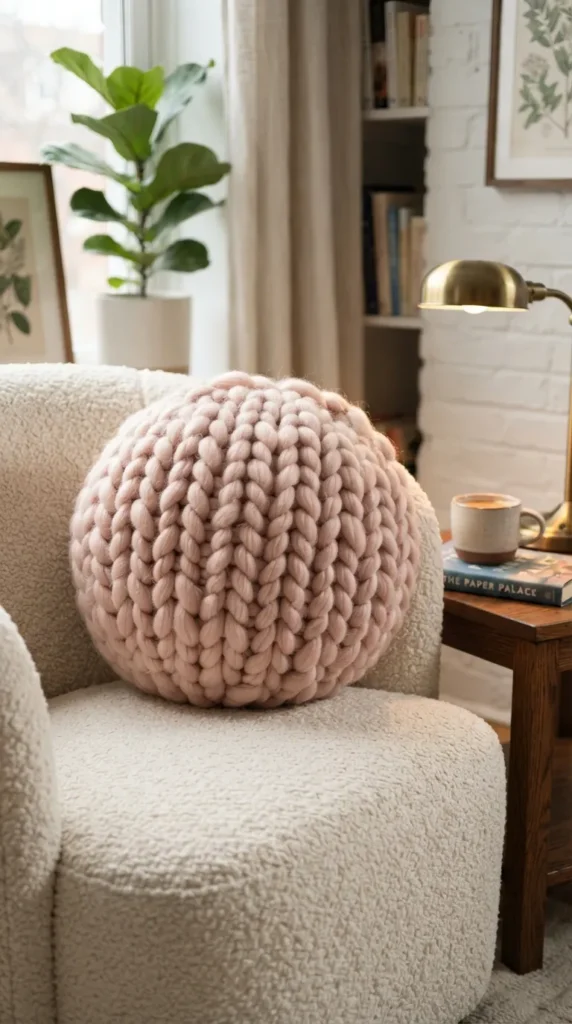
4. Chunky Wool Arm-Knitted Round Cushion

Introduction

Giant, oversized yarn creations have taken the interior design world by storm. A chunky wool arm-knitted round cushion offers cloud-like softness and an oversized, sculptural presence. It acts as a statement piece that begs to be touched, bringing immense texture and cozy warmth to minimalist or Scandinavian-styled rooms.

What This Idea Means

This idea revolves around hyper-textured minimalism and tactile comfort. By utilizing ultra-thick roving yarn, the scale of the pillow is exaggerated, creating an inviting, plush accent that grounds modern furniture with organic softness.

How to Make It

  1. Materials Needed: 2 to 3 pounds of unspun merino wool roving or thick chenille blanket yarn, and a sturdy matching cotton round inner pillow form (or stuffing to stuff your knit tube directly).
  2. Casting On: Using your arms instead of knitting needles, create a slip knot and cast on about 6 to 8 stitches depending on the thickness of your yarn.
  3. Knitting the Tube: Work in simple stockinette stitch by pulling loops through previous rows until you have a long rectangular knitted strip that can wrap around your round form.
  4. Seaming: Sew the short ends of the rectangle together to form a tube, then gather the top and bottom openings tightly with matching thread to enclose the round pillow insert securely.
  5. Securing Ends: Weave in all loose yarn ends securely into the interior core of the knit structure.

Tips and Variations

  • Tip: If using raw merino wool roving, handle it gently to avoid pilling, and note that these pillows are best suited for decorative use rather than heavy daily lounging.
  • Variation: Knit the round cushion using a vibrant mustard yellow or blush pink chunky chenille yarn for a pop of modern color.

5. Geometric Embroidered Linen Pillow

Introduction

Linen is celebrated for its natural breathability, casual elegance, and beautiful slub texture. When combined with bold, contemporary geometric embroidery using bright contrasting threads, linen transforms into a sophisticated designer statement piece that bridges rustic charm with sleek modern design.

What This Idea Means

This approach highlights the contrast between raw, natural linen and precise, colorful needlework. It celebrates clean lines, graphic shapes, and the deliberate intersection of traditional handcrafting with modern graphic layouts.

How to Make It

  1. Materials Needed: Natural or optic white linen fabric, embroidery floss in three vibrant colors (e.g., coral, turquoise, and mustard), an embroidery hoop, a fine embroidery needle, a water-soluble marking pen, and a sewing machine.
  2. Transferring the Pattern: Draw your geometric design (such as interlocking triangles or bold concentric arches) onto the front panel of your linen using the water-soluble pen.
  3. Stitching: Place the fabric taut inside your embroidery hoop. Use satin stitch, chain stitch, or simple geometric running stitches to fill in the design with your colorful floss.
  4. Washing: Once embroidery is complete, rinse the fabric in cool water to dissolve any remaining marker lines, and press flat with an iron while damp.
  5. Assembling the Pillow: Cut a back panel matching the front dimensions, sew right sides together leaving an opening, turn, stuff with a plush insert, and slip-stitch closed.

Tips and Variations

  • Tip: Back your linen with a lightweight fusible interfacing before stitching to prevent the fabric from puckering under tight embroidery tension.
  • Variation: Use neon pink and metallic gold embroidery threads on charcoal grey linen for a striking, high-contrast urban aesthetic.

6. Pom-Pom Trimmed Pastel Velvet Pillow

Introduction

Playful yet undeniably chic, pom-pom trim adds an instant touch of whimsy and joy to any home decor setting. When paired with soft, buttery pastel velvet—such as mint green, lavender, buttery yellow, or baby blue—the result is a charming accessory that feels light, airy, and delightfully tactile.

What This Idea Means

This style bridges youthful exuberance with refined comfort. It demonstrates how a simple decorative edge treatment can completely change the personality of a solid-colored pillow, making it feel approachable, fun, and stylishly curated.

How to Make It

  1. Materials Needed: Two 18×18 inch squares of pastel velvet fabric, 2 yards of matching or contrasting pom-pom trim fringe, a coordinating zipper, matching thread, and an 18-inch pillow insert.
  2. Attaching the Trim: Baste or pin the pom-pom trim along the right side of the front pillow panel’s edges, ensuring the actual pom-poms face inward toward the center of the square so they do not get caught in the main seam.
  3. Inserting the Zipper: Install your zipper along the bottom edge, making sure the pom-pom trim is neatly tucked out of the way near the corners.
  4. Sewing the Cover: Place the back velvet panel over the front panel with right sides facing together, trapping the pom-pom tape securely between the two layers. Sew around all four sides with a half-inch seam allowance.
  5. Finishing: Turn the cover right-side out, poke the corners out gently, and insert your plush pillow form.

Tips and Variations

  • Tip: When sewing over thick pom-pom headers, turn your hand wheel slowly to ensure your sewing machine needle does not strike a pom-pom ball and break.
  • Variation: Use multi-colored rainbow pom-poms on a solid mint green velvet base for a cheerful, playful pastel statement.

7. Tufted Punch Needle Boho Cushion

Introduction

Punch needle embroidery has taken the crafting world by storm, allowing creators to paint with loops of yarn to produce rich, textured fabric art. A tufted punch needle cushion features raised loops and sheared plush textures that create captivating geometric or floral motifs bursting with vibrant color combinations.

WhatThis Idea Means

This concept focuses on maximalist texture and graphic punch. It allows you to experiment with dense piles of colored yarn, turning a standard throw pillow into an interactive, tactile masterpiece that feels right at home in eclectic or modern bohemian spaces.

How to Make It

  1. Materials Needed: Monks cloth fabric, an adjustable punch needle tool, embroidery hoop or gripper frame, an assortment of colorful acrylic or wool yarns, a backing fabric, fabric glue (optional), and a sewing machine.
  2. Stretching and Punching: Secure your monks cloth tightly in your frame. Draw your colorful abstract shapes or sunburst patterns on the cloth and punch loops using your tool, working from the background to the foreground.
  3. Securing the Loops: Once the punch needle panel is complete, apply a layer of diluted PVA glue or textile adhesive to the back side of the cloth to lock all yarn loops securely in place.
  4. Trimming: Trim excess monks cloth, leaving a half-inch border around your finished tufted panel.
  5. Sewing Together: Sew your completed tufted panel to a durable canvas or linen back piece to form the finished pillow cover.

Tips and Variations

  • Tip: Mix looped stitches with sheared (cut) velvet-like stitches by snipping the tops of certain loops with embroidery scissors for varied texture.
  • Variation: Create a sunset motif using gradient yarns of terracotta, burnt orange, golden yellow, and dusty pink.

8. Metallic Foil Stenciled Velvet Pillow

Introduction

For those who love a touch of glamour and sophisticated sparkle, metallic foil stenciling is a game-changer. By pressing shimmering gold, silver, or rose gold foil onto rich matte fabrics, you create a stunning contrast between understated luxury and eye-catching metallic shine.

What This Idea Means

This style celebrates refined opulence and light reflection. It captures modern art-deco elegance, utilizing clean metallic graphics that shimmer dynamically as daylight shifts across your living room.

How to Make It

  1. Materials Needed: A dark matte velvet pillow cover (navy, charcoal, or deep plum), foil adhesive medium, a stencil brush, a geometric or botanical stencil, transfer foil sheets (gold or copper), and an iron.
  2. Stenciling Adhesive: Secure your stencil over the velvet cover using painter’s tape. Dab a thin, even layer of foil adhesive medium through the stencil openings using your brush.
  3. Curing: Remove the stencil immediately and wash it with warm water. Let the adhesive dry until it turns completely clear and tacky (usually 1 to 2 hours).
  4. Applying Foil: Place the shiny, colorful side of the metallic foil sheet facing UP against the tacky adhesive areas. Press firmly with your fingers or a warm, dry iron.
  5. Revealing the Shine: Peel the plastic sheet away briskly to leave behind a brilliant, mirror-like metallic print on the velvet.

Tips and Variations

  • Tip: Always test your foil adhesive on a scrap piece of velvet first to ensure the pile does not absorb too much glue before it becomes tacky.
  • Variation: Use multi-colored holographic foil for a futuristic, iridescent geometric pattern on a black velvet base.

9. Block-Printed Botanical Linen Cushion

Introduction

Block printing is an ancient art form that relies on hand-carved wooden stamps and natural pigments to create repeated, charmingly imperfect patterns. A block-printed botanical linen cushion introduces organic charm, heritage craftsmanship, and delightful earthy tones to your seating arrangements.

What This Idea Means

This idea honors slow, traditional artisan techniques where human touch and natural variations create authentic beauty. It embraces botanical motifs like ferns, olives, or wildflowers stamped onto breathable, luxurious linen.

How to Make It

  1. Materials Needed: Natural linen fabric, carved wooden printing blocks (botanical motifs), fabric block printing ink in earthy tones (olive green, terracotta, ochre), a foam brayer roller, and a flat printing surface.
  2. Setting Up Ink: Roll a thin, even layer of fabric ink onto your flat tray using the brayer roller.
  3. Inking the Block: Press your carved wooden block evenly onto the inked roller until the raised surface is thoroughly and uniformly coated.
  4. Stamping: Press the block firmly and evenly onto your unstitched linen panel, applying steady downward pressure without shifting the block. Repeat across the fabric in a rhythmic pattern.
  5. Curing and Sewing: Let the ink cure for 72 hours, heat set with an iron, and sew into a custom pillow cover.

Tips and Variations

  • Tip: Place a padded mat or folded towel underneath your linen while stamping to ensure crisp, clean impressions on slubby fabric.
  • Variation: Alternate between olive green and rust orange ink stamps for a vibrant two-tone botanical garden effect.

10. Quilted Patchwork Modern Pillow

Introduction

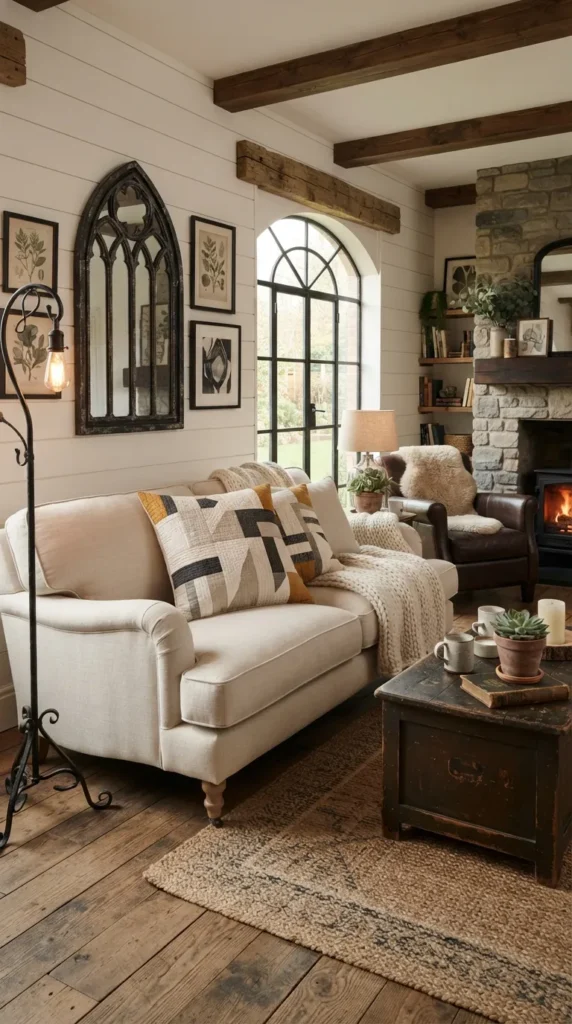
Patchwork has evolved far beyond traditional country quilts into a sophisticated, modern design movement. By combining geometric cuts of solid-colored cotton and linen in chic, complementary color palettes, a quilted patchwork pillow introduces intricate texture, geometric precision, and cozy heirloom charm.

What This Idea Means

This concept transforms fabric scraps into high-design art. It highlights the beauty of color blocking and precise linear quilting, turning simple geometric triangles and squares into a stylish architectural accent.

How to Make It

  1. Materials Needed: Assorted scraps of solid cotton/linen fabrics in a curated color palette (e.g., sage, mustard, cream, rust), lightweight quilt batting, backing fabric, sewing machine, and matching thread.
  2. Cutting and Piecing: Cut your fabrics into uniform geometric shapes (like half-square triangles) and sew them together into a modern geometric front panel.
  3. Quilting Sandwich: Layer your pieced front panel on top of a square of quilt batting and a backing square. Pin or baste the layers together.
  4. Stitch Lines: Sew straight diagonal quilting lines across the surface spaced one inch apart to create a gorgeous textured grid effect.
  5. Finishing: Trim the quilted square to size and finish into a zippered throw pillow cover.

Tips and Variations

  • Tip: Use a walking foot on your sewing machine to keep all three layers (top, batting, backing) feeding smoothly without shifting.
  • Variation: Use all-linen fabrics in muted monochromatic tones for a sophisticated, texture-rich minimalist patchwork look.

11. Punch-Card Tapestry Patterned Pillow

Introduction

Inspired by vintage tapestries and heritage woven textiles, tapestry-style pillows bring rich storytelling and intricate patterns into modern interiors. Featuring complex motifs such as folkloric animals, vintage florals, or abstract tribal patterns, these pillows add instant depth and cultural richness to a room.

What This Idea Means

This concept celebrates rich visual density and narrative design. It acts as a focal textile that anchors simpler solid pillows around it, adding an air of worldly sophistication and collected curation.

How to Make It

  1. Materials Needed: Pre-woven tapestry jacquard fabric (or heavy upholstery woven fabric), durable canvas backing, heavy-duty sewing machine needle, zipper, and pillow insert.
  2. Pattern Placement: Carefully select the most striking section of your woven tapestry fabric for the center of your pillow front face.
  3. Cutting Panels: Cut your front tapestry panel and your solid backing canvas to your desired dimensions (e.g., 20×20 inches).
  4. Reinforcing Seams: Because heavy woven fabrics tend to fray, serge or zig-zag stitch along all raw edge perimeters before sewing.
  5. Assembly: Install a heavy-duty upholstery zipper along the bottom and sew the cover together with a generous half-inch seam allowance.

Tips and Variations

  • Tip: Use upholstery-grade thread to handle the thickness and weight of heavy woven tapestry fabrics.
  • Variation: Add faux-leather corner tabs or brass rivet accents to the corners of the tapestry pillow for an industrial-chic finish.

12. Tasseled Corner Linen Lumbar Pillow

Introduction

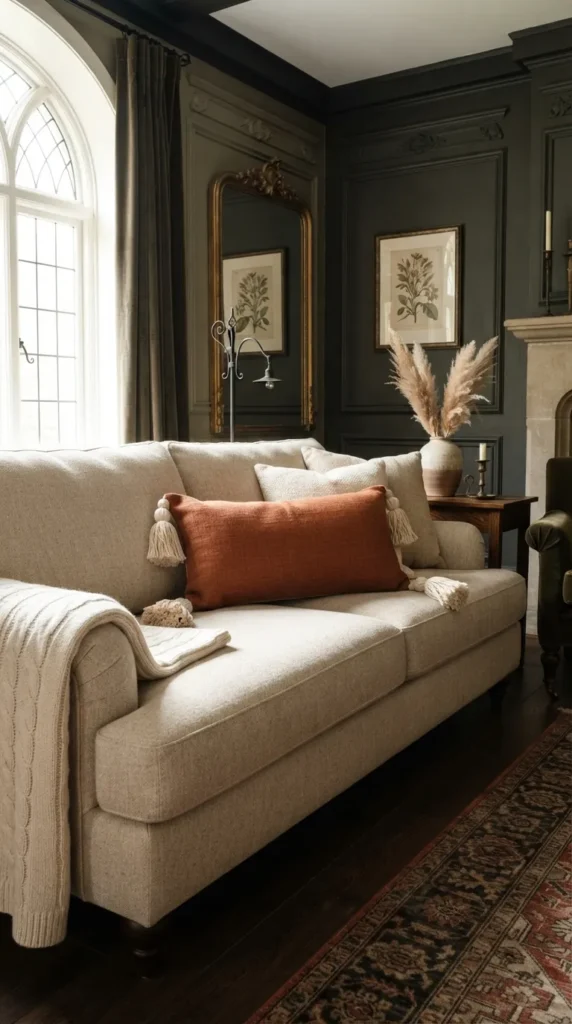
Lumbar pillows offer fantastic ergonomic support while introducing a sleek, elongated silhouette to sofas and beds. Adding oversized, handmade yarn tassels to each of the four corners elevates a simple linen lumbar cushion into an elegant designer piece with playful movement.

What This Idea Means

This style focuses on proportion and balanced accents. The elongated rectangular shape breaks up the repetitive squares of standard throw pillows, while the corner tassels add a tailored yet relaxed finishing touch.

How to Make It

  1. Materials Needed: 1 yard of heavy-weight linen in a rich color (like terracotta or burnt sienna), matching yarn for tassels, a sturdy sewing machine, a zipper, and a 12×24 inch lumbar pillow insert.
  2. Making Tassels: Wrap yarn around a 4-inch piece of cardboard roughly 40 times. Tie off the top, cut the bottom loops, and wrap a separate strand around the neck to form four lush tassels.
  3. Sewing the Cover: Construct a standard zippered lumbar pillow cover out of your linen fabric, leaving the corners open slightly if you want to trap the tassel strings directly into the corner seams.
  4. Attaching Tassels: Alternatively, hand-sew your completed tassels securely to the exterior tips of all four corners for maximum swing.
  5. Inserting Pillow: Insert your 12×24 inch lumbar form for a crisp, plump finish.

Tips and Variations

  • Tip: Steam your linen cover before attaching the handmade yarn tassels to ensure the fabric is completely smooth and crisp.
  • Variation: Make contrasting cream-colored tassels on a dark forest green linen lumbar pillow for a striking, high-contrast look.

13. Braided Jute and Cotton Accent Pillow

Introduction

Natural fibers bring grounding, earthy energy into interior spaces. By combining braided natural jute cord with soft, colorful cotton strips, you create a rustic yet refined accent pillow that introduces rugged organic texture alongside cozy fabric comfort.

What This Idea Means

This concept explores the harmony between rough natural elements and soft home textiles. It is ideal for coastal, farmhouse, or modern rustic decors that crave warmth, texture, and sustainable natural materials.

How to Make It

  1. Materials Needed: Natural thin jute twine/braid, heavy cotton canvas fabric, fabric glue suitable for jute, a heavy-duty sewing machine, and a pillow insert.
  2. Creating the Front Design: Sew or glue concentric spirals of braided jute twine onto the center face of a sturdy cotton canvas square to form a striking circular mandala or geometric border.
  3. Adding Color Accents: Weave strips of dyed colorful cotton fabric through the jute braids or sew a colorful linen border around the central jute panel.
  4. Sewing the Back: Attach a matching canvas backing piece with an envelope closure or hidden zipper.
  5. Final Assembly: Turn right side out and insert your pillow form.

Tips and Variations

  • Tip: Wear a mask if working with large amounts of natural jute fiber to avoid inhaling loose dust particles.
  • Variation: Spray paint select sections of the jute braid with metallic gold paint for a touch of rustic glam.

14. Shibori Indigo-Dyed Linen Pillow

Introduction

Shibori is the traditional Japanese manual resist-dyeing technique that produces mesmerizing patterns in deep indigo blues. A shibori-dyed linen pillow introduces serene, oceanic color tones, organic geometry, and a meditative, artisanal beauty to your living room decor.

What This Idea Means

This style honors heritage textile dyeing traditions. It celebrates the unpredictable, stunning interaction between folded fabric and natural indigo dye, resulting in striking geometric blue-and-white patterns that never go out of style.

How to Make It

  1. Materials Needed: White linen fabric squares, an indigo dye kit, rubber bands, wooden blocks or clamps (for folding and clamping resist methods), and rubber gloves.
  2. Folding and Binding: Fold your linen fabric accordion-style, then clamp it tightly between two wooden blocks or bind it securely with rubber bands to create geometric resist patterns (Itajime shibori).
  3. Dyeing: Submerge the bound fabric bundle into your prepared indigo vat for 3 to 5 minutes, gently massaging the dye into the folds.
  4. Oxidation: Remove the fabric and watch as the yellow-green dye turns deep rich blue upon exposure to oxygen. Repeat for darker shades.
  5. Unbinding and Sewing: Remove clamps/bands, rinse thoroughly until water runs clear, dry, press, and sew into a gorgeous indigo cushion cover.

Tips and Variations

  • Tip: Always wear gloves when working with indigo dye to avoid staining your hands blue for days.
  • Variation: Try pole-wrapping the linen around a PVC pipe before compressing it downward to create mesmerizing organic concentric ring patterns.

15. Tufted Wool Flokati-Style Shaggy Pillow

Introduction

Maximum texture meets ultimate coziness in a flokati-inspired shaggy pillow. Covered in thick, plush, high-pile wool yarn loops, this cushion provides an irresistible tactile experience that invites you to sink in and relax, adding instant hygge and warmth to your seating.

What This Idea Means

This idea focuses on sensory indulgence and tactile comfort. It brings the luxurious, cloud-like feel of a Greek flokati rug directly onto your sofa or bed as an ultra-soft decorative accent.

How to Make It

  1. Materials Needed: Thick wool or chunky acrylic yarn in cream, blush, or ochre; a sturdy backing fabric (heavy cotton canvas); a crochet hook or latch hook tool; and a sewing machine.
  2. Preparing the Base: Cut your canvas backing and front panel fabrics to size.
  3. Creating Shag Loops: Punch or crochet thick loops of wool yarn across the surface of the front panel fabric, working in tight rows from bottom to top.
  4. Shearing (Optional): Leave the loops intact for a curly textured look, or carefully snip the tops of the loops with scissors to create a plush, velvety flokati shag pile.
  5. Finishing: Sew the shaggy front panel to your backing fabric with a hidden zipper closure.

Tips and Variations

  • Tip: Shake your finished shaggy pillow vigorously outdoors before bringing it inside to shed any loose yarn fluff.
  • Variation: Use multi-colored pastel yarns to create a dreamy, candy-colored shaggy rainbow effect.

16. Felt Applique Geometric Color-Block Pillow

Introduction

Felt is a wonderful, forgiving material that does not fray at the edges, making it an absolute dream for crafting applique designs. A felt applique geometric color-block pillow allows you to play with bold, saturated color combinations and clean, architectural shapes with zero fuss.

What This Idea Means

This style celebrates modern graphic design and crisp color blocking. It utilizes clean lines and vibrant felt colorways—like coral, mustard, turquoise, and teal—to create a cheerful, modern Scandinavian aesthetic.

How to Make It

  1. Materials Needed: Wool-blend felt sheets in various vibrant colors, a solid neutral base linen pillow cover (grey or cream), fabric adhesive (such as HeatnBond), an iron, and matching sewing thread.
  2. Cutting Shapes: Cut your felt into modern geometric shapes like semi-circles, large triangles, or overlapping arches using sharp fabric scissors.
  3. Fusing: Apply iron-on adhesive backing to the back of your felt shapes, peel off the paper liner, and arrange them into your desired composition on the linen pillow cover.
  4. Ironing: Press firmly with a hot iron to bond the felt shapes permanently to the base fabric.
  5. Edge Stitching: Stitch around the perimeter of each felt shape with a straight sewing machine stitch for added durability and a tailored finish.

Tips and Variations

  • Tip: Use a rotary cutter and a clear acrylic quilting ruler to cut ultra-straight, precise geometric lines in your felt sheets.
  • Variation: Create a mid-century modern abstract sunburst motif using overlapping arcs of mustard, terracotta, and cream felt.

17. Metallic Leather-Accented Velvet Cushion

Introduction

Mixing contrasting textures—such as buttery soft velvet and sleek metallic leather—creates instant visual intrigue and high-end sophistication. A metallic leather-accented velvet cushion brings a touch of edgy modern luxury to traditional or transitional home decor schemes.

What This Idea Means

This concept explores the juxtaposition of soft and hard, matte and shine. By introducing metallic leather panels or piping onto rich velvet, the pillow gains architectural structure and a glamorous sheen.

How to Make It

  1. Materials Needed: Rich jewel-toned velvet fabric, scrap pieces of metallic gold or copper lambskin leather (or faux metallic leather), leather sewing machine needles, heavy-duty thread, and a zipper.
  2. Designing Accents: Cut geometric leather patches (such as modern corner triangles or a central vertical stripe) to accent your velvet pillow face.
  3. Sewing Leather: Attach your metallic leather pieces to the velvet panel using a specialized leather needle and a longer stitch length on your sewing machine to avoid perforating the leather too closely.
  4. Assembling the Cover: Sew the accented front panel to your velvet back panel, incorporating a hidden zipper along the bottom edge.
  5. Stuffing: Insert a luxurious down-alternative pillow form for a crisp, high-end karate-chop look.

Tips and Variations

  • Tip: Use clips or painter’s tape instead of pins to hold your leather pieces in place while sewing, as pins leave permanent holes in leather.
  • Variation: Use metallic silver leather accents on a deep midnight blue velvet background for a celestial, moody aesthetic.

18. Hand-Tufted Floral Punch Needle Pillow

Introduction

Floral motifs are perennial favorites in interior design, bringing freshness and natural beauty indoors. A hand-tufted floral punch needle pillow combines sweet botanical designs with rich, raised yarn textures, creating a charming heirloom piece that brightens any room.

What This Idea Means

This idea reimagines classic floral patterns through a modern, tactile lens. Instead of flat printed flowers, the blossoms pop off the pillow surface in lush, colorful loops of yarn.

How to Make It

  1. Materials Needed: Monks cloth, punch needle tool, embroidery hoop, colorful yarn (pinks, yellows, greens, cream), backing fabric, and sewing machine.
  2. Drawing Florals: Sketch charming vintage-style daisies, tulips, or wildflowers onto your monks cloth using a pencil.
  3. Punching the Design: Punch loops for the flower petals in vibrant pinks and yellows, fill the flower centers with French knots or dense loops, and punch the stems and leaves in lush olive green.
  4. Locking and Trimming: Apply textile glue to the back of the monks cloth to secure all loops permanently.
  5. Sewing the Pillow: Sew your completed tufted floral panel to a durable neutral canvas backing.

Tips and Variations

  • Tip: Keep your yarn tension loose and consistent as you punch to ensure your floral loops lay uniform and flat on the front side.
  • Variation: Create a bold, oversized single daisy centered on a mustard yellow background for a retro 1970s vibe.

19. Pleated Velvet Lumbar Cushion

Introduction

Pleating is a classic couture fashion technique that brings incredible architectural dimension and rich texture to fabrics. A pleated velvet lumbar cushion showcases stunning sunburst or channel pleats that catch light dynamically, adding timeless elegance and tailored sophistication to a bed or sofa.

What This Idea Means

This style celebrates haute couture tailoring applied to home decor. It relies on meticulous folds rather than prints or embroidery to create breathtaking visual depth and luxurious comfort.

How to Make It

  1. Materials Needed: 1.5 yards of stretch velvet fabric, matching sewing thread, a sewing machine, a long lumbar pillow insert (12×24 inches), and fabric marking chalk.
  2. Measuring and Folding: Measure and press uniform vertical or sunburst pleats across your velvet panel using marking chalk and steam iron heat to hold the creases.
  3. Basting Pleats: Secure the pleats in place by sewing a row of basting stitches across the top and bottom edges of the pleated fabric panel.
  4. Constructing the Lumbar Cover: Cut a plain velvet back panel to match your pleated front dimensions, insert a zipper, and sew the cover together.
  5. Final Pressing: Lightly steam the finished cover to ensure crisp, elegant pleating lines.

Tips and Variations

  • Tip: Use a pressing cloth when ironing velvet to protect the delicate pile from being flattened or scorched by direct heat.
  • Variation: Create a stunning sunburst channel-pleated round velvet cushion for a glamorous mid-century modern look.

20. Hand-Painted Ombre Linen Pillow

Introduction

Ombre—the seamless graduation of color from light to dark or from one hue into another—brings serene, ethereal beauty to interior textiles. A hand-painted ombre linen pillow introduces a gentle wash of sunset or oceanic colors that adds calm, meditative grace to any living space.

What This Idea Means

This concept celebrates smooth color transitions and artistic fluidity. It mimics the natural gradients found in twilight skies or ocean depths, offering a sophisticated wash of color that softens modern furniture.

How to Make It

  1. Materials Needed: Pure white linen pillow cover, liquid fabric dye or diluted fabric paint in your chosen color gradient (e.g., coral fading into soft peach and cream), a large sponge brush, and water spray bottle.
  2. Dampening: Mist your linen pillow cover lightly with water so the paint or dye absorbs smoothly without harsh water rings.
  3. Applying Gradient Color: Apply the darkest shade of your dye or paint along one edge of the pillow cover.
  4. Blending: As you move toward the center and opposite edge, dilute your paint with water and blend upward with your sponge brush to create a seamless, soft ombre transition.
  5. Curing: Allow the painted cover to dry completely for 24 hours, heat set with an iron, and insert your plush pillow form.

Tips and Variations

  • Tip: Work quickly while the fabric is damp to ensure your color gradients bleed smoothly into one another without drying lines.
  • Variation: Create a sunset ombre effect transitioning from rich burnt orange at the bottom to golden yellow and soft rose pink at the top.

Leave a Reply

Your email address will not be published. Required fields are marked *