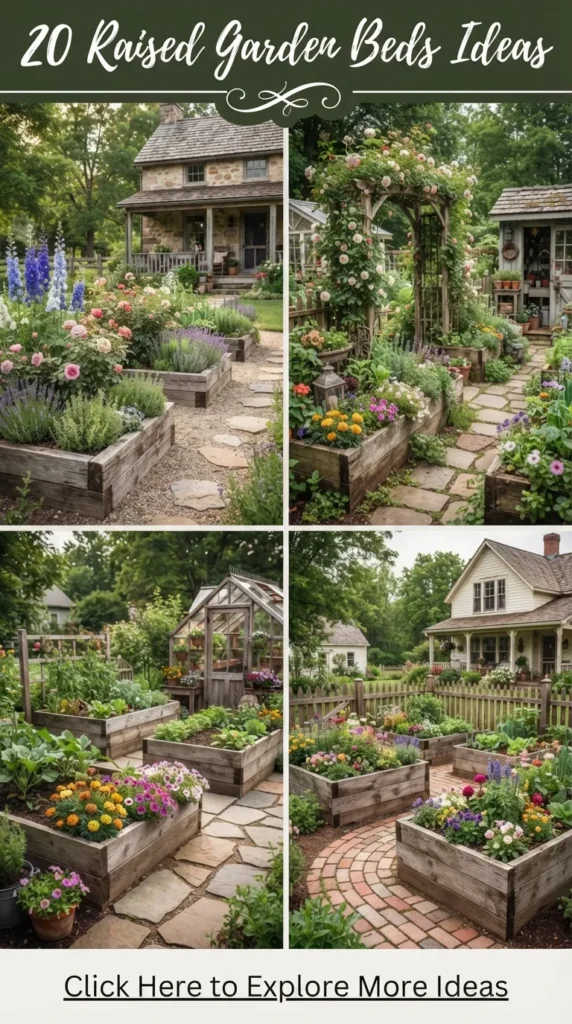
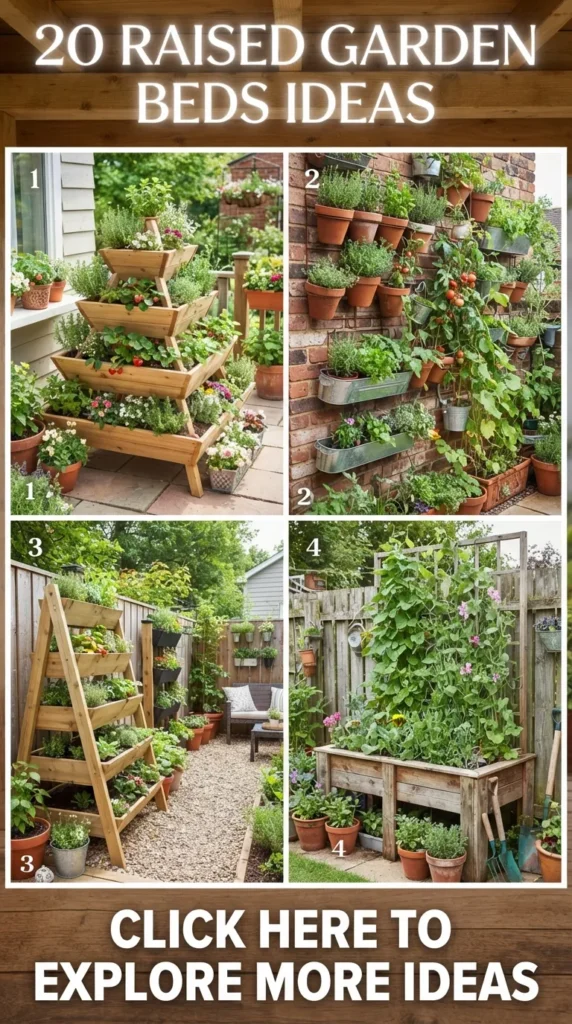
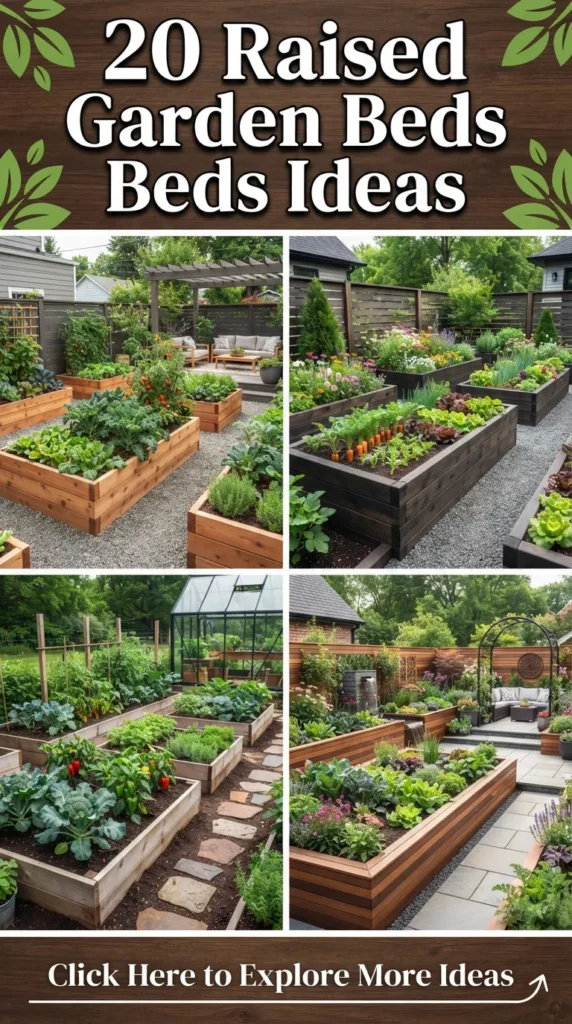
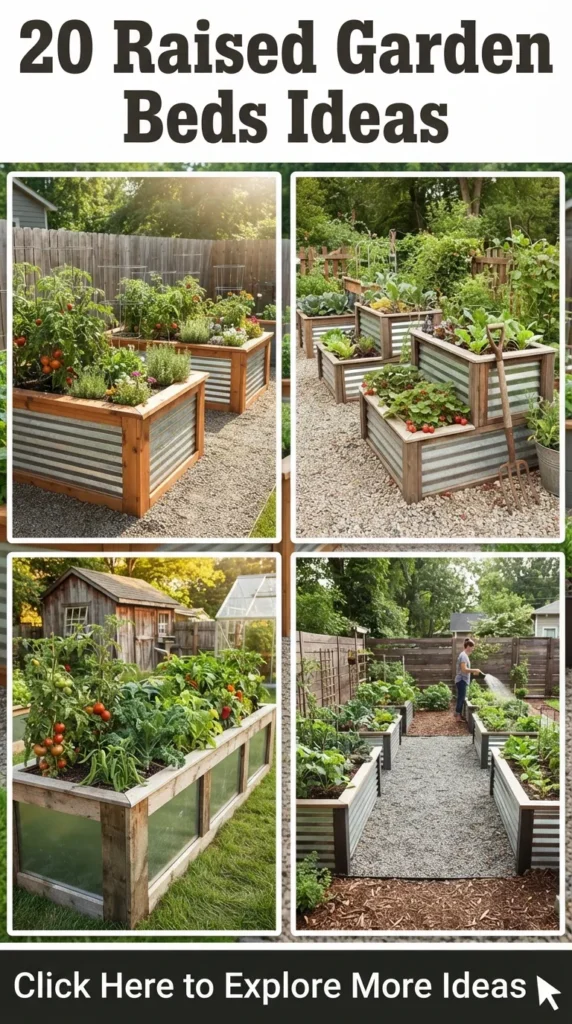
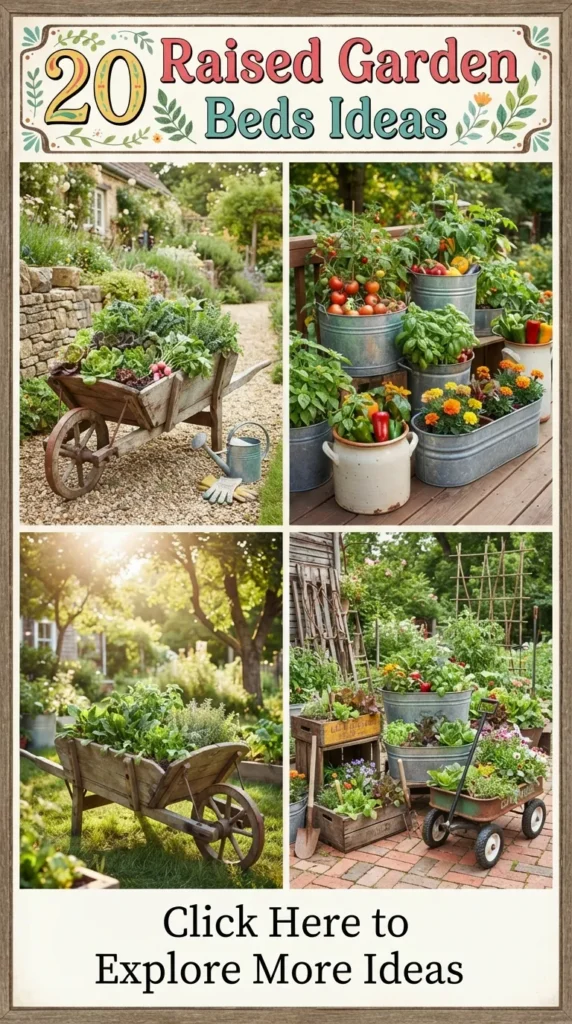
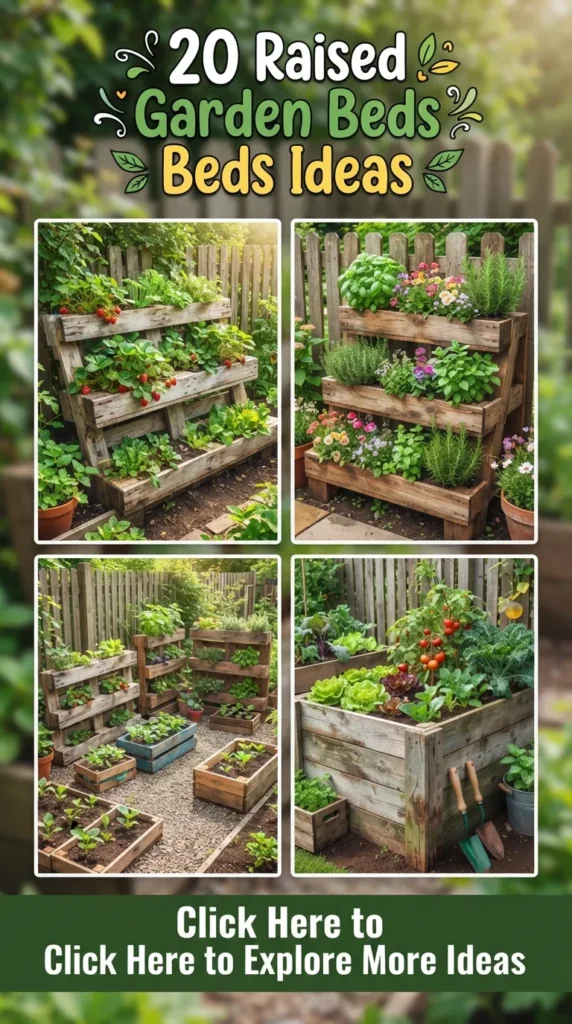
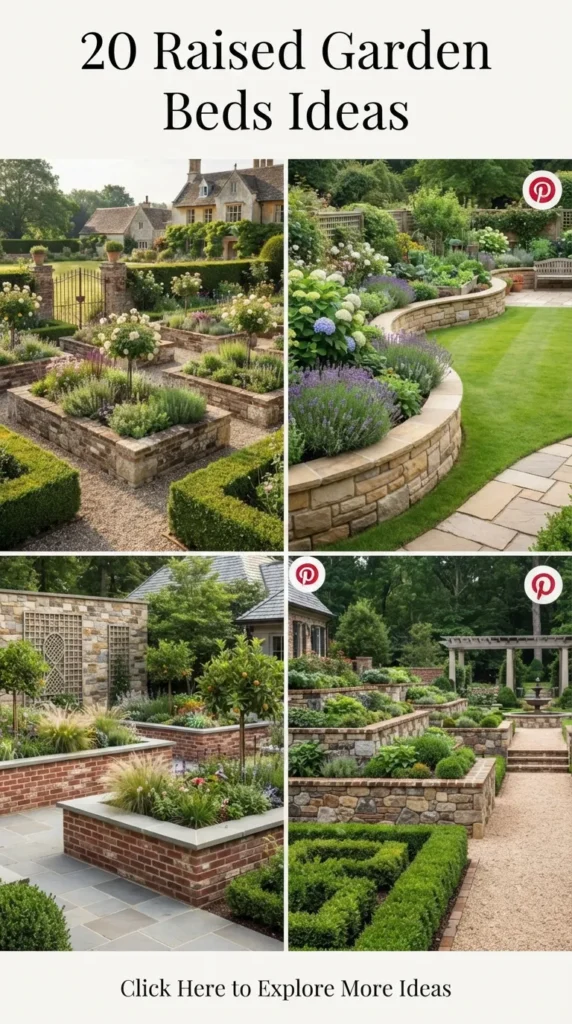
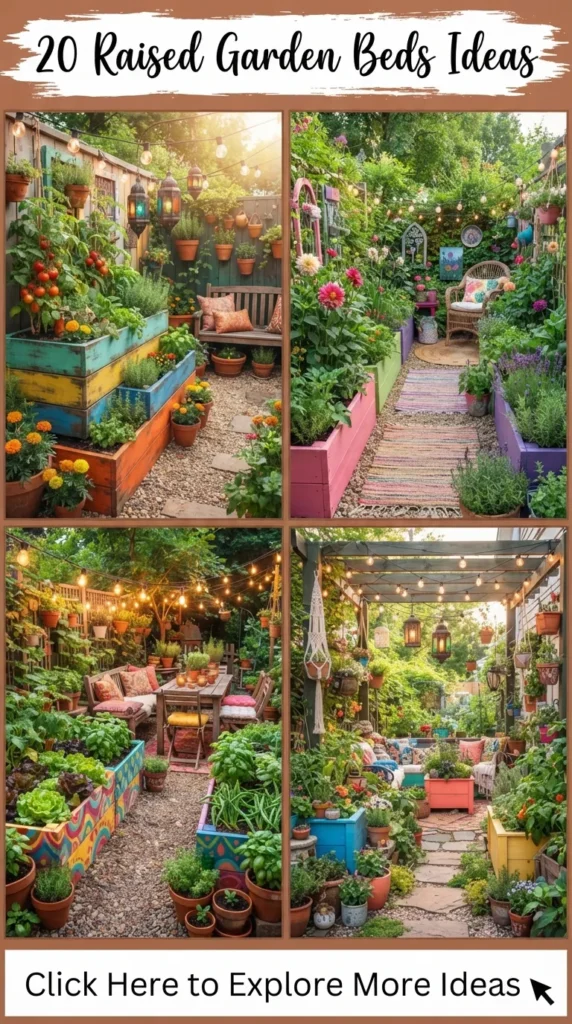
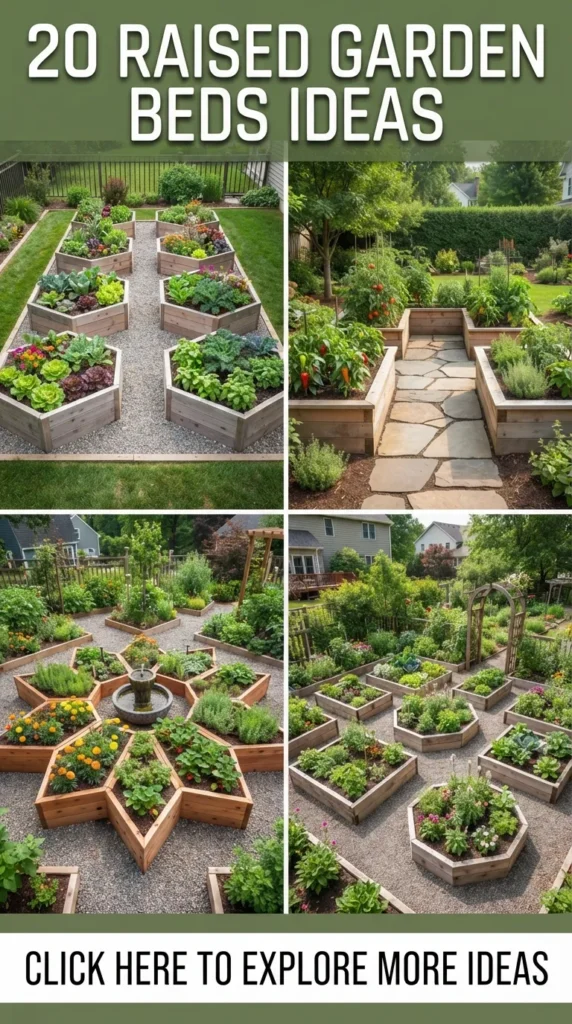
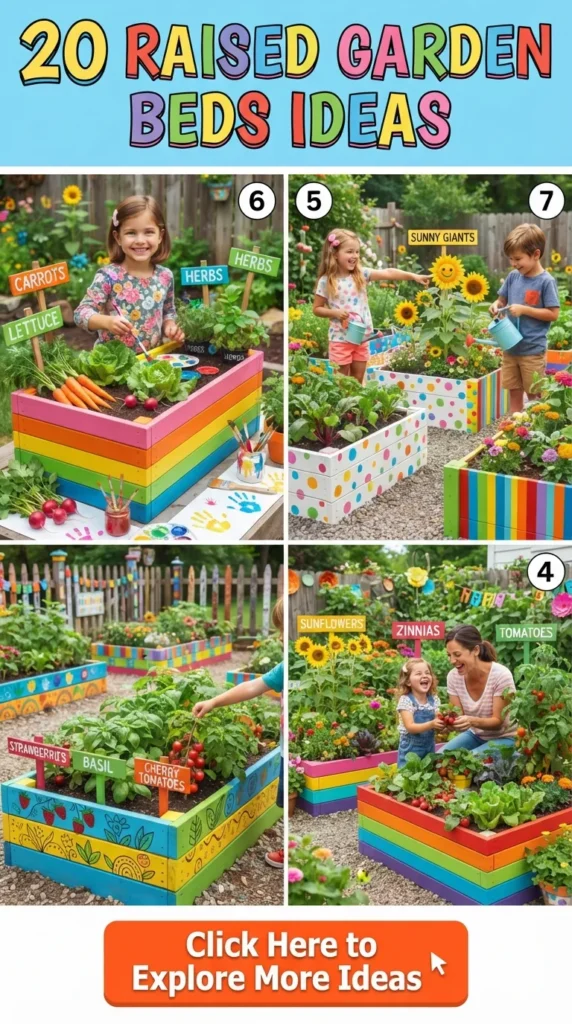
Raised garden beds have fundamentally changed modern gardening by merging ergonomic utility with elevated landscape design. Building your plantings off the ground optimizes drainage, offers total control over soil composition, warms roots earlier in spring, and spares your back and knees from repetitive strain. Beyond agriculture, a well-constructed raised bed acts as an architectural focal point that anchors your yard, defines outdoor living zones, and brings neat geometry to flourishing botanical life.
Whether you have a compact urban courtyard or a sprawling suburban plot, these 20 aesthetic raised garden bed designs provide the structural framework, construction steps, and planting strategies needed to cultivate an extraordinary garden sanctuary.
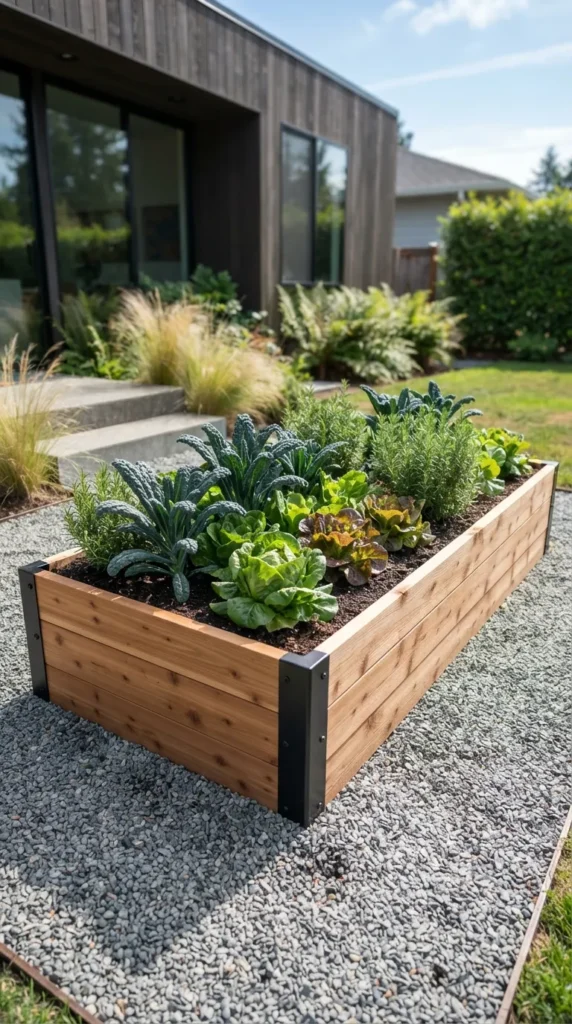
1. Minimalist Raw Cedar Box with Black Metal Corner Brackets
What This Idea Means
This style brings contemporary Scandinavian minimalism into the garden. It pairs warm, honey-toned natural Western red cedar with powder-coated matte black steel angle irons at each corner. The contrast provides structural rigidity while introducing clean, modern lines to organic greenery.
How to Make It
- Cut 2×8 or 2×10 Western red cedar planks to your desired footprint (e.g., 4×8 feet).
- Lay the bottom perimeter flat on level ground, checking squareness with corner-to-corner diagonal measurements.
- Stack boards two or three courses high (16 to 24 inches total height).
- Fasten matte black heavy-duty 90-degree steel angle brackets to the exterior corners using exterior-grade black structural lag screws.
- Attach an internal 2×2 corner post in each interior corner for added stability.
- Line the interior with breathable, non-woven geotextile landscape fabric to protect the wood while preserving drainage.
Tips and Variations
- Material Selection: Select rough-sawn, untreated cedar or redwood to avoid toxic chemical leaching into edible crops.
- Finish Option: Apply pure food-grade raw linseed oil or tung oil to preserve the rich cedar hues, or leave it unfinished to weather into a soft, silvery-gray patina.
- Low-Profile Variation: Use a single 12-inch plank height and extend the black metal posts 6 inches higher as an integrated anchor for protective netting hoops.
2. Industrial Corrugated Galvanized Metal & Timber Hybrid
What This Idea Means
A blend of modern industrial texture and rustic warmth. Corrugated galvanized steel panels reflect sunlight, resist rot indefinitely, and create crisp horizontal ripples framed by thick timber posts and top capping.
How to Make It
- Frame four vertical corners using 4×4 rot-resistant timbers (cedar or pressure-treated pine lined with plastic).
- Cut heavy-gauge (26-gauge minimum) galvanized corrugated metal roofing panels to size using metal shears or an angle grinder.
- Dado a 1/2-inch deep groove down the inner center of the 4×4 posts, or screw exterior 2×2 cleats to the inner faces to secure the metal edges.
- Slide and screw the panels into the frame.
- Add a flat 2×6 timber top cap around the entire top rim, mitered at 45-degree angles, creating a smooth, comfortable perimeter bench.
Tips and Variations
- Heat Management: In hot climates, insulate the interior metal face with rigid natural cork or a 1-inch wooden buffer so root systems along the edges do not overheat in midsummer.
- Aesthetic Finish: Use matte charcoal or matte black coated metal panels instead of bright zinc galvanized steel for an ultra-modern aesthetic.
- Safety: File down and deburr all cut metal edges thoroughly before sealing them inside the timber framework.
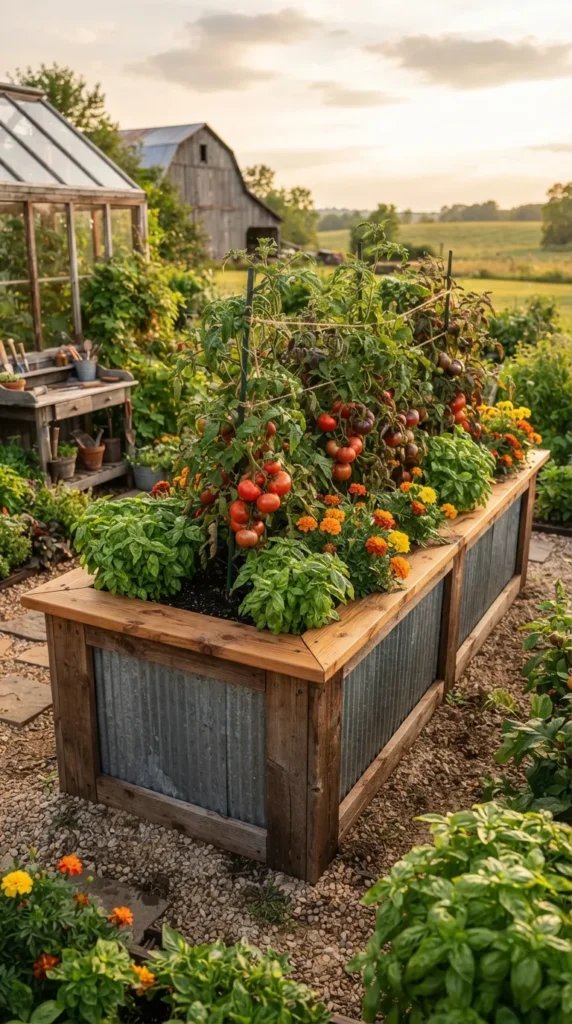
3. Tiered Cascading Staircase Garden Beds
What This Idea Means
Tiered beds utilize vertical space and natural slopes, creating a stepped, multi-level amphitheater of flowers, trailing vines, and vegetables. This structure lets every tier capture optimal sunlight without casting shadows on adjacent plants.
How to Make It
- Excavate and level three stepped terraces into a gentle yard slope or flat footprint.
- Build the base tier to a height of 10 inches using 2×10 cedar boards.
- Construct the second tier set back 18 to 24 inches behind the front wall, building it 18 to 20 inches tall.
- Build the rear tier at 28 to 30 inches tall.
- Anchor the tiers together using interior vertical 4×4 posts driven securely into the subsoil.
- Fill each level sequentially with a rich mix of compost, topsoil, and coarse aeration amendments.
Tips and Variations
- Planting Layout: Place tall root vegetables and climbing pole beans at the top tier, mid-sized herbs and bush peppers in the center, and trailing strawberries or creeping thyme along the bottom edge to spill over the sides.
- Corner Configuration: Adapt this build into a 90-degree corner unit to transform dead yard corners into layered focal points.
- Drainage: Ensure the backing walls between tiers have internal drainage weep holes or coarse gravel backing to prevent hydrostatic soil pressure buildup.
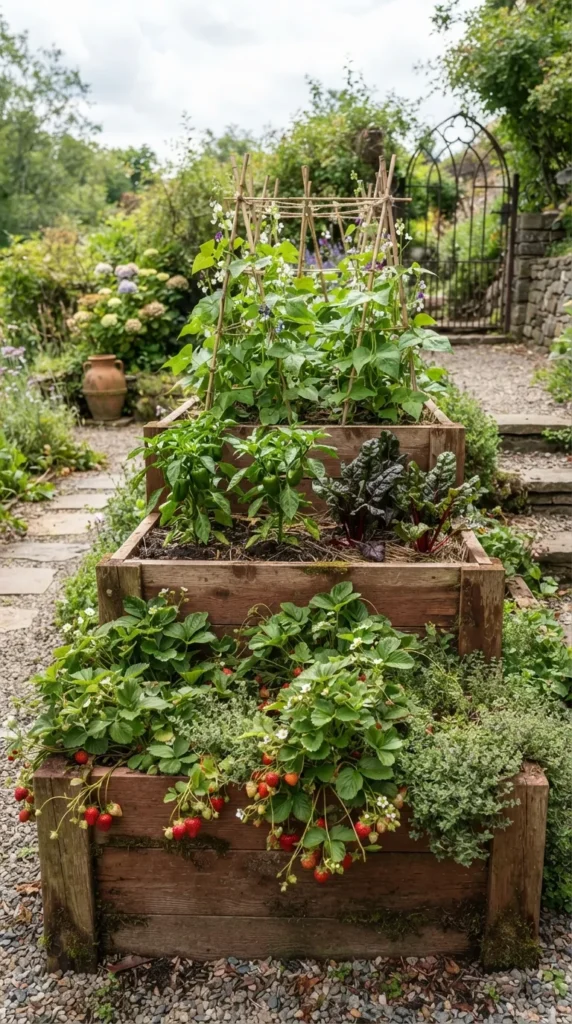
4. Classic English Cottage Weathered Stone Bed
What This Idea Means
This style brings the timeless permanence of historical European country estates to your backyard. Using dry-stacked or lightly mortared fieldstone, flagstone, or limestone, these beds integrate smoothly into natural wildflower landscapes.
How to Make It
- Dig a shallow 6-inch trench following the desired perimeter outline and fill it with 4 inches of crushed gravel, tamping thoroughly to create a level, stable foundation.
- Lay the widest, flattest foundation stones at the base.
- Dry-stack complementary stones, staggering the vertical joints across courses (one stone over two, two over one).
- Pitch stones slightly inward toward the bed center to leverage gravity for lateral structural strength.
- Fill gaps with a sand-and-soil mixture or leave small crevices open for rock-dwelling alpine herbs.
- Top off with a uniform course of broad, flat coping stones.
Tips and Variations
- Mortar Choice: If building higher than 18 inches, secure internal joints with hidden type-N mortar while leaving the outer facade dry-stacked for a natural look.
- Crevice Planting: Tuck creeping thyme, alpine strawberries, and trailing campanula directly into outer gaps during the build.
- Stone Varieties: Match stone types to your regional geology—such as blue-gray slate, creamy limestone, or golden sandstone—to complement your local environment.
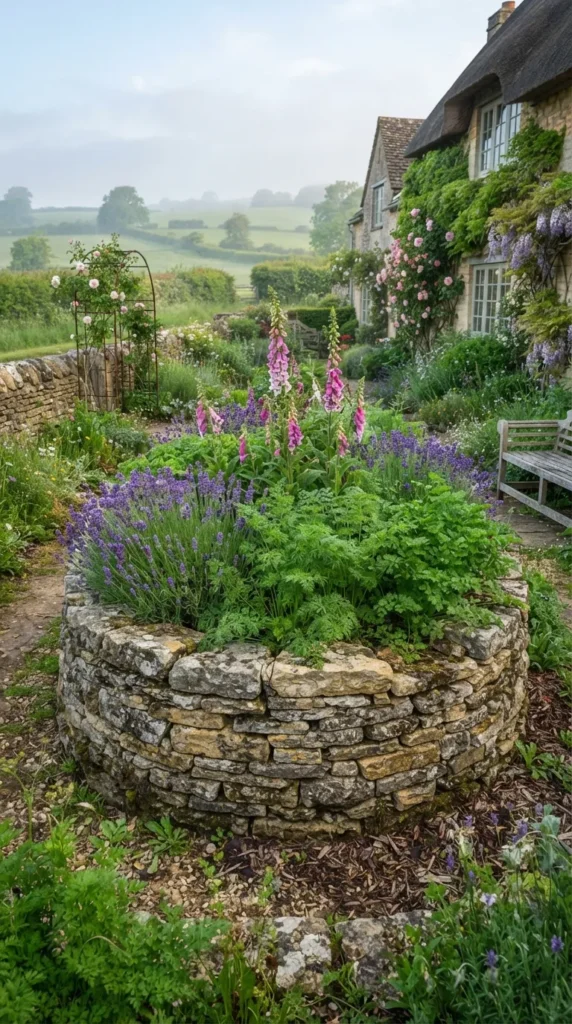
5. Ergonomic U-Shaped Keyhole Garden Bed
What This Idea Means
The U-shaped keyhole layout brings high space efficiency and ergonomic accessibility to your garden. By incorporating a central walk-in cutout, you can tend a large soil area from a single spot without stepping onto the planting bed and compacting the soil.
How to Make It
- Map out an 8×8 foot overall square footprint on cleared ground.
- Cut out a central 2.5-foot wide walking corridor extending 5 to 6 feet into the center of the square.
- Assemble exterior perimeter walls and interior corridor walls using 2-inch thick rot-resistant planks or stacked modular composite timbers.
- Secure inner and outer corners with 4×4 timber posts.
- Run tension-support cross cables or tie-bars across parallel walls spanning wider than 4 feet to prevent soil outward bowing.
- Lay crushed pea gravel or natural flagstones inside the walk-in pathway for clean, mud-free footing.
Tips and Variations
- Compost Tower Integration: Place a perforated cylindrical wire-and-burlap composting basket in the center of the keyhole to water and fertilize the bed naturally through nutrient diffusion.
- Integrated Seating: Add a hinged flip-down wooden bench across the walkway entrance for a comfortable weeding seat.
- Irrigation Routing: Run a single 1/2-inch drip irrigation line down the interior corridor with branch lines feeding both outer wings.
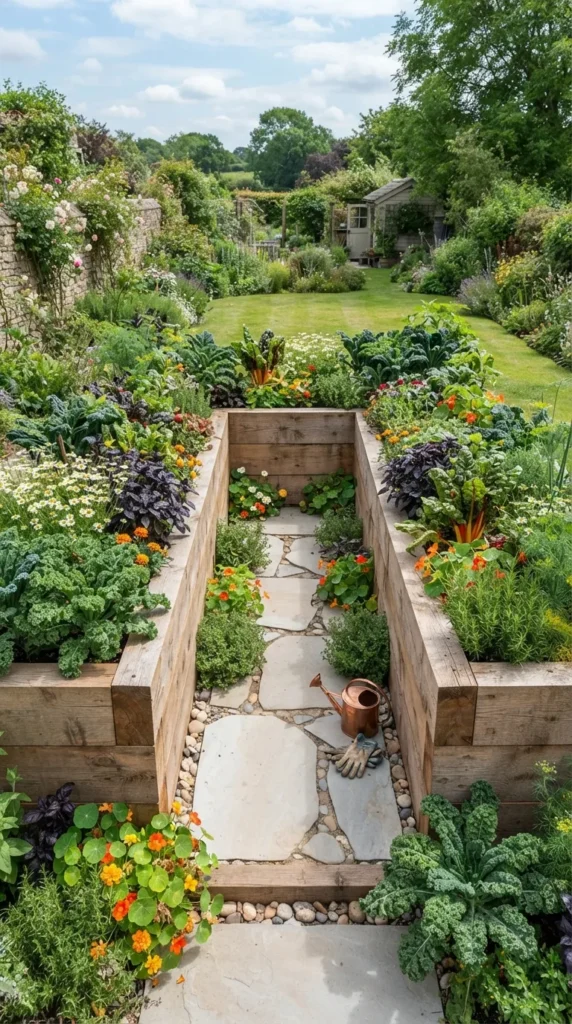
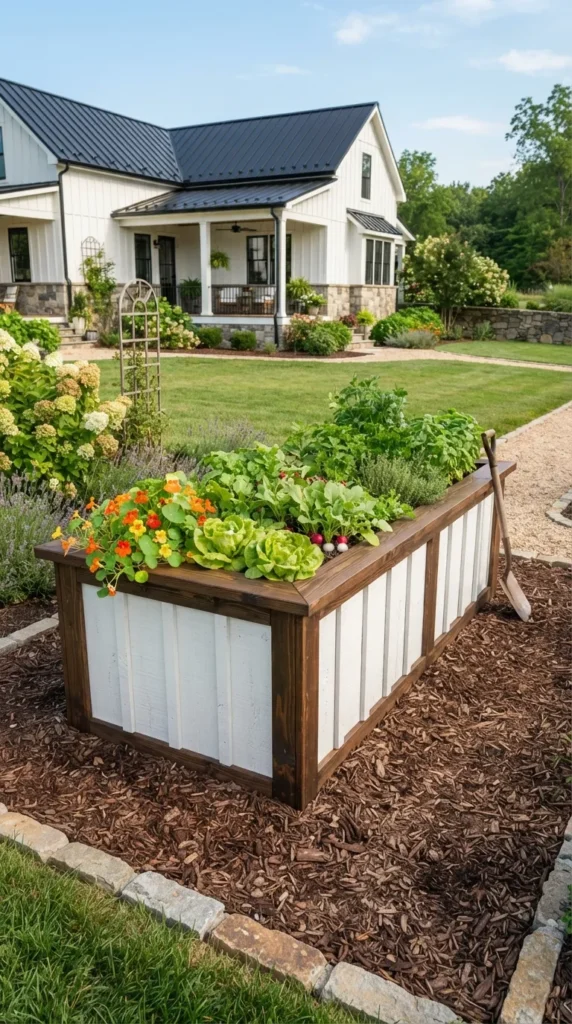
6. Whitewashed Farmhouse Board & Batten Beds
What This Idea Means
Inspired by American heritage farmsteads, this design features wide vertical siding accented with raised battens, finished in a soft, weathered white exterior wash. It creates a crisp, light backdrop that accentuates deep green foliage and colorful blooms.
How to Make It
- Build a structural structural box frame from 2×4 framing lumber.
- Clad the exterior with exterior-grade vertical cedar tongue-and-groove boards or smooth flat timber siding.
- Nail thin 1×2-inch cedar battens vertically over every joint at regular 6-to-8-inch intervals.
- Apply two coats of exterior non-toxic, eco-safe mineral silicate paint or breathable lime-based whitewash.
- Cap the top edge with a flat, dark walnut-stained or natural cedar 2×6 ledge for high-contrast visual framing.
Tips and Variations
- Lining Protection: Staple a thick heavy-duty pond liner or dimpled air-gap membrane along the inner wood face to shield the whitewashed facade from soil moisture stains.
- Distressed Aesthetic: Lightly sand high-wear edges and corners with 80-grit sandpaper after painting to achieve a soft, vintage weathered patina.
- Color Palette: Swap traditional bright white for modern muted tones like warm cream, pale sage green, or dove gray.
7. Corten Weathering Steel Ribbon Planters
What This Idea Means
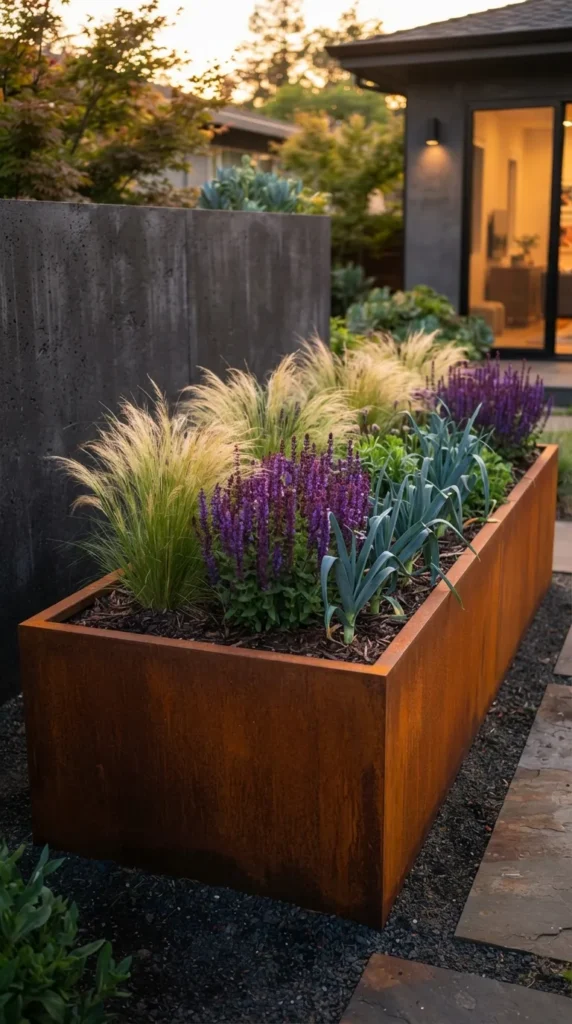
Corten steel is beloved by landscape architects for its rich, self-sealing amber-rust patina. These ultra-slim yet robust steel walls allow for clean geometric shapes, serpentine curves, and crisp edges without the bulk of traditional timber framing.
How to Make It
- Order pre-fabricated 14-gauge Corten steel raised bed panels or custom laser-cut sheets.
- Dig a narrow trench to seat the bottom edge 2 to 3 inches below grade.
- Bolt panel sections together using internal stainless-steel hardware through pre-drilled interior flanges.
- Drive matching Corten ground stakes into the subsoil behind the panels and weld or bolt them in place to maintain straight wall alignment.
- Wet the newly installed steel with a gentle salt-and-vinegar water spray to accelerate uniform rust oxidation across 72 hours.
Tips and Variations
- Subsurface Isolation: Ensure the steel panels do not directly touch concrete patios or pale flagstones during the initial oxidation phase, as initial rust runoff can stain surfaces.
- Curved Geometries: Choose flexible 1/8-inch thick weathering steel strips to bend fluid, organic wave shapes across your landscape.
- Thermal Insulation: Line inner sunny exposures with natural coconut coir sheeting to moderate soil temperature during high summer heat.
8. Integrated Bench Perimeter Seating Bed
What This Idea Means
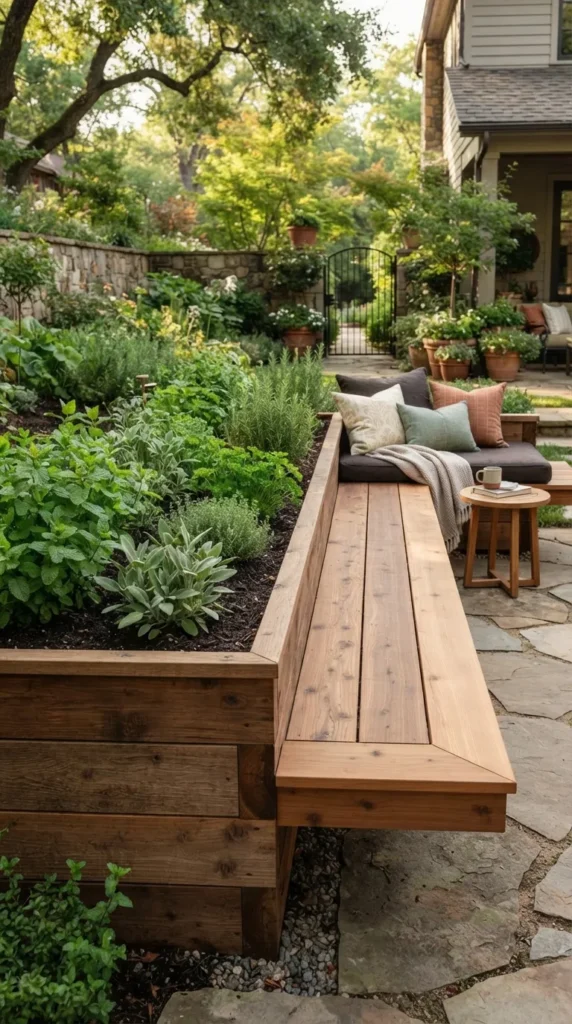
This multifunctional design combines a functional growing bed with built-in perimeter bench seating. It turns the garden bed into an interactive outdoor living space where you can read, entertain, and harvest produce comfortably.
How to Make It
- Construct a deep 24-inch tall box using 2×10 cedar timbers, reinforced with internal 4×4 posts every 4 feet.
- Attach horizontal 2×4 cantilever support brackets to the top outer edges, extending outward by 10 to 12 inches.
- Lay three parallel 2×4 or two 2×6 smooth-planed, round-over edged cedar planks across the brackets around the entire perimeter.
- Secure the bench planks from underneath using pocket screws to keep the top seating surface free of exposed screw heads.
- Sand the seating surfaces smooth to 180 grit and seal with an outdoor plant-safe polyurethane or deck oil.
Tips and Variations
- Corner Cushions: Add weather-resistant Sunbrella fabric cushion pads to corners for garden lounge seating.
- Storage Modification: Make one side of the perimeter bench hinged to create an integrated hidden storage compartment for trowels, pruning shears, and garden hoses.
- Under-Glow Accent: Install a waterproof, warm-white LED strip under the bench lip to cast a gentle downward glow over garden paths at night.
9. Geometric Hexagonal Honeycomb Cluster
What This Idea Means
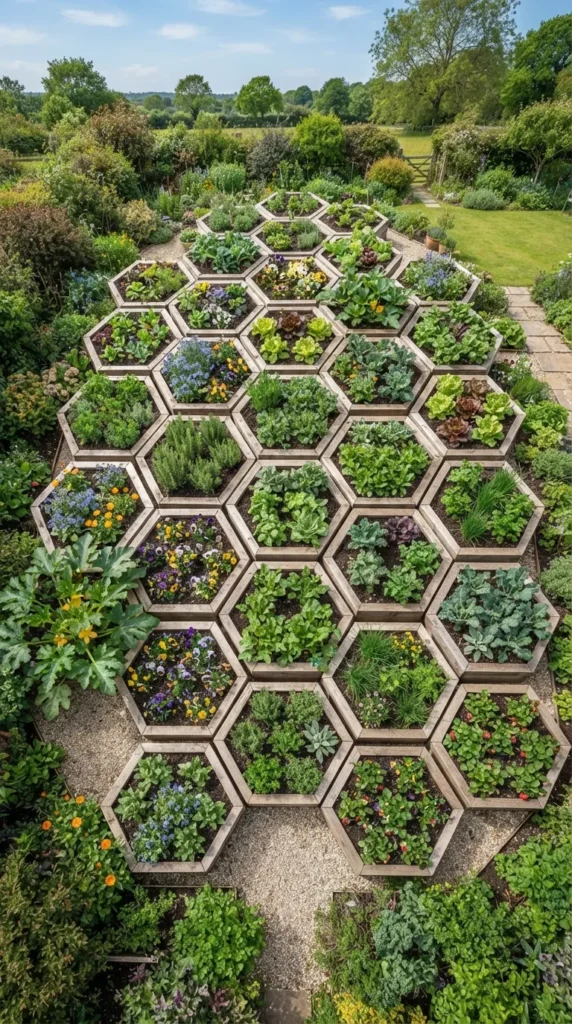
Moving away from standard right angles, the hexagonal bed layout introduces dynamic natural geometry to your garden. Clustered together like a honeycomb, these beds offer modular flexibility, create clear pathways, and present artistic visual angles from above.
How to Make It
- Cut 12 equal lengths of 2×8 or 2×10 rot-resistant timber for each single hexagon (e.g., 24 inches per side).
- Miter both ends of every board at a precise 30-degree angle (creating the 120-degree interior corner angle of a hexagon).
- Join the edges with waterproof wood glue and two 3-inch exterior ceramic-coated screws per joint.
- Reinforce the interior corners with customized 120-degree metal mending plates.
- Stack a second identical layer on top, offsetting the corner joints slightly or securing them with internal vertical corner blocking.
- Arrange multiple completed hexagonal units in an interlocking or stepping cluster pattern with 2-foot pathways in between.
Tips and Variations
- Varied Heights: Build adjacent modular hexagons to different heights (e.g., 12 inches, 20 inches, and 28 inches) for a staggered, architectural landscape look.
- Central Feature: Place a circular birdbath or water feature in a center hexagon surrounded by outer planting modules.
- Specialized Zones: Dedicate each hexagon to a specific culinary cuisine theme (e.g., an Italian Herb hex, a Salsa Garden hex, a Tea Leaf hex).
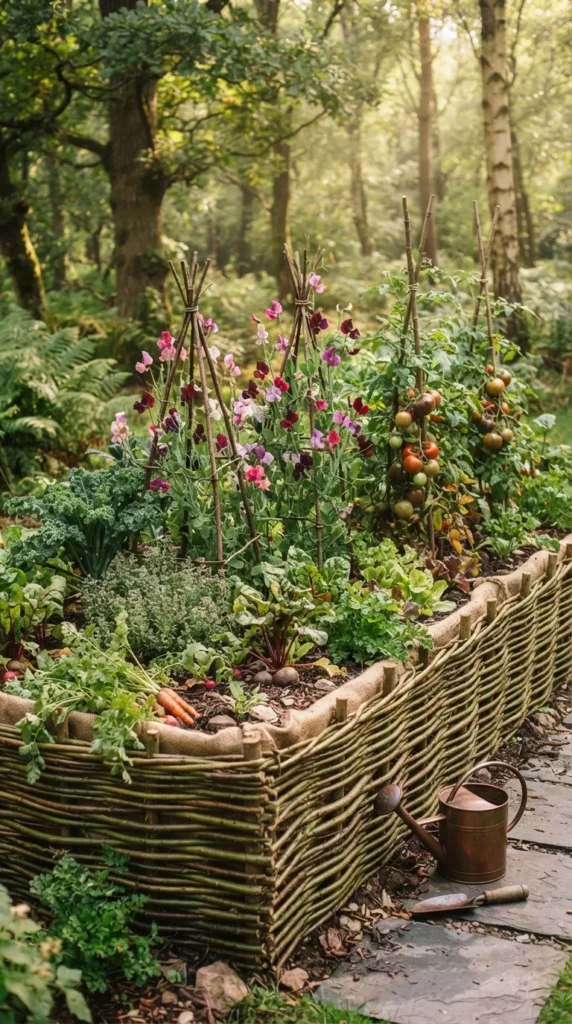
10. Living Living-Wall Willow & Hazel Wattle Hurdle Beds
What This Idea Means
Wattle hurdle gardening is a centuries-old European woodland technique. By weaving flexible, green sapling branches around upright stakes, you create a natural, textured, and biodegradable raised bed that blends into natural gardens.
How to Make It
- Drive 2-inch thick, pointed hardwood or coppiced sweet chestnut stakes into the ground 12 inches apart along the bed perimeter.
- Harvest fresh, pliable green branches of willow, hazel, or birch (1/2 to 1 inch in diameter).
- Weave the branches horizontally in and out of the vertical stakes using an alternating basket-weave pattern.
- Tap down each completed row using a rubber mallet and wooden block to ensure a dense, tight weave.
- Trim excess branch ends flush at the corners with sharp loppers.
- Line the interior with natural burlap, jute fabric, or cardboard to contain fine soil particles while allowing excellent aeration.
Tips and Variations
- Living Wattle Option: Use freshly cut live willow rods in damp soil; they will root and sprout fine green leafy foliage directly from the bed walls in spring.
- Longevity Maintenance: Spray the woven exterior annually with a 50/50 mixture of raw linseed oil and turpentine to extend the wood’s lifespan against rot.
- Corner Bracing: Place paired corner stakes tied together with heavy natural jute twine to prevent corners from splaying under wet soil loads.
11. Built-in Overhead Trellis Archway Beds
What This Idea Means
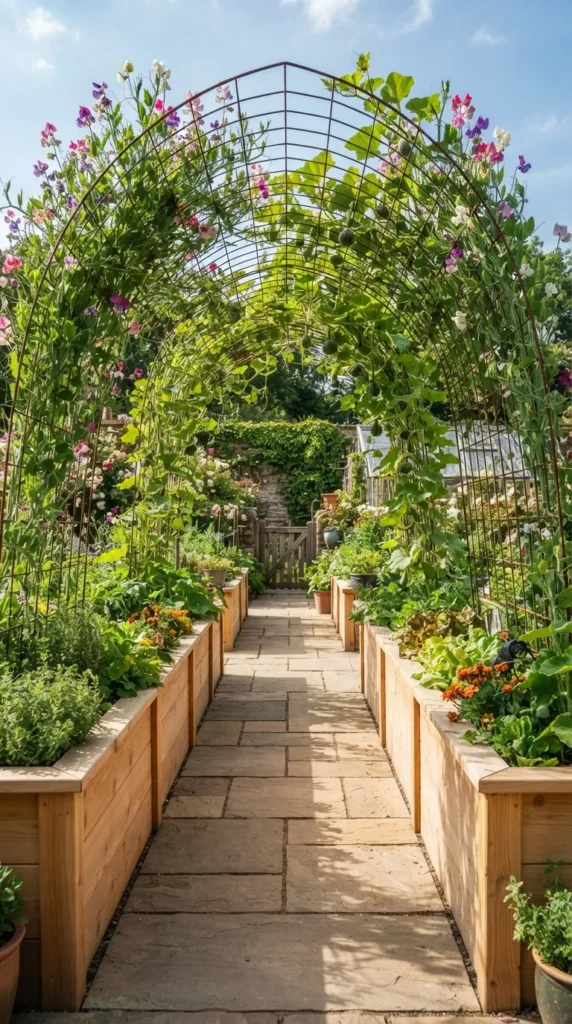
This architectural design connects two parallel raised garden beds with a sturdy walk-through overhead archway. It adds functional vertical height, allowing heavy vining vegetables to climb overhead while creating a lush garden entrance.
How to Make It
- Construct two parallel 3×6 foot wooden raised beds separated by a 3-foot wide walking aisle.
- Fasten four 8-foot long, 2×2 cedar upright posts along the inner walls of both beds.
- Span heavy-duty 4-gauge galvanized welded wire cattle fencing (or bent black powder-coated steel rebar mesh) in a sweeping semi-circular arch between the uprights.
- Secure the wire mesh to the timber framework using heavy-duty galvanized structural pipe staples.
- Add 2×4 horizontal top-ties connecting the beds for lateral stiffness.
Tips and Variations
- Vine Selections: Plant climbing sugar snap peas, heirloom pole beans, miniature pumpkins, or flowering sweet peas to train overhead.
- Lighting Elements: Hang solar fairy lights or hanging lanterns from the apex of the archway for evening illumination.
- Removable Trellis Variation: Mount open conduit pipe straps on bed walls so the entire metal arch can slide out for winter storage or maintenance.
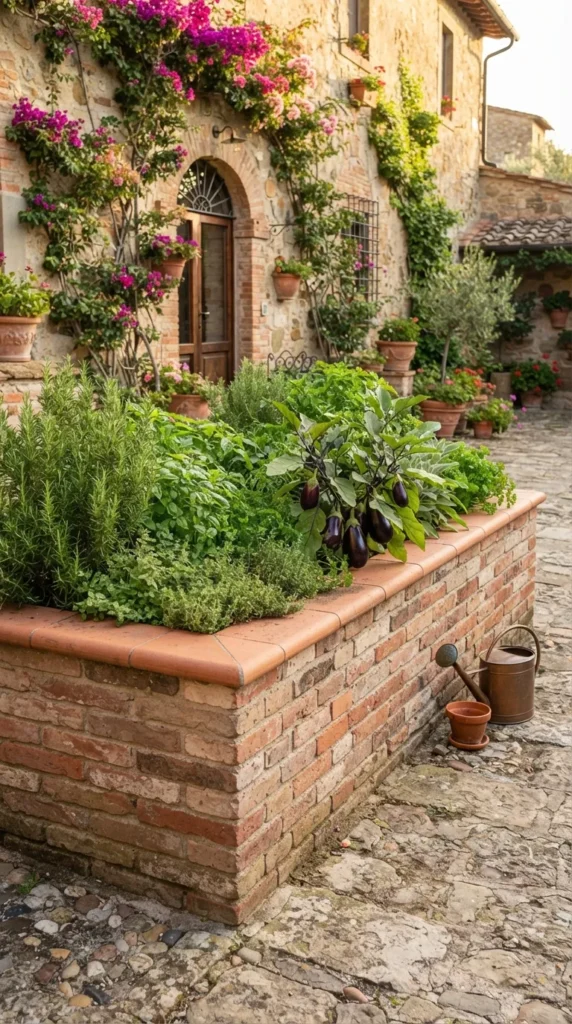
12. Elegant Fluted Terracotta & Brick Masonry Beds
What This Idea Means
Masonry beds bring solid warmth and classic Mediterranean architectural style to the yard. Thick brick or terracotta walls act as thermal heat sinks, soaking up daytime solar energy and releasing it into the soil overnight to stabilize root temperatures.
How to Make It
- Pour a shallow 4-inch deep level concrete footing along the bed perimeter, reinforced with a single piece of steel rebar.
- Mix outdoor Type-M or Type-S mortar.
- Lay standard reclaimed clay bricks or decorative fluted terracotta blocks in a running bond pattern, checking every course with a spirit level.
- Install 1/2-inch weep holes with inserted mesh bug screens every 3 feet along the base mortar joint for lower drainage.
- Cap the top wall course with bullnose paving bricks or smooth flagstone copings for a refined finish.
Tips and Variations
- Herringbone Inset: Lay the top finish course or mid-wall decorative accent bands in a diagonal herringbone pattern for architectural detail.
- Reclaimed Patina: Source weathered antique street pavers or historical bricks covered in natural moss spores for instant vintage charm.
- Lime Washing: Coat raw brickwork with a thin, chalky lime wash that naturally weathers and breathes with moisture shifts.
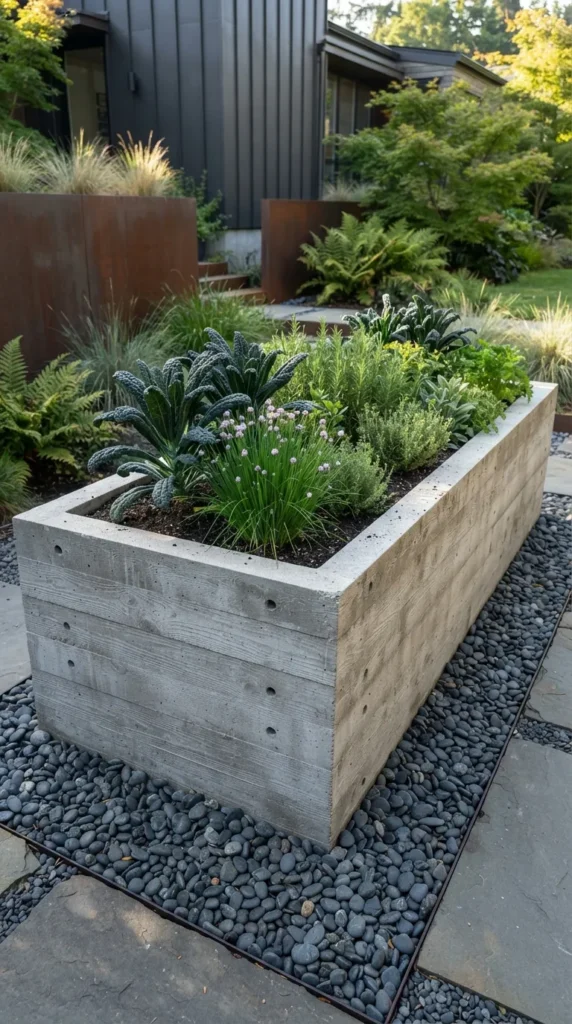
13. Modern Monolithic Poured Concrete Beds
What This Idea Means
For contemporary and mid-century modern architectural homes, poured-in-place board-formed concrete beds provide a clean, monolithic aesthetic. The raw structural concrete showcases wood-grain textures, clean lines, and long-term durability.
How to Make It
- Excavate a 6-inch perimeter footing and lay 3 inches of crushed gravel.
- Build double-sided wooden formwork forms using rough-sawn Douglas fir planks facing inward to imprint vivid natural grain into the concrete.
- Place a reinforcing grid of #3 (3/8-inch) steel rebar tied with wire inside the form channel.
- Mix and pour high-strength structural concrete, running an orbital sander or mechanical vibrator along the form exterior to eliminate air pockets.
- Let cure for 5 to 7 days, then strip the wooden formwork to reveal the textured concrete finish.
- Apply a food-safe silane-siloxane penetrating concrete sealer to repel moisture without creating artificial shine.
Tips and Variations
- Color Infusion: Mix charcoal, buff, or terracotta mineral pigments into the wet concrete to match your surrounding home siding.
- Smooth Trowel Alternative: Use smooth high-density melamine sheets as formwork rather than textured timber to achieve an ultra-smooth finish.
- Integrated Planter Shelving: Cast cantilevered horizontal concrete ledges into the inner forms to hold small, movable herb pots.
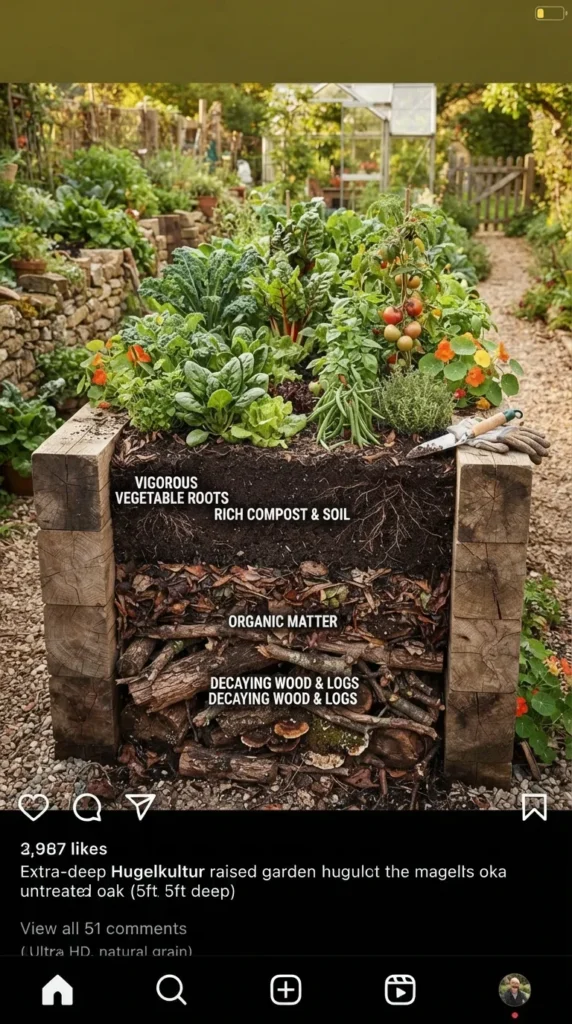
14. Raised Hugelkultur Mounded Timber Pit Beds
What This Idea Means
Merging traditional German Hugelkultur permaculture with aesthetic structural beds. You build an attractive wooden surround over a foundational core of decaying logs and branches, creating a self-watering, nutrient-rich ecosystem that builds living soil over time.
How to Make It
- Build an extra-deep raised bed box (minimum 28 to 36 inches in depth) out of thick rough-sawn timbers.
- Excavate 6 to 8 inches into the native subsoil inside the bed boundary.
- Pack the bottom 40% of the volume with large, decaying hardwood logs, fallen branches, and yard brush.
- Layer organic nitrogen-rich greens (grass clippings, kitchen scraps, green leaves) tightly over the logs.
- Add an 8-inch layer of aged leaf mold and composted animal manure.
- Top the final 8 to 10 inches with high-grade garden loam, compost, and worm castings.
Tips and Variations
- Wood Selection: Use rot-friendly hardwoods like birch, maple, alder, or oak. Avoid anti-microbial rot-resistant woods like cedar, black walnut, or redwood in the Hugelkultur core.
- Moisture Storage: Thoroughly soak each layer of wood and compost with a hose during assembly to charge the subterranean moisture bank.
- Settling Allowance: Fill the soil 2 inches above the bed rim initially, as the core will naturally settle 4 to 6 inches over the first season.
15. Tiered L-Shaped Wrap-Around Deck Bed
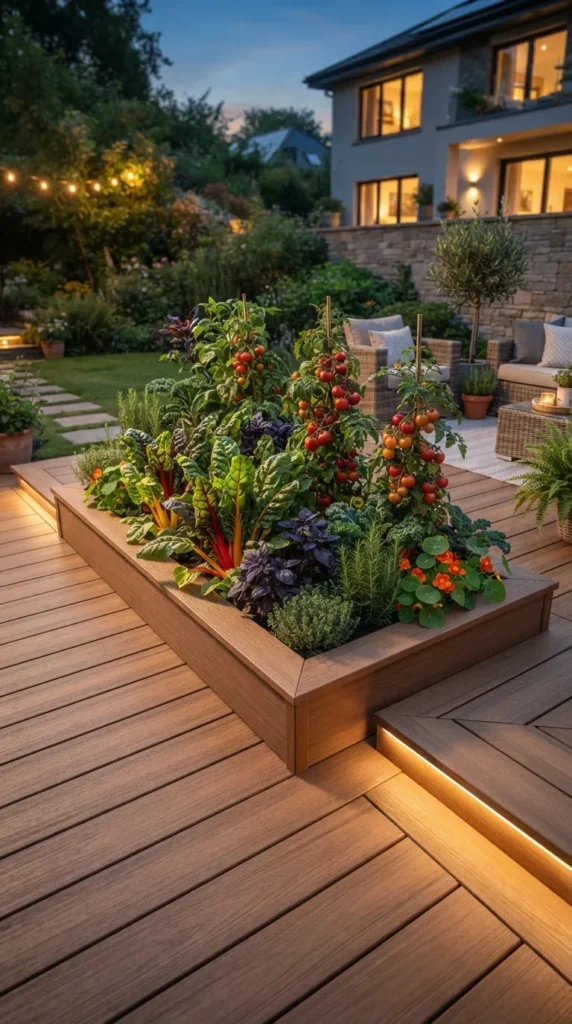
What This Idea Means
Designed to integrate directly with raised outdoor living zones, these beds wrap seamlessly around patio perimeters, retaining walls, or deck corners. They turn unused deck margins into elevated, accessible gardens that sit flush with outdoor seating areas.
How to Make It
- Map an L-shaped corner footprint (e.g., two 6-foot wings meeting at a 90-degree corner, 2 feet wide).
- Build the structural load-bearing sub-frame using treated 2×4 framing lumber rated for ground contact.
- Clad the exterior with the exact same decking boards (composite decking, ipe, or cedar) used on your adjoining patio for a tailored, cohesive look.
- Add matching composite top-edge trim with 45-degree mitered corner joints.
- Line interior wall cavities with thick, heavy dimpled drainage membranes to isolate moisture from adjoining deck structural posts.
Tips and Variations
- Integrated Step Lighting: Install recessed, low-voltage mini puck lights into the base of the cladding to illuminate deck steps.
- Dual Level Plan: Build the corner section 30 inches tall while stepping the two outer wings down to 18 inches.
- Removable Planter Liners: Use drop-in plastic structural agricultural stock tanks inside the clad frame for easy root maintenance and zero moisture transfer to framing lumber.
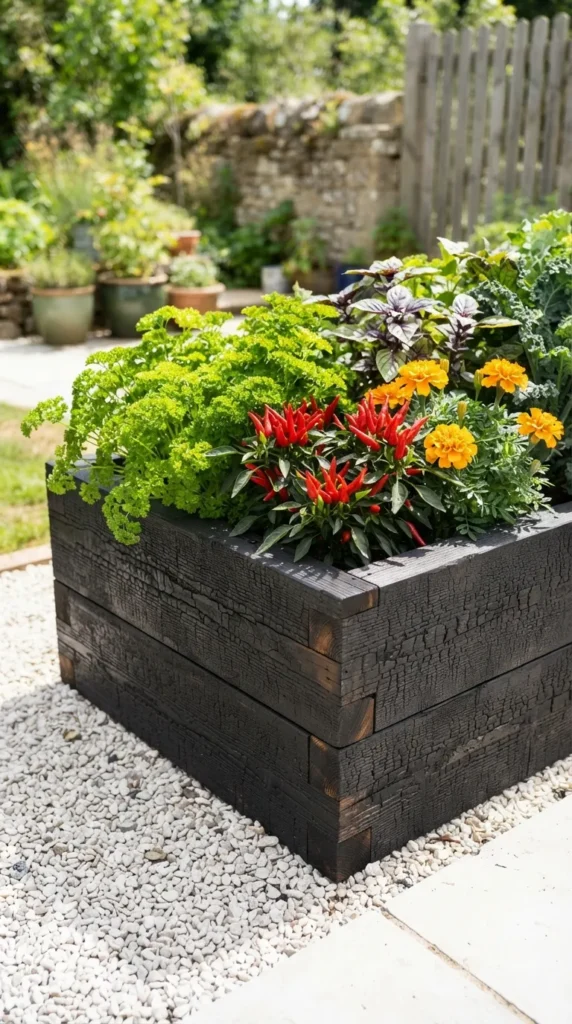
16. Japanese Yakisugi (Shou Sugi Ban) Charred Wood Beds
What This Idea Means
Yakisugi is an 18th-century Japanese technique of charring cypress or cedar timber with an open flame. The carbonized outer layer makes the wood naturally resistant to fire, rot, insects, and fungal decay while producing a rich, lustrous, alligator-skin black finish.
How to Make It
- Cut rough-sawn cedar, cypress, or pine 2×8 boards to length.
- Lay boards flat over non-flammable sawhorses in an open, well-ventilated outdoor space.
- Use a high-output propane weed-torch flame to systematically char the timber surface until an even, deep black layer of crackled carbon forms.
- Let the timber cool completely, then use a stiff natural-bristle brush to sweep away loose ash.
- Wash clean with a light water mist and let dry thoroughly.
- Seal the wood with pure natural tung oil or raw linseed oil to lock in the deep, shimmering charcoal tones.
- Assemble the raised bed using black ceramic exterior screws.
Tips and Variations
- Burn Depths: Opt for a light, brushed “cinnamon” burn to show off the raised wood grain, or a deep “crocodile” char for a bold, midnight-black industrial-zen style.
- Complementary Gravel: Pair the blackened timber with clean white marble chips or light gray granite pathways around the base for high visual contrast.
- Hardware Accents: Use exposed copper corner braces, which develop a rich teal-green verdigris patina that pairs with charred wood.
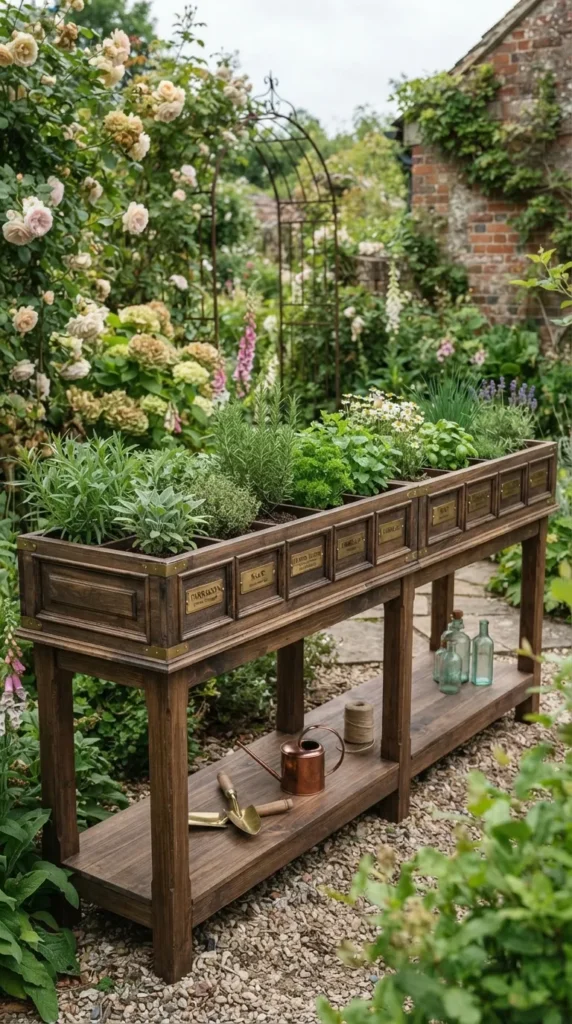
17. Victorian Apothecary Multi-Bay Herb Trough
What This Idea Means
Inspired by historical 19th-century apothecary botanic gardens, this elevated long-trough design is separated into neat, individual organizational compartments. Each partitioned bay houses a dedicated herbal family, pairing organized botanical categorization with classic vintage charm.
How to Make It
- Build a long, narrow waist-height trough (12 feet long, 2 feet wide, 32 inches tall) mounted on sturdy 4×4 legs.
- Divide the interior trough length into five or six equal 2×2-foot square growing bays using drop-in 1-inch thick wooden dividers.
- Drill 3/4-inch drainage holes spaced every 4 inches along the bottom boards of every bay, covering them with fine stainless wire mesh.
- Mount antique, stamped brass or copper label plates centered on the exterior face of each compartment.
- Fill each partitioned bay with customized soil tailored to its specific herb group (e.g., sandy, free-draining soil for Mediterranean herbs; rich loam for leafy herbs).
Tips and Variations
- Labeling Strategy: Stencil Latin botanical names onto aged copper plates or use reusable natural slate markers slotted into exterior brass brackets.
- Lower Slatted Shelf: Build an open-slat storage shelf between the four bottom legs to store watering cans, terracotta pots, and hand tools.
- Caster Wheels: Mount heavy-duty, lockable, industrial steel swivel casters under the legs to move the entire herb trough across paved patios.
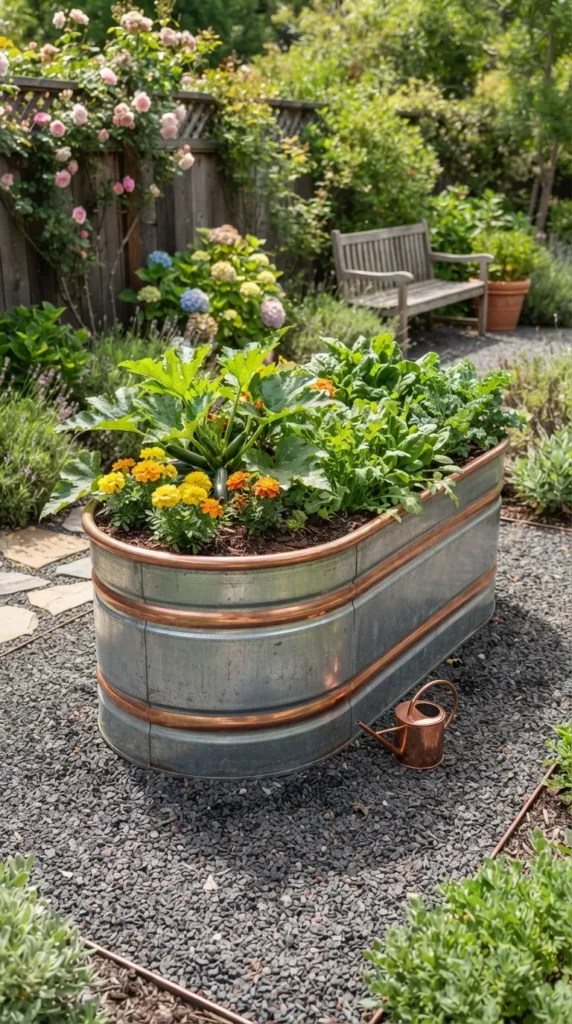
18. Repurposed Oval Galvanized Stock Tank Bed with Copper Trim
What This Idea Means
Heavy-duty oval galvanized steel stock tanks (farm animal water troughs) offer rapid, assembly-free setups. By adding dark wood wrapping, patinated copper banding, and clean gravel skirts, you can elevate raw agricultural tanks into sleek, polished backyard showpieces.
How to Make It
- Procure a 6x2x2 foot or 8x3x2 foot heavy-gauge galvanized oval stock tank.
- Flip the tank upside down and drill 1/2-inch drainage holes every 6 inches across the bottom floor using a cobalt steel drill bit.
- Place the tank in its final location over a level 3-inch deep bed of compacted crushed gravel.
- Wrap the top rolled metal lip with a curved timber trim made from marine-grade plywood or flexible, oil-rubbed copper tubing bent around the perimeter.
- Fasten thin, flexible decorative copper accent strapping around the center perimeter of the metal body using short pop rivets.
Tips and Variations
- Exterior Paint Technique: Lightly etch the galvanized zinc outer walls with white vinegar, prime with self-etching primer, and apply two coats of matte olive or slate blue exterior paint.
- Base Aeration: Elevate the tank base 1 inch off the gravel using durable composite shims to prevent bottom drainage holes from getting blocked.
- Sub-Irrigation Conversion: Install perforated drain pipes and a vertical PVC fill tube in the base to turn the stock tank into a self-watering sub-irrigated planter (SIP).
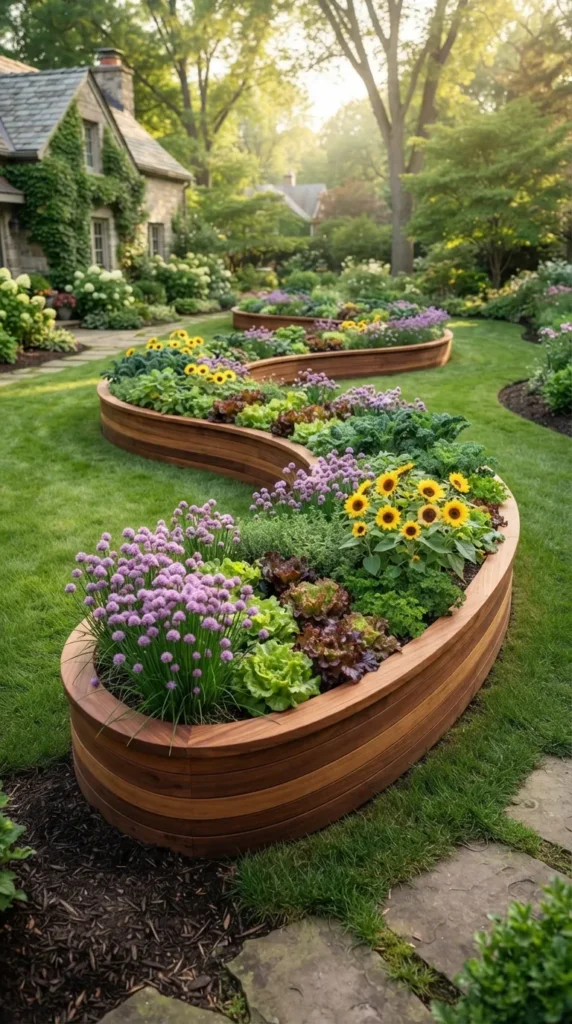
19. Curved Serpentine Plywood & Cedar Garden Ribbon
What This Idea Means
This artistic design breaks away from rectangular gardening boxes, featuring sweeping S-curves that flow like a sculptural ribbon through the landscape. It introduces fluid, organic motion and softens straight architectural property lines.
How to Make It
- Stake out a smooth, curving serpentine layout across your yard using a flexible garden hose as your visual guide.
- Drive 2×2 rot-resistant vertical support stakes into the ground every 12 inches along both sides of the curved trench.
- Layer and laminate three thin 1/4-inch flexible exterior-grade marine cedar veneers or bending-plywood strips along the stakes.
- Glue and screw the laminates together while bent, locking in the natural flowing curve.
- Cap the curved top edge with thin, steam-bent or multi-segmented mitered cedar cap strips.
- Backfill carefully, tamping soil evenly across both sides to balance lateral curves.
Tips and Variations
- Contrasting Plant Heights: Plant tall, structural plants like ornamental alliums and feathered grasses in the inward convex arcs, and low creeping groundcovers in the outward bends.
- Paired Pathway: Lay a matching curved pathway of decomposed granite or flagstones alongside the serpentine wall to echo its shape.
- Inner Structural Bracing: Install cross-ties between the curving parallel walls at narrow points to maintain consistent spacing when loaded with wet soil.
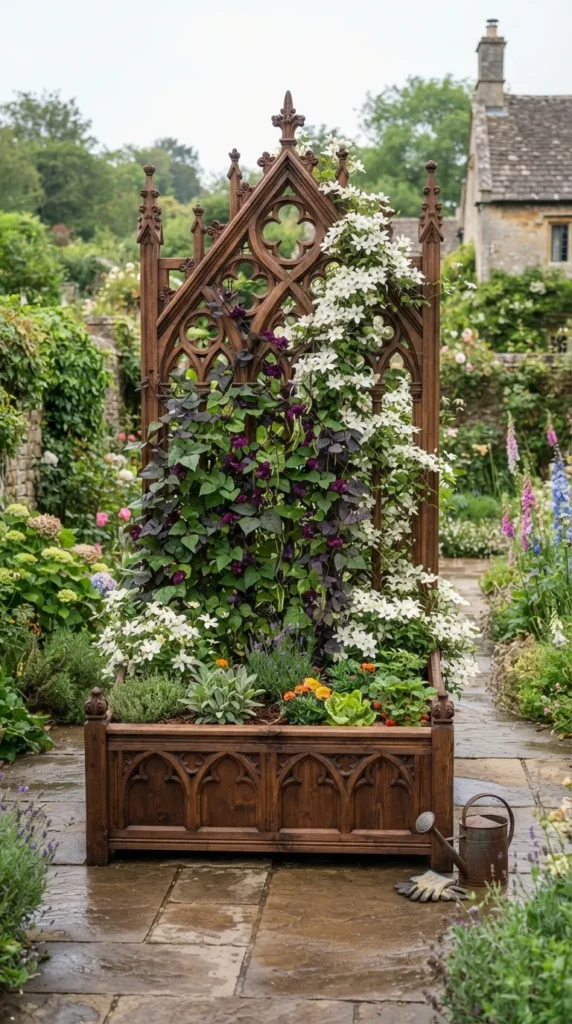
20. Gothic Cathedral Trellis High-Back Garden Bed
What This Idea Means
Drawing inspiration from traditional Gothic revival architecture, this deep raised bed features an integrated tall rear backboard with pointed, cathedral-style arch latticework. It provides strong structural climbing support while functioning as a privacy screen.
How to Make It
- Construct a deep rectangular 4×8 foot wooden base using 2×10 cedar boards (18 inches tall).
- Extend the two rear corner posts upward using 7-foot tall 4×4 cedar timbers.
- Frame a tall wooden rear framework between these back posts.
- Build or mount custom Gothic arch framework using cedar battens, joining angled tops at sharp 45-degree points to mimic pointed cathedral windows.
- Infill the arches with a diagonal wooden lattice or thin black iron rods.
- Sand and treat the wood with a rich, semi-transparent stain in charcoal, dark walnut, or forest green.
Tips and Variations
- Privacy Screening: Position the tall Gothic back-wall along a boundary fence or patio edge to block neighboring sightlines with climbing roses, clematis, or jasmine.
- Focal Mirror Inset: Mount an outdoor-rated, weather-resistant antique mirror behind the central cathedral arch cutout to create an illusion of depth in smaller courtyard spaces.
- Finial Post Tops: Cap the vertical rear 4×4 posts with carved wooden Gothic pyramid or copper ball finials for an authentic period finish.