20 DIY Supplies Every Crafter Must Have

For every creative soul, maker, and DIY enthusiast, having a well-stocked art studio or craft room is the ultimate dream. Having the right tools on hand not only turns spontaneous inspiration into tangible art, but it also elevates the quality, precision, and enjoyment of every project you undertake. Whether you are delving into paper crafts, woodworking, textile art, resin work, or home decor renovations, a foundational toolkit of essential supplies is what transforms a hobbyist into a master maker.

Building a versatile DIY setup doesn’t require buying out the entire craft store overnight. Instead, it is about curating multi-functional, durable, and high-performance essentials that serve as the backbone for hundreds of different projects. From heavy-duty cutting tools and precision adhesives to versatile color mediums and protective finishes, here are 20 amazing, inspiring, and essential DIY supplies every crafter must have in their creative arsenal, complete with detailed breakdowns, practical tips, variations, and necessary materials.
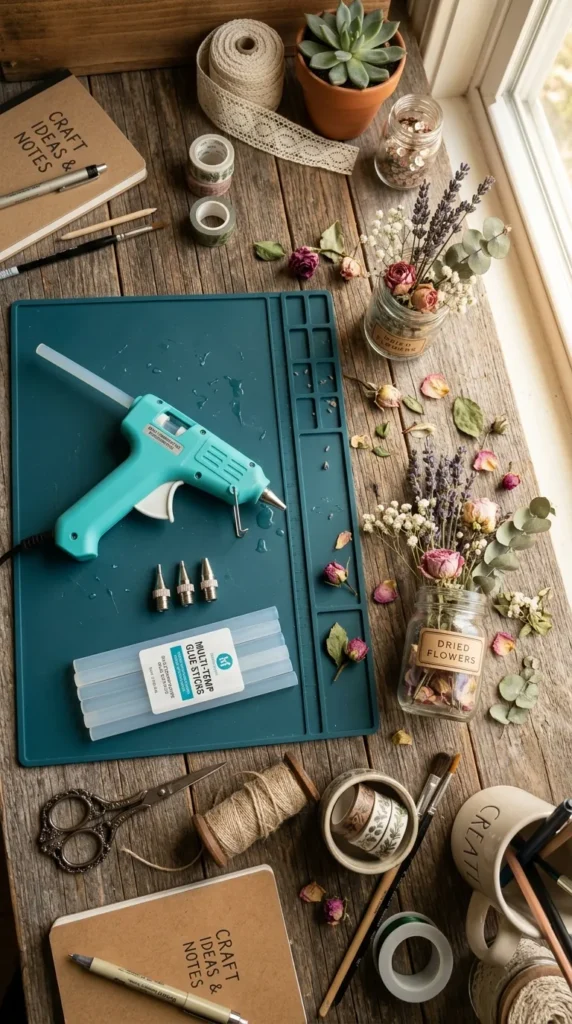
1. Multi-Temperature Precision Glue Gun

What This Idea Means

A multi-temperature hot glue gun is the undisputed king of instant adhesives in the crafting world. Unlike standard single-temp glue guns, dual or multi-temperature models allow you to switch between high heat for heavy-duty bonding (like wood, leather, and metal) and low heat for delicate materials (like lace, thin paper, and foam) without melting or burning your substrate.

How to Make It (How to Set Up & Use)

  1. Choose the Right Nozzle: Thread on a fine-point precision nozzle for detailed work or a wide flat nozzle for heavy ribbon applications.
  2. Select Temperature: Switch to low temp (approx. 250°F / 120°C) for delicate fabrics and foam, or high temp (approx. 380°F / 190°C) for wood, ceramic, and metal.
  3. Load and Prime: Insert a dual-temp glue stick into the chamber, allow it to warm up for 3–5 minutes on a silicone safety mat, and squeeze gently to test flow.
  4. Apply and Secure: Apply glue sparingly directly to the project surface and press parts together immediately, holding for 10–15 seconds until set.

Tips and Variations

  • Tips: Always keep a small bowl of ice water nearby to soothe accidental finger burns immediately.
  • Variations: Stock up on specialized glue sticks, such as flexible fabric glue sticks, extra-strength yellow wood glue sticks, or decorative metallic glitter glue sticks for exposed seals.

Needs to Make/Use

  • Dual-temperature glue gun with stand
  • Dual-temp glue sticks
  • Heat-resistant silicone work mat
  • Finger protectors (silicone caps)

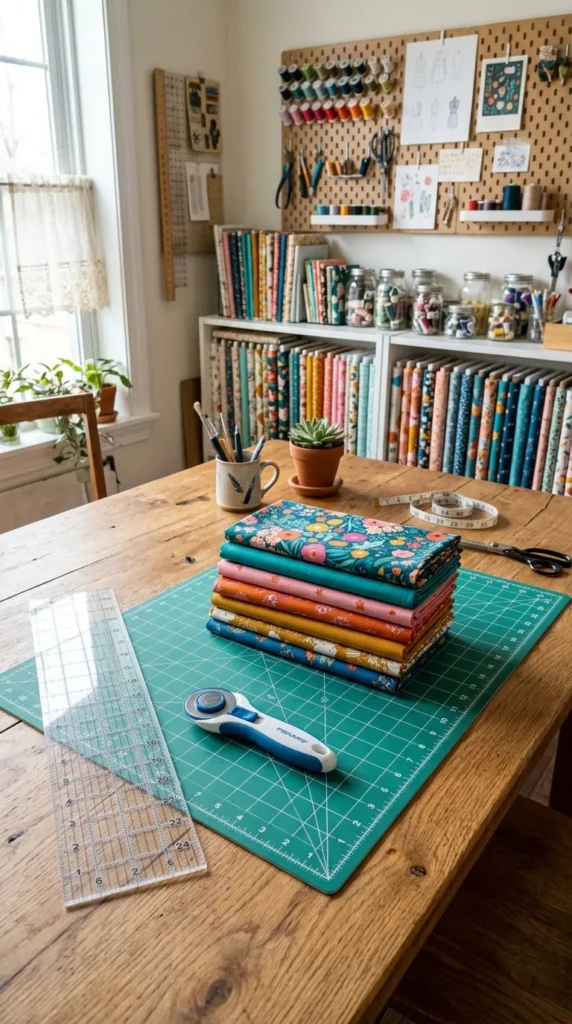
2. Self-Healing Rotary Cutting Mat

What This Idea Means

A self-healing rotary cutting mat is a dense grid-lined mat that protects your work surface while extending the life of your blades. The surface “heals” itself after every blade cut, preventing grooves from catching your future cuts and ensuring dead-straight measurements every time.

How to Make It (How to Set Up & Use)

  1. Position Correctly: Lay the mat completely flat on a sturdy, level tabletop. Never roll or fold it, as this causes permanent warping.
  2. Align Materials: Place your paper, fabric, or leather along the printed grid lines (inches or centimeters) using angle guides (45° or 60°) for diagonal cuts.
  3. Execute Cut: Press down firmly with a rotary cutter, utility knife, or precision craft blade, using an acrylic ruler as a straightedge guide along the grid.
  4. Clean & Store: Wipe away lint and debris with a damp microfiber cloth, and store flat away from direct sunlight or extreme heat.

Tips and Variations

  • Tips: Rotate the mat regularly so you don’t continually cut along the exact same grid lines over time.
  • Variations: Double-sided mats feature light backgrounds on one side (for dark fabrics) and dark backgrounds on the other (for white paper and light textiles).

Needs to Make/Use

  • High-density PVC self-healing mat (typically 18″x24″ or larger)
  • Non-slip acrylic quilter’s ruler
  • Rotary cutter or craft knife
  • Microfiber cleaning cloth

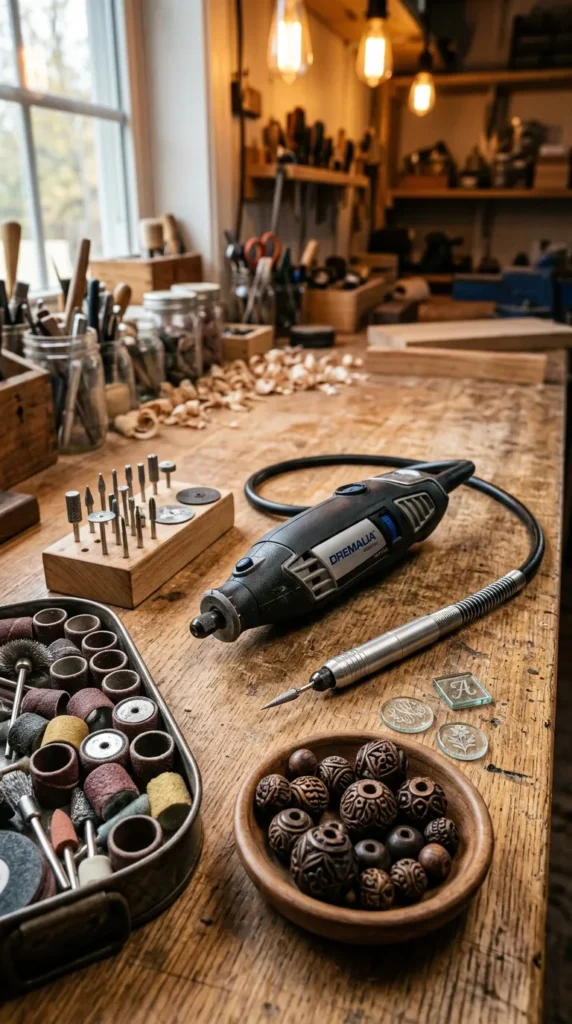
3. High-Torque Rotary Multi-Tool

What This Idea Means

A compact rotary tool (commonly known by brands like Dremel) is a handheld power tool with interchangeable bits designed for high-speed sanding, carving, engraving, polishing, and cutting across wood, glass, resin, and metal.

How to Make It (How to Set Up & Use)

  1. Select Bit: Choose the correct bit attachment—diamond bit for glass engraving, sanding drum for wood edges, or cut-off wheel for metal wire.
  2. Secure the Bit: Insert the bit shank into the collet, tighten with a wrench, and ensure it is centered without wobble.
  3. Adjust Speed: Set low RPMs for plastic and delicate wood to avoid melting, and high RPMs for engraving glass or cutting thin metal.
  4. Guide Gracefully: Hold the tool like a large pen for detailed work or with a full palm grip for heavy cutting, letting the high-speed RPM do the work without pushing too hard.

Tips and Variations

  • Tips: Always wear safety goggles and a dust mask when grinding or cutting resin, wood, or glass.
  • Variations: Attach a flexible shaft extension to transform the heavy tool into an ultralight, pen-like engraver for fine jewelry making.

Needs to Make/Use

  • Variable-speed rotary multi-tool
  • Multi-piece bit set (sanding, cutting, polishing, engraving bits)
  • Safety glasses and dust mask
  • Flex-shaft attachment (optional)

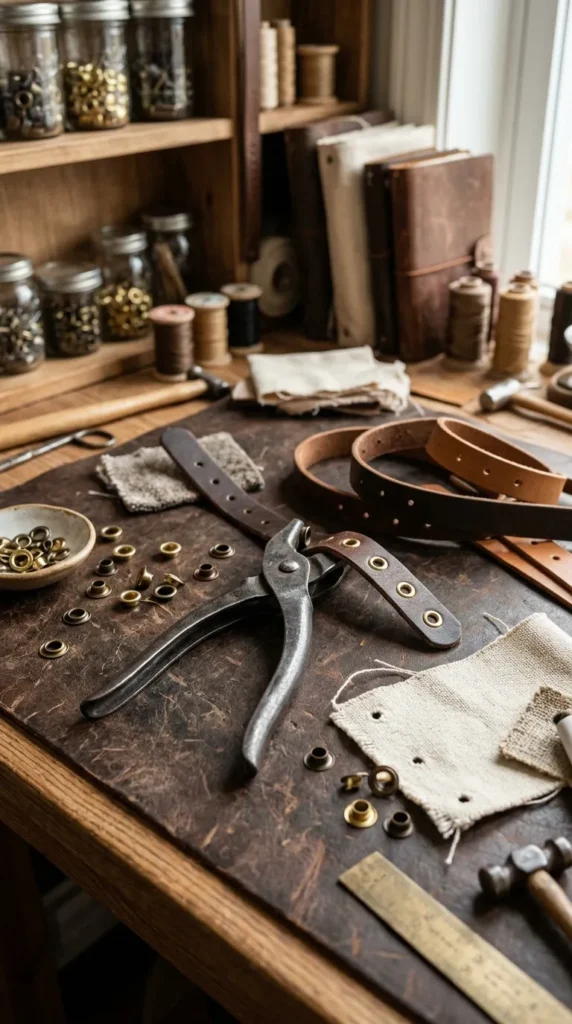
4. Heavy-Duty Brass Eyelet & Snap Pliers

What This Idea Means

Eyelet and snap setting pliers are specialized hand tools designed to punch clean holes and crimp metal eyelets, grommets, or snap fasteners permanently into fabric, leather, paper, or plastic without needing a hammer.

How to Make It (How to Set Up & Use)

  1. Punch Hole: Mark your hole location, set the revolving hole-punch wheel to the matching size, and squeeze the handles firmly to punch through the material.
  2. Position Eyelet: Insert the metal eyelet shank through the front side of the punched hole.
  3. Set the Die: Place the eyelet barrel over the shaped anvil jaw of the setting pliers, ensuring the matching washer is placed on the backside.
  4. Crimp Tight: Squeeze the spring-loaded pliers firmly together to flare and flatten the metal shank smoothly against the back.

Tips and Variations

  • Tips: Place a small scrap of stiff leather under delicate fabric when punching to achieve a crisp, fray-free hole edge.
  • Variations: Interchangeable die pliers allow you to switch between standard metal eyelets, magnetic bag clasps, plastic kam snaps, and rivet studs.

Needs to Make/Use

  • Heavy-duty eyelet/snap setting pliers
  • Assorted metal eyelets and washers (brass, silver, bronze)
  • Leather or heavy canvas scraps
  • Fabric marking chalk or pen

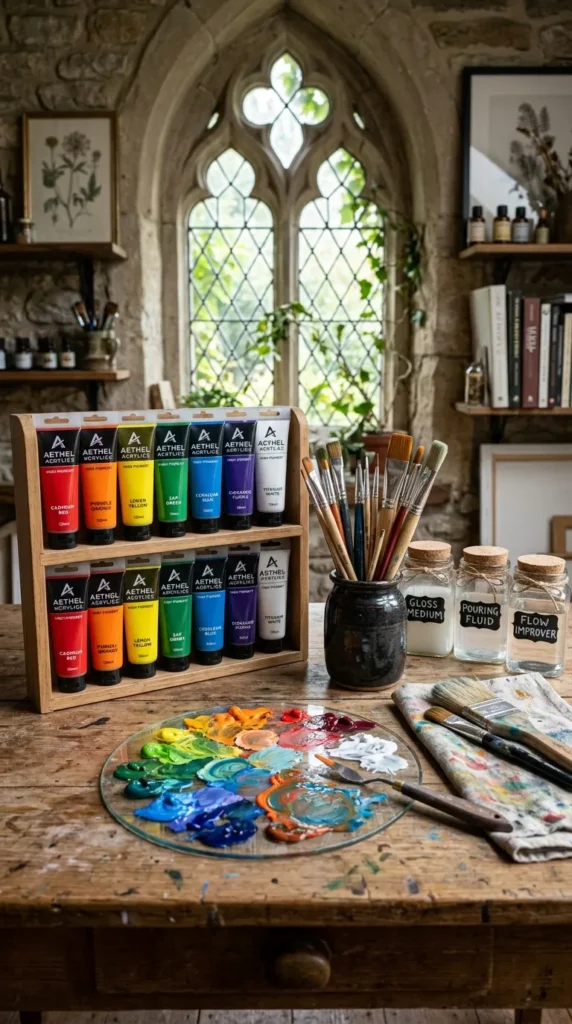
5. Premium Acrylic Paint Set & Mediums

What This Idea Means

High-pigment acrylic paint is the most versatile color medium in crafting. It adheres to paper, canvas, wood, terracotta, glass, and fabric. Paired with specialty acrylic mediums, it can morph from thick textured impasto to fluid pouring paint or permanent fabric dye.

How to Make It (How to Set Up & Use)

  1. Prepare Surface: Lightly sand wooden surfaces or prime raw materials with white gesso to ensure maximum color vibrancy.
  2. Mix Mediums: Mix acrylic paint with Pouring Medium for liquid fluid art, Gel Medium for heavy textured palette knife work, or Fabric Medium for washable textile painting.
  3. Blend Colors: Work on a stay-wet or glass palette, blending colors using soft-synthetic brushes or palette knives.
  4. Seal: Once dry (acrylics dry quickly in 20–30 minutes), seal with a clear matte, satin, or gloss varnish to protect against UV and moisture.

Tips and Variations

  • Tips: Keep your brushes submerged in a jar of water while working; dried acrylic paint will permanently ruin brush bristles.
  • Variations: Heavy-body acrylics give rich 3D texture, while soft-body or fluid acrylics are ideal for detailed line work and smooth glazes.

Needs to Make/Use

  • Heavy-pigment artist acrylic paint tubes
  • Acrylic mediums (Gesso, Pouring Medium, Fabric Medium)
  • Glass or stay-wet palette
  • Synthetic brush set and palette knives
  • Clear protective varnish

6. Precision Stainless Steel Craft Knife Set

What This Idea Means

A precision craft knife set (featuring classic #11 scalpel-style blades) is essential for delicate, micro-cutting tasks that scissors simply cannot manage, such as stencil cutting, paper filigree, vinyl trimming, and intricate model building.

How to Make It (How to Set Up & Use)

  1. Insert Blade: Unscrew the textured metal collar of the knife handle, insert the flat shank of a fresh #11 stainless steel blade, and screw tight.
  2. Grip Properly: Hold the knife like a writing pencil, keeping your index finger resting on the textured grip area for maximum control.
  3. Cut with Light Pressure: Pull the knife toward you along your cut lines, using multiple light, smooth passes rather than forcing a single heavy cut.
  4. Rotate the Work: Rotate your cutting mat instead of twisting your wrist when navigating tight curved corners.

Tips and Variations

  • Tips: Replace your blades as soon as you feel dragging or snagging; a dull blade requires more pressure and easily slips.
  • Variations: Swivel-blade craft knives feature a tiny 360-degree rotating head designed specifically for effortless curve cutting.

Needs to Make/Use

  • Anodized aluminum craft knife handles
  • Pack of high-carbon stainless steel replacement blades (#11, chisel, curved)
  • Stainless steel metal safety ruler
  • Blade disposal container

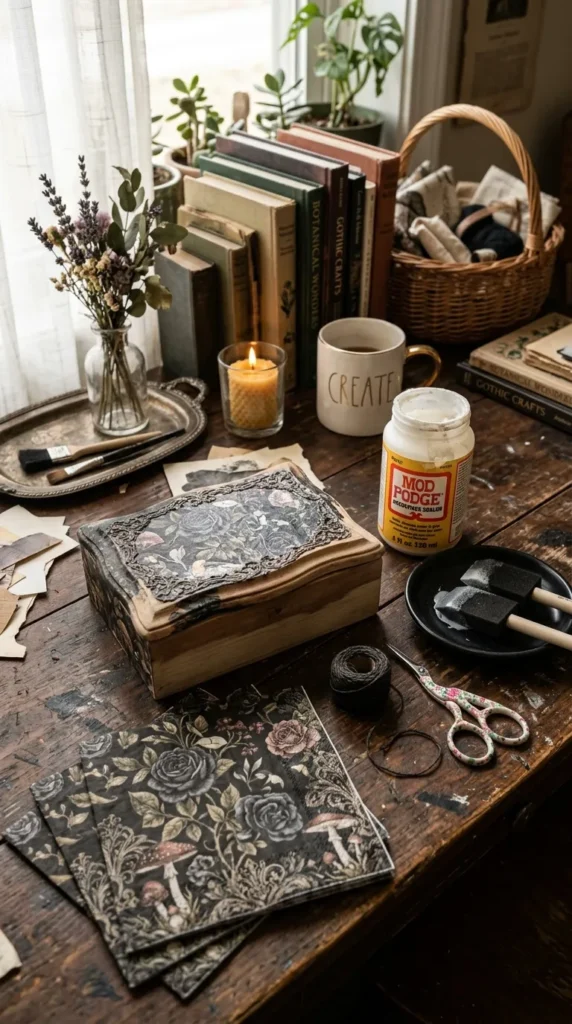
7. Multi-Surface Decoupage Sealant (Mod Podge)

What This Idea Means

Decoupage medium (popularized as Mod Podge) is an all-in-one glue, sealer, and finish designed specifically for gluing paper, fabric, and tissue to surfaces like wood, glass, ceramics, and canvas without causing wrinkling or yellowing over time.

How to Make It (How to Set Up & Use)

  1. Prepare Materials: Cut or tear decorative napkins, paper scraps, photos, or fabric pieces to fit your target object.
  2. Apply Base Coat: Brush an even, thin layer of decoupage medium onto the clean surface of your wooden box, tray, or jar using a foam brush.
  3. Smooth Paper: Place your paper onto the wet glue, smoothing from the center outward with a brayer or damp sponge to release trapped air bubbles.
  4. Seal Surface: Let dry for 20 minutes, then apply 2–3 thin top coats over the entire project, allowing thorough drying between coats.

Tips and Variations

  • Tips: When using thin decorative napkins, peel away the bottom white paper plies so you are applying only the top printed layer.
  • Variations: Available in Matte, Gloss, Satin, Outdoor (water-resistant), Dishwasher-Safe, and Sparkle Glitter finishes.

Needs to Make/Use

  • Multi-surface decoupage medium
  • Soft foam paint brushes or broad synthetic brushes
  • Rubber roller (brayer) or smoothing tool
  • Decorative papers, napkins, or fabric

8. Ergonomic Jewelry Pliers & Wire Tool Set

What This Idea Means

A dedicated set of miniature jewelry pliers allows crafters to bend, loop, cut, and grip delicate wires, jump rings, chainmaille, and embellishments without scratching metals or fatiguing hands.

How to Make It (How to Set Up & Use)

  1. Chain-Nose Pliers: Use smooth, flat-jawed pliers to grip jump rings, open wire loops, or hold small components securely.
  2. Round-Nose Pliers: Wrap wire around the smooth conical jaws at varying depths to form perfect, consistent loops and eye-pins.
  3. Flush Cutters: Place the flat side of flush-cutting pliers directly against your wire to cut clean, flat wire ends without sharp burs.
  4. Bent-Nose Pliers: Use angled bent-nose pliers to reach into tight spaces or weave intricate wire structures.

Tips and Variations

  • Tips: Look for pliers with smooth, non-serrated jaws to prevent marring or scratching soft craft wires like copper, silver, and brass.
  • Variations: Nylon-jaw pliers feature soft plastic covers that allow you to straighten kinked craft wire without stripping decorative metallic coatings.

Needs to Make/Use

  • 4-piece jewelry plier set (Chain-nose, Round-nose, Flush cutter, Bent-nose)
  • Craft wire (spools of 18, 20, and 24 gauge)
  • Open jump rings and headpins
  • Bead mat or tray

9. Non-Stick Silicone Crafting Work Mat

What This Idea Means

A thick, heat-resistant silicone mat creates an indestructible barrier over your craft desk. Liquid glass resin, hot melt glue, acrylic paint, melted wax, and Mod Podge will not stick to silicone, making cleanup as easy as peeling dried drips off or wiping with a wet rag.

How to Make It (How to Set Up & Use)

  1. Lay Flat: Spread the flexible silicone mat over your main workbench or kitchen table.
  2. Perform Messy Tasks: Mix resin, paint, hot glue, or heat-emboss powders directly over the mat surface.
  3. Peel Dry Spills: Allow glue, resin, or paint drips to dry completely on the mat—they will peel off effortlessly in solid rubbery sheets.
  4. Wash & Roll: Wash with warm soapy water for wet paint or ink spills, dry thoroughly, and roll up tightly for space-saving storage.

Tips and Variations

  • Tips: Choose extra-large mats (24″x36″) with raised outer spill-lip edges to contain liquid paint or resin overflows completely.
  • Variations: Multi-functional painter’s silicone mats come built with molded brush-cleaning cups, tool slots, and paint palette wells.

Needs to Make/Use

  • Food-grade extra-large silicone mat (1mm to 2mm thick)
  • Mild dish soap and sponge
  • Warm water

10. Multi-Purpose Craft Heat Gun

What This Idea Means

A craft heat gun is a focused, flameless heating tool that produces concentrated hot air without blowing high-speed wind. Unlike hair dryers, which blow light items away, a craft heat gun quickly cures resin bubbles, shrinks tubing, dries watercolor washes, and melts embossing powders instantly.

How to Make It (How to Set Up & Use)

  1. Position & Plug In: Plug in the heat gun and hold it roughly 3 to 5 inches away from your project at a 45-degree angle.
  2. Embossing Powder: Pass the heat gun slowly over stamped embossing ink coated with powder; watch the opaque powder transform into a raised, glossy metallic finish in seconds.
  3. Popping Resin Bubbles: Sweep the heat gun quickly 4 inches above freshly poured UV or epoxy resin to burst surface micro-bubbles without scorching the liquid.
  4. Cool Down: Set the tool on its built-in metal wire kickstand to cool down safely without touching desk surfaces.

Tips and Variations

  • Tips: Keep the heat gun moving constantly; holding it stationary in one spot for too long can singe paper or warp thin plastic.
  • Variations: Dual-temp heat guns feature low settings (350°F / 180°C) for drying paper/inks and high settings (650°F / 350°C) for shrinking plastics and bending acrylics.

Needs to Make/Use

  • Dual-temperature craft heat gun with kickstand
  • Embossing ink pad and powders
  • Heavy cardstock
  • Heat-resistant silicone work surface

11. All-In-One Bone Folder & Creasing Tool

What This Idea Means

Traditionally carved from cattle bone or molded from smooth Teflon, a bone folder is an indispensable hand tool used to score, fold, burnish, and smooth paper, cardstock, leather, and bookbinding cloth without leaving shiny marks or tears.

How to Make It (How to Set Up & Use)

  1. Score the Line: Place a metal ruler along your fold line on cardstock. Drag the pointed tip of the bone folder firmly along the ruler to score a clean indent.
  2. Fold the Sheet: Fold the paper along the scored line toward the indented groove.
  3. Burnish the Fold: Lay the wide, flat edge of the bone folder against the folded edge and stroke firmly down its length to create a razor-sharp, flat crease.
  4. Smooth Adhesives: Use the smooth flat belly of the tool to press paper down onto glued surfaces, eliminating air bubbles without scratching prints.

Tips and Variations

  • Tips: Teflon bone folders are slightly more expensive than traditional natural bone, but glues and adhesives will never stick to them.
  • Variations: Scoreboards feature pre-grooved plastic channels paired with a bone folder to allow rapid creation of custom envelopes and gift boxes.

Needs to Make/Use

  • Natural bone or Teflon creasing tool
  • Heavy cardstock or bookbinding paper
  • Metal edge ruler
  • Scoring board (optional)

12. Steel-Core Clear Acrylic Quilting Rulers

What This Idea Means

Clear acrylic rulers featuring grid markings and built-in stainless steel cutting edges allow crafters to see their underlying artwork while guiding rotary blades or craft knives safely without shaving off edges of the plastic ruler.

How to Make It (How to Set Up & Use)

  1. Position Over Project: Lay the transparent ruler over your fabric, paper, or leather, using the black and yellow grid lines to align with edges.
  2. Anchor Position: Press down firmly on the center of the ruler with your non-dominant hand spread wide to prevent sliding.
  3. Cut Along Steel Edge: Run your craft knife or rotary cutter blade directly along the raised steel wire edge embed.
  4. Measure Angles: Use printed 30°, 45°, and 60° angle lines for precise quilting blocks, geometric paper patterns, or envelope folds.

Tips and Variations

  • Tips: Stick small clear silicone non-slip grips onto the bottom corners of the ruler to prevent it from shifting on smooth paper or silk.
  • Variations: L-shaped square acrylic rulers allow you to check and cut perfect 90-degree right angles for framing, book covers, and box bases.

Needs to Make/Use

  • 6″x24″ or 12″x12″ grid-lined acrylic ruler with steel cut-edge
  • Non-slip rubber friction dots
  • Rotary cutter or precision craft knife
  • Self-healing mat

13. Heavy-Duty Fabric Shears & Thread Snips

What This Idea Means

Ultra-sharp, high-carbon steel fabric shears are designed specifically to glide through thick canvas, denim, leather, and multiple layers of delicate silk without chewing, twisting, or fraying the cloth edges.

How to Make It (How to Set Up & Use)

  1. Dedicate Usage: Strictly mark these scissors for FABRIC ONLY. Never cut paper, plastic tape, or cardboard with fabric shears, as paper fibers dull blade edges instantly.
  2. Execute Long Cuts: Keep the flat bottom blade resting lightly on your cutting table surface, taking long, smooth, continuous strokes for straight seams.
  3. Use Thread Snips: Keep spring-action thread snips held in your palm for instant, close-up cutting of loose thread tails while sewing.
  4. Maintain Sharpening: Wipe blades clean after every project with a light drop of sewing machine oil to prevent rust and maintain effortless cutting.

Tips and Variations

  • Tips: Tie a bright ribbon or tag on the handle reading “FABRIC ONLY” to prevent family members from using them on paper or tape!
  • Variations: Pinking shears feature zig-zag notched blades that cut fabric edges in a saw-tooth pattern, preventing woven textiles from unraveling.

Needs to Make/Use

  • 8″ to 10″ bent-handle forged steel fabric shears
  • Spring-loaded thread snips
  • Pinking shears (optional)
  • Machine oil and soft cleaning cloth

14. Crystal-Clear UV Resin & UV Curing Lamp

What This Idea Means

UV resin is a single-part liquid gel that cures rock-hard within 1–3 minutes when exposed to ultraviolet light. Unlike two-part epoxy resins, which require exact measuring and 24-hour drying times, UV resin offers instant gratification for jewelry, gloss coats, and bonding.

How to Make It (How to Set Up & Use)

  1. Fill Bezel or Mold: Pour single-part UV resin directly into a silicone mold, metal jewelry bezel, or over a dried clay craft.
  2. Embed Decor: Use toothpicks to sink glitter, dried flowers, gold foil, or miniature charms into the liquid resin, popping air bubbles with a quick pass of a heat gun.
  3. Cure Under UV Light: Place the resin piece directly beneath a 36W or 48W UV/LED lamp for 2 to 3 minutes until completely hard and dry to the touch.
  4. Final Polish: Allow it to cool for 1 minute before demolding or handling.

Tips and Variations

  • Tips: Pour UV resin in thin layers (no deeper than 2–3mm at a time) to ensure the ultraviolet light penetrates fully and cures crystal clear.
  • Variations: Mix liquid UV resin with mica powders, alcohol inks, or glow-in-the-dark pigments to create colorful gems and domed charms.

Needs to Make/Use

  • High-viscosity or low-viscosity crystal clear UV resin
  • 36W+ UV LED curing lamp
  • Silicone jewelry molds and metal bezels
  • Dried flowers, glitter, or mica pigments
  • Nitrile gloves and face mask

15. Flexible Silicone Clay & Mold Putty

What This Idea Means

Two-part silicone mold putty allows crafters to duplicate any small object—from vintage buttons and keys to hand-sculpted clay figures—by creating custom, reusable, heat-resistant silicone molds in under 20 minutes.

How to Make It (How to Set Up & Use)

  1. Mix Equal Parts: Measure equal parts by weight or volume of Part A (white) and Part B (colored) silicone putty.
  2. Knead Thoroughly: Knead the two parts together vigorously in your hands for 1 minute until a solid, uniform color with no streaks is achieved.
  3. Press Master Object: Roll the mixed putty into a smooth ball, press your master object (e.g., a seashell or metal charm) deep into the center, and let it sit undisturbed.
  4. Demold & Use: After 15–20 minutes, the putty turns into flexible rubber. Flex the mold back to pop your master out; your custom mold is now ready for resin, clay, or wax casting!

Tips and Variations

  • Tips: Work quickly once mixed; silicone putty typically has a short 3-to-5-minute work time before setting up.
  • Variations: Food-grade silicone putties allow you to create custom candy, chocolate, and cake fondant molds from sculpted shapes.

Needs to Make/Use

  • 2-part platinum silicone mold putty (Part A & Part B)
  • Master objects for replication (buttons, shells, medals)
  • Casting materials (clay, UV resin, plaster, soap)
  • Digital mini scale (optional)

16. Fast-Drying Permanent Alcohol Inks

What This Idea Means

Alcohol inks are fast-drying, highly pigmented, alcohol-based fluid dyes that create vibrant, translucent marble effects on non-porous surfaces like glass, metal, glazed ceramic tiles, synthetic Yupo paper, and resin.

How to Make It (How to Set Up & Use)

  1. Prepare Surface: Clean a ceramic tile, glass tumbler, or sheet of waterproof Yupo paper with isopropyl alcohol to remove oil prints.
  2. Drip Inks: Drip 2–3 colors of alcohol ink directly onto the surface alongside drops of 91%+ Isopropyl Alcohol or Blending Solution.
  3. Blow & Spread: Use a manual air blower, straw, or small hand fan to push and spread the liquid ink, creating feathery blooms and layered cell structures.
  4. Add Metallic Accents: Drip rich gold or silver metallic alloy inks into the wet puddle to form shimmering metallic veins.

Tips and Variations

  • Tips: Always work in a well-ventilated area or wear an organic vapor respirator mask when working extensively with alcohol mediums.
  • Variations: Drop alcohol inks into liquid epoxy resin petri-dish molds to create suspended, floating “underwater” mushroom and jellyfish formations.

Needs to Make/Use

  • Assorted alcohol ink bottles (including metallic alloys)
  • 91% or 99% Isopropyl alcohol or Blending Solution
  • Yupo synthetic paper or glazed ceramic tiles
  • Hand air pump or airbrush tool
  • Protective gloves and respirator mask

17. Fine-Tip Acrylic Paint Marker Set

What This Idea Means

Paint pens pack vibrant, opaque water-based acrylic paint into a convenient marker body, giving crafters pin-point detail control over glass, wood, rock, canvas, plastic, and metal surfaces without mess or brushes.

How to Make It (How to Set Up & Use)

  1. Shake Well: Shake the paint marker vigorously with the cap on for 20 seconds to mix internal paint pigments thoroughly.
  2. Prime the Nib: Press the felt nib down repeatedly on a scrap piece of paper until paint saturates the tip.
  3. Draw & Outline: Draw directly onto painted rocks, wooden signs, terracotta pots, or glass jars with consistent flow.
  4. Replace Nibs: Swap worn reversible nibs (chisel to bullet tip) as needed to maintain clean lines.

Tips and Variations

  • Tips: Store paint pens horizontally to prevent nibs from drying out or pigment settling heavily at the bottom of the barrel.
  • Variations: Oil-based paint markers offer fully waterproof, permanent outdoors finishes on rough metal, concrete, and unglazed pottery.

Needs to Make/Use

  • Multi-color acrylic paint marker set (fine extra-fine tips)
  • Scrap paper for priming
  • Sealed substrates (rocks, wood signs, ceramics)
  • Clear sealing spray

18. Multi-Gauge Crafting Wire & Coiling Jig

What This Idea Means

Malleable craft wire in various gauges (thicknesses)—paired with a peg-board coiling jig—allows crafters to create custom jewelry findings, sculptural wire art, armature skeletons for clay, and decorative hooks.

How to Make It (How to Set Up & Use)

  1. Select Gauge: Choose thick 16–18 gauge wire for structural frames/earring hooks, or fine 24–28 gauge wire for wrapping beads and intricate weaves.
  2. Set Up Wire Jig: Insert metal pegs into the grid holes of an acrylic wire jig in custom geometric or letter patterns.
  3. Wrap Wire: Bend soft copper or aluminum wire around the metal pegs, following the layout to replicate identical wire patterns, links, and chandelier frames.
  4. Harden Wire: Gently tap finished soft wire shapes with a rubber mallet on a steel bench block to work-harden the metal so it holds shape permanently.

Tips and Variations

  • Tips: Always use smooth nylon-jaw pliers or rubber-tipped tools when shaping wire to prevent scraping off colored anodized layers.
  • Variations: Silver-plated, tarnish-resistant brass, and anodized aluminum wires come in rainbow colors for wire-wrapped crystal wrapping.

Needs to Make/Use

  • Spools of craft wire (18, 20, 24 gauge soft copper/brass)
  • Wire-wrapping peg jig with metal pins
  • Steel bench block and rubber mallet
  • Flush cutters and nylon-jaw pliers

19. All-Surface Waterproof Permanent Inks & Stamps

What This Idea Means

Specialty permanent solvent ink pads (such as StazOn) adhere permanently to non-porous surfaces like plastic, glass, metal, glossy photo paper, and leather, allowing detailed rubber stamp artwork anywhere.

How to Make It (How to Set Up & Use)

  1. Ink the Stamp: Tap a rubber or photopolymer clear stamp lightly and evenly onto the solvent ink pad until the entire design surface is coated.
  2. Position Stamping: Press the inked stamp firmly and evenly straight down onto glass jars, plastic bags, wood tags, or metal tins without twisting.
  3. Lift Cleanly: Lift the stamp straight up to reveal crisp, instantly waterproof line detail that won’t smudge or bleed.
  4. Clean Immediately: Clean solvent ink off rubber stamps using specialty stamp cleaner before the ink dries and cures permanently on the rubber.

Tips and Variations

  • Tips: Avoid over-inking the stamp; light, repeated taps produce much sharper detail than pressing hard into a wet pad.
  • Variations: Archival pigment ink pads are raised fabric pads designed specifically for crisp, fade-proof stamping on porous watercolor papers and cotton fabric.

Needs to Make/Use

  • Multi-surface solvent ink pad (e.g., StazOn Jet Black)
  • Clear photopolymer or rubber stamps
  • Acrylic mounting stamping blocks
  • Stamp cleaner solution and cloth

20. Professional Ergonomic Waterbrush Pens

What This Idea Means

A waterbrush pen combines a soft synthetic brush head with a refillable water reservoir handle, eliminating the need for open water jars when working with watercolors, water-soluble pencils, and gouache.

How to Make It (How to Set Up & Use)

  1. Fill Reservoir: Unscrew the brush handle, fill the chamber with clean distilled water, and reattach the brush nib.
  2. Activate Paints: Gently squeeze the soft plastic barrel to push a tiny droplet of water into the synthetic bristles, then touch the wet brush to watercolor pans or watercolor pencils.
  3. Paint & Blend: Paint directly onto watercolor paper, squeezing slightly for wet-on-wet washes or painting light for fine line detail.
  4. Self-Cleaning: To change colors, simply squeeze a burst of water through the bristles while wiping them clean on a paper towel—no rinse jar needed!

Tips and Variations

  • Tips: Fill the handle reservoir with diluted liquid watercolor or fountain pen ink instead of water to turn it into a continuous lettering brush pen!
  • Variations: Waterbrush sets include multiple brush shapes—from fine round detail tips to broad flat wash brushes—for field sketchers and outdoor journalers.

Needs to Make/Use

  • Multi-pack waterbrush pens (Fine, Medium, Broad, Chisel)
  • Watercolor pan set or water-soluble pencils
  • Heavy 300gsm watercolor paper journal
  • Paper towels or absorbent cloth

Leave a Reply

Your email address will not be published. Required fields are marked *