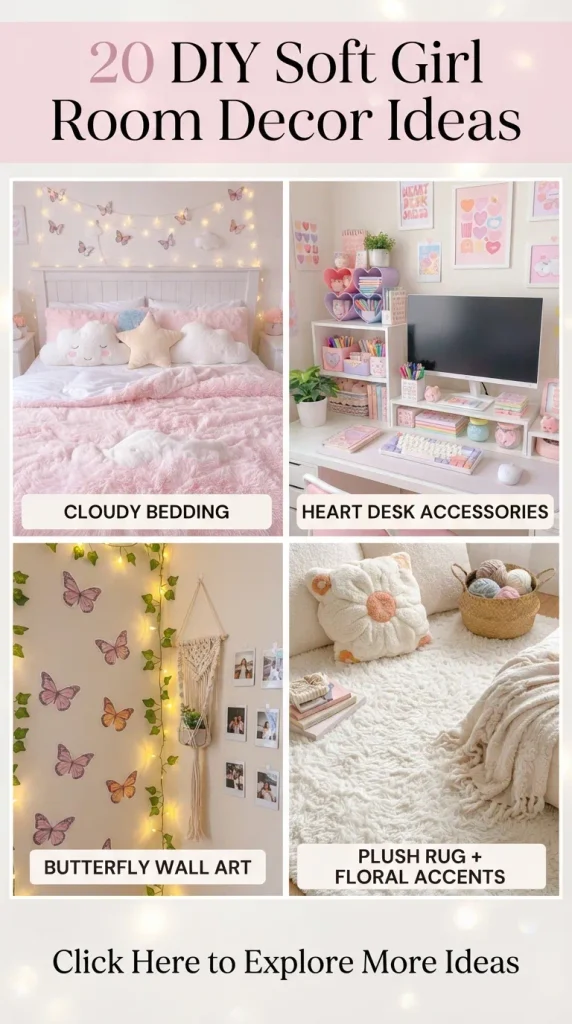
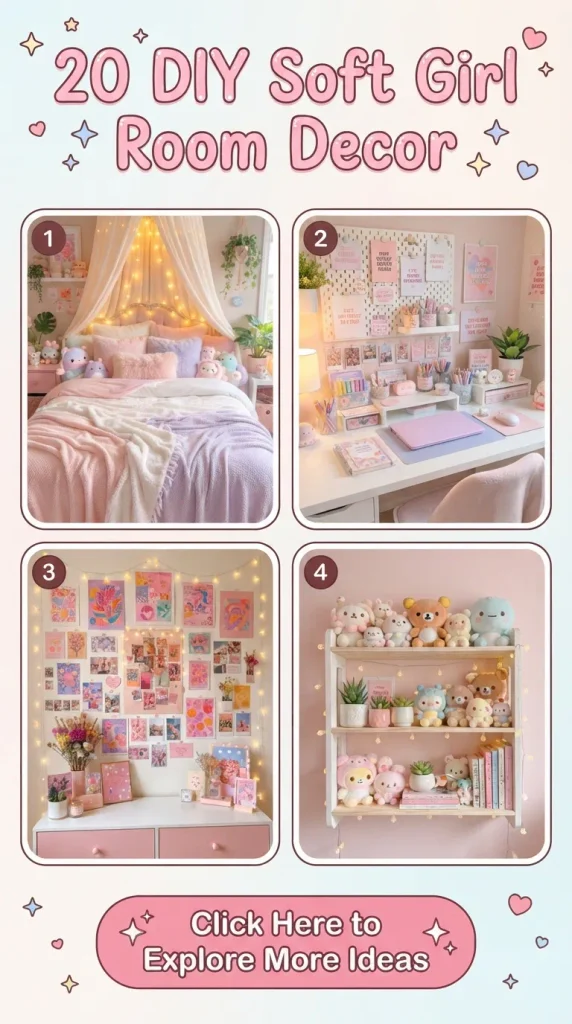
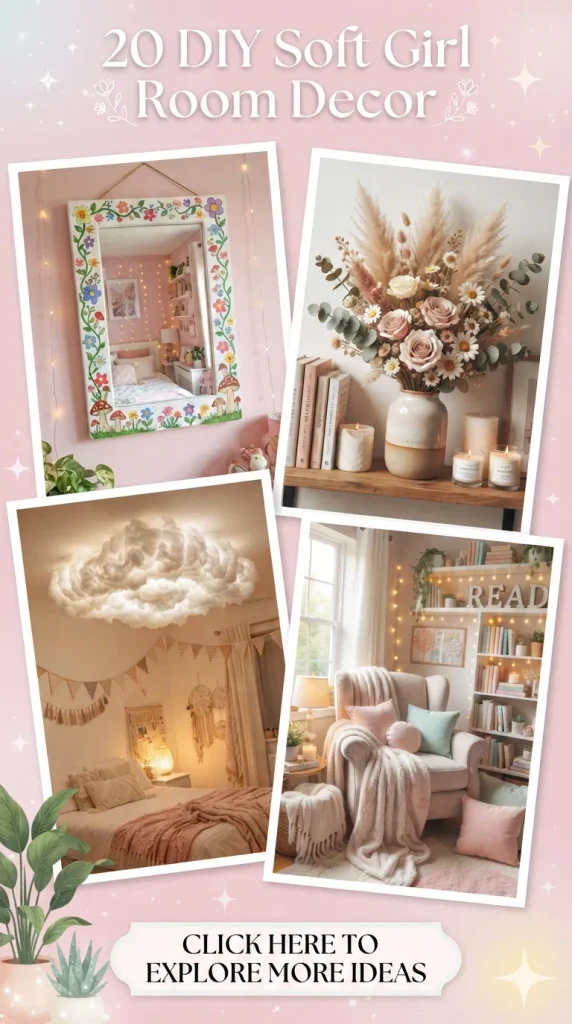
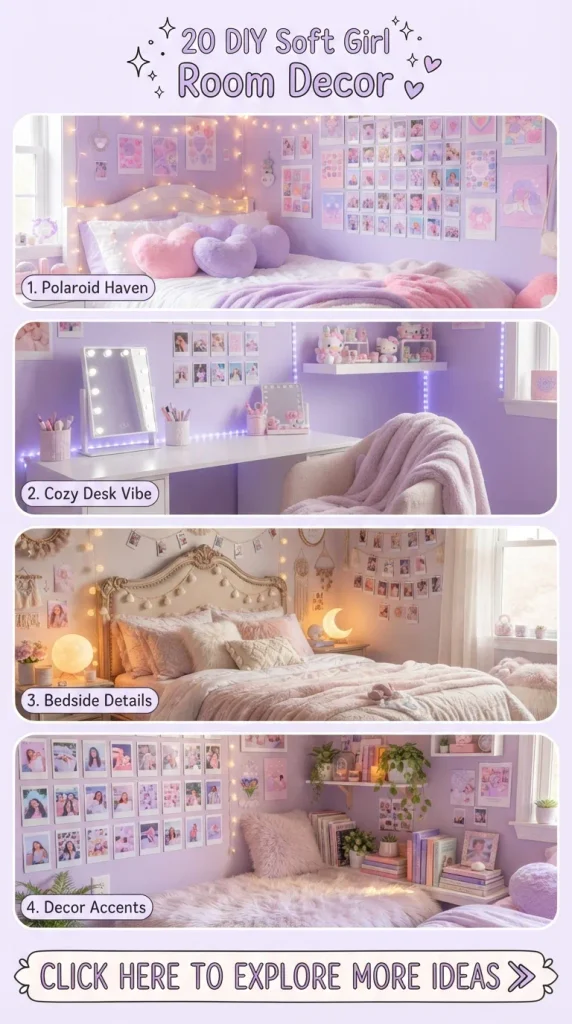
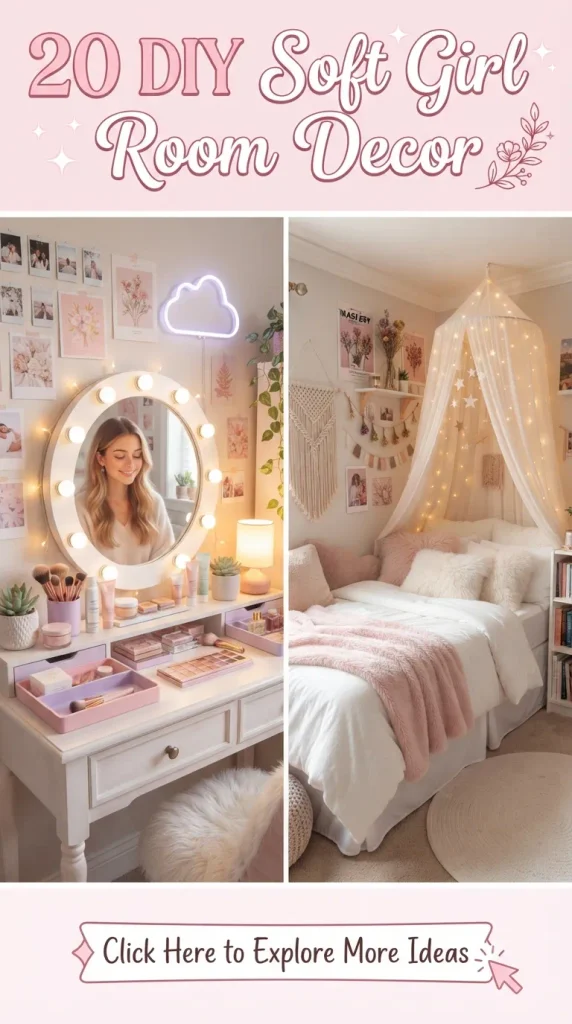
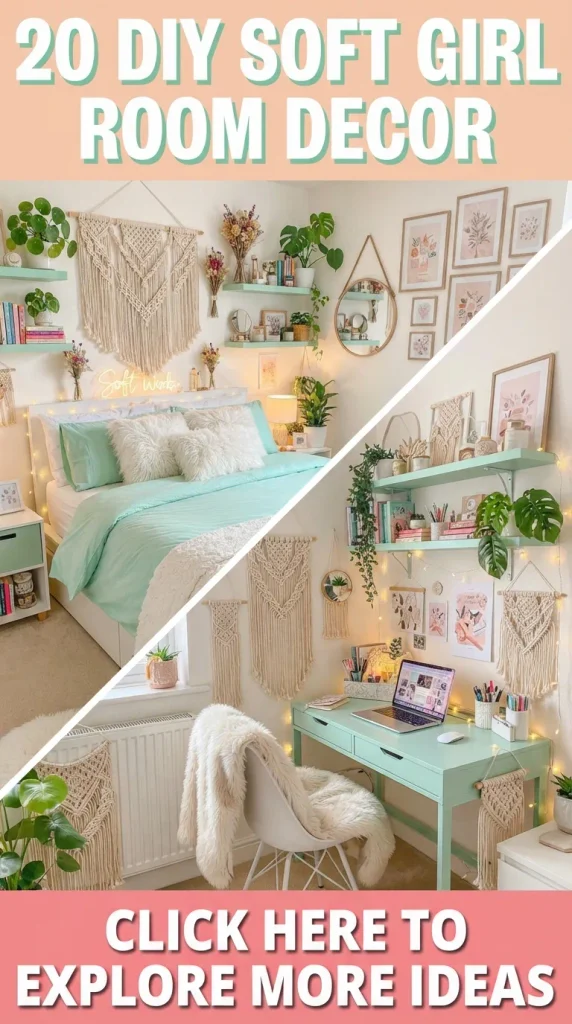
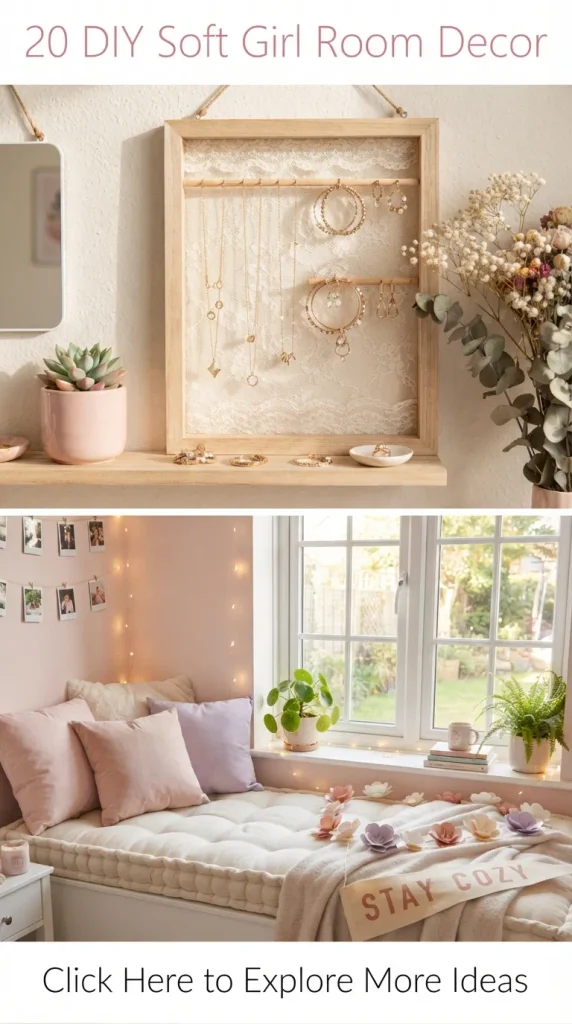
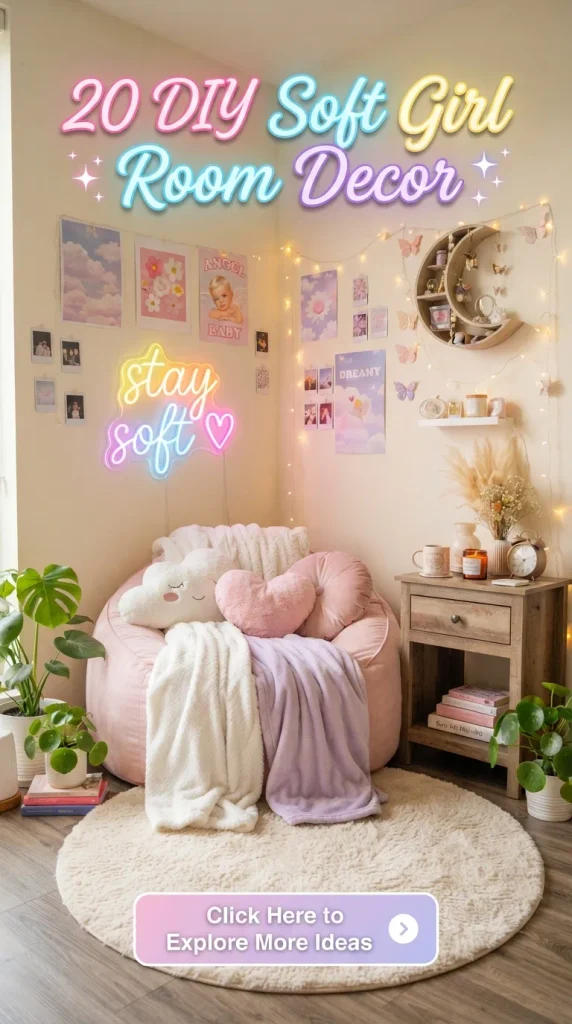
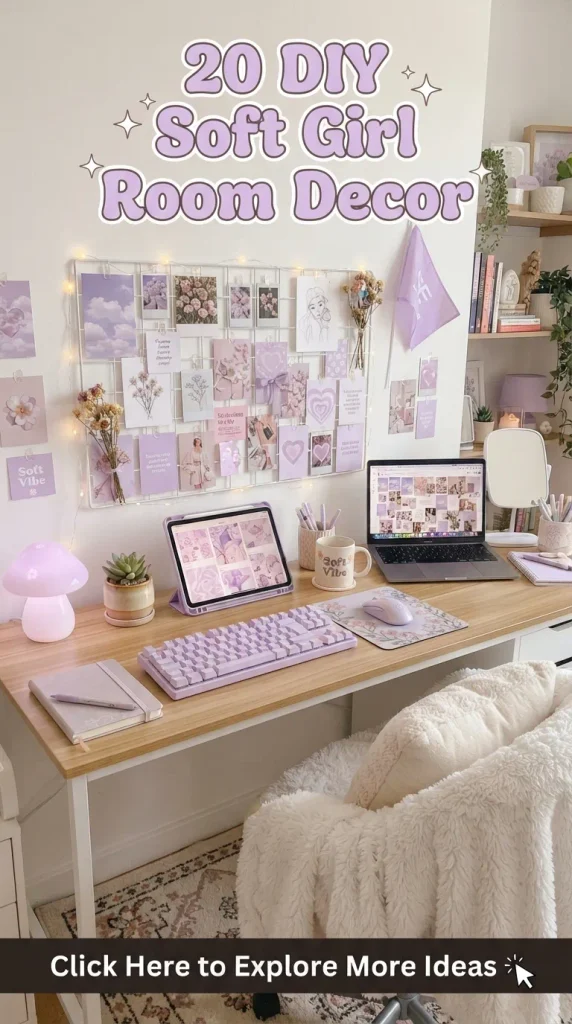
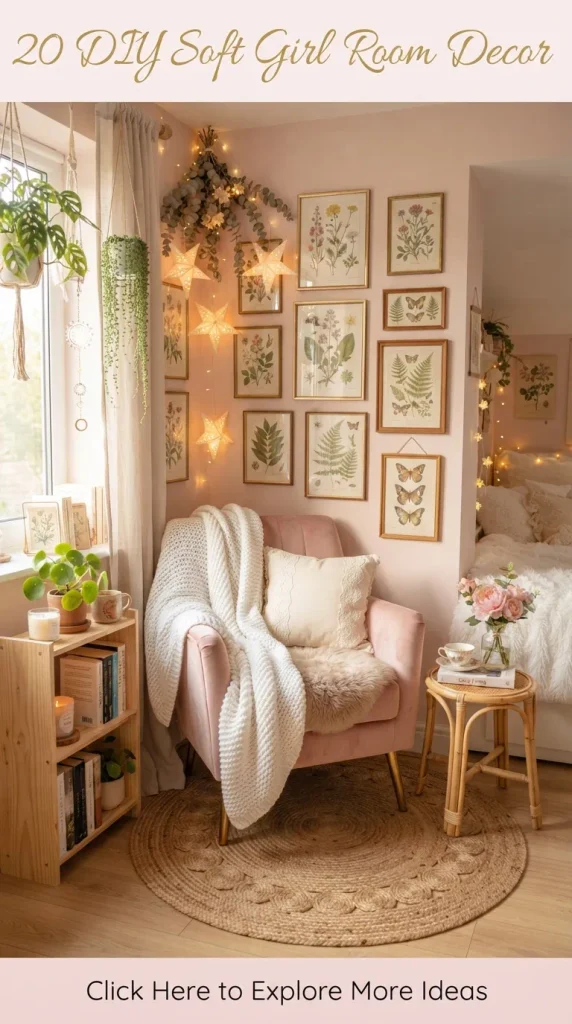
Transforming your personal living space into a dreamy, soothing sanctuary is one of the most rewarding creative projects you can undertake. The soft girl aesthetic is centered on tenderness, nostalgic warmth, romantic textures, and a delicate pastel color palette. Think powder pink, buttermilk yellow, mint green, lavender, baby blue, and warm ivory. It blends elements of Japanese kawaii culture, vintage romanticism, cozy cottagecore accents, and modern minimalist organization.
Crafting your own DIY room decor allows you to customize every detail to match your exact spatial layout and aesthetic vision while staying budget-friendly. Below is an in-depth guide to 20 unique, realistic, and Pinterest-worthy DIY soft girl room decor ideas, complete with materials, step-by-step methods, and creative styling variations.
1. Pressed Flower Floating Acrylic Frames
- Introduction: Soft botanical elements are essential to the soft girl room aesthetic. Floating acrylic frames encase delicate, real blossoms in clear suspension, allowing natural light to pass through the petals and cast faint colored shadows on your walls.
- What This Idea Means: This project represents a delicate preservation of nature. By stripping away heavy, ornate wooden frames in favor of transparent acrylic, the florals take center stage, adding an airy, botanical softness to your gallery wall.
- Materials Needed:
- Double-panel clear acrylic photo frames with brass or silver standoffs
- Dried and pressed flowers (hydrangeas, baby’s breath, cosmos, pansies)
- Tweezers
- Clear-drying silicone craft glue
- Microfiber cloth
- How to Make It:
- Clean both inner surfaces of the acrylic panels with a microfiber cloth to remove dust and fingerprints.
- Plan your composition on a sheet of white paper before touching the acrylic. Arrange the pressed florals in an organic, cascading layout or a neat minimalist grid.
- Using tweezers, transfer the pressed florals to the bottom acrylic sheet.
- Apply a micro-dot of clear silicone glue to the thickest part of each stem or petal base to secure its position.
- Carefully lower the top acrylic panel onto the base.
- Secure the corners with the metal standoff hardware and mount on your wall near a soft light source.
- Tips & Variations:
- Mix dried pastel floral petals with gold leaf flakes for a hint of sparkle.
- Use a calligraphy pen to hand-write a soft, poetic quote on the inner surface before placing the flowers.

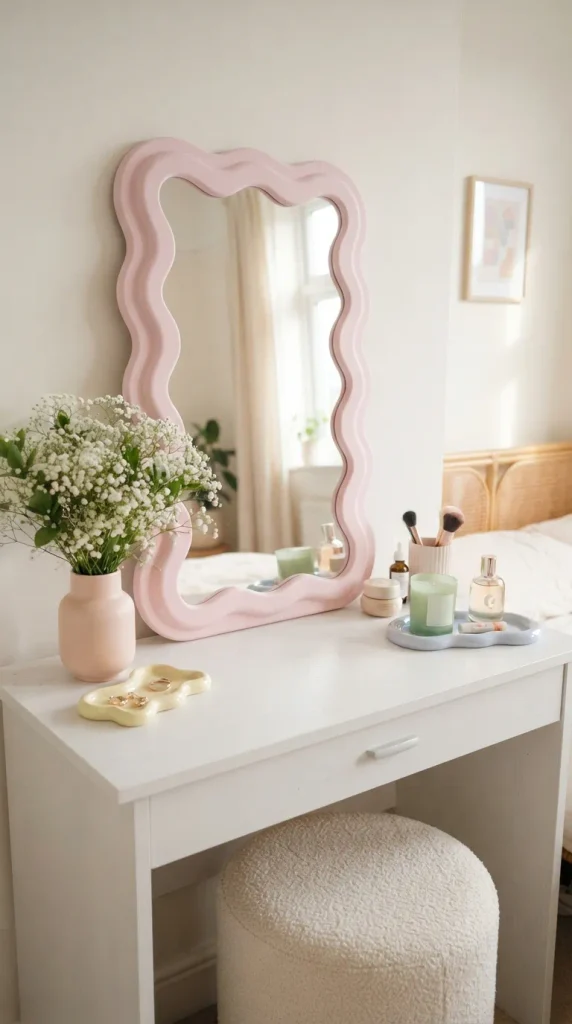
2. Upcycled Pastel Squiggle Wavy Mirror
- Introduction: Playful, curvilinear shapes define the modern soft girl visual language. A DIY pastel wavy frame breathes fresh life into a standard, inexpensive rectangular mirror, turning it into a sculptural statement piece.
- What This Idea Means: Moving away from rigid, sharp geometric lines, wavy forms add whimsy, softness, and youthfulness to your dressing or vanity area.
- Materials Needed:
- Frameless rectangular or oval mirror (minimum 12×16 inches)
- Lightweight air-dry clay or high-density upholstery foam cord
- Pastel acrylic paint (strawberry milk pink, matcha green, or lilac)
- Matte or satin acrylic sealant
- Heavy-duty mounting tape or mirror mastic
- Sandpaper (220-grit)
- How to Make It:
- Measure the perimeter of your mirror base.
- Roll out the air-dry clay into uniform snakes, or shape the flexible foam cord into continuous, soft sine waves that match your perimeter.
- Smooth out any structural cracks using damp fingertips and allow the clay to dry fully for 24 to 48 hours.
- Sand the surface lightly with 220-grit sandpaper until completely smooth.
- Paint the wavy frame with 2 to 3 coats of your chosen pastel acrylic shade.
- Seal with a satin varnish to protect against moisture.
- Adhere the wavy clay or foam frame securely to the outer border of the mirror using heavy-duty craft adhesive.
- Tips & Variations:
- Paint alternating wave crests in two complementary pastel tones like baby pink and cream.
- Embed tiny faux pearls into the damp clay along the wave crests before painting.
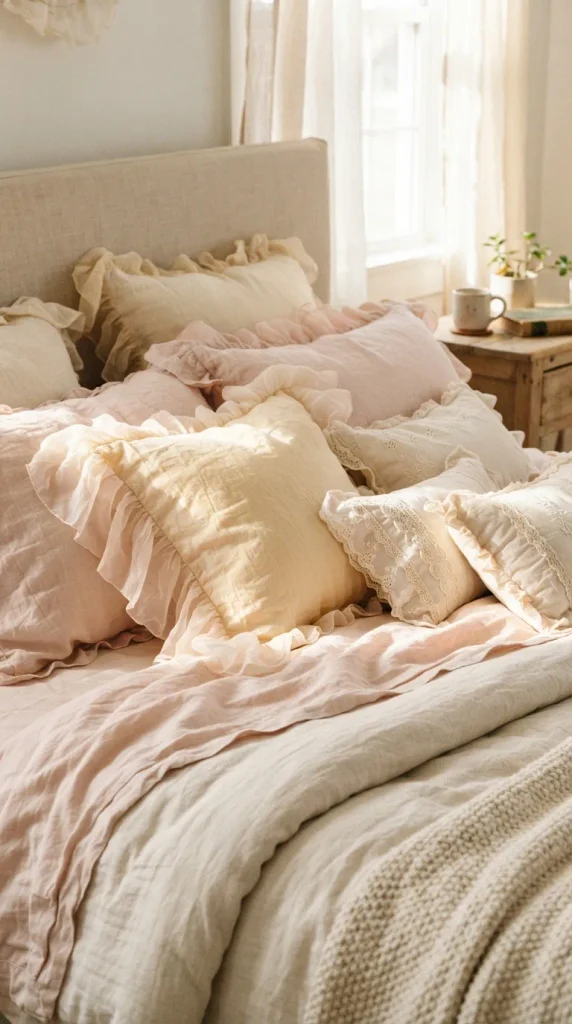
3. DIY Chiffon Ruffle Pillow Covers
- Introduction: Layering plush, romantic textures on your bed or reading nook creates the cozy softness central to this aesthetic. Ruffled edge cushions made from sheer chiffon or washed cotton exude timeless vintage charm.
- What This Idea Means: Ruffles represent romantic leisure and vintage cottage elegance. They soften the boxy edges of pillows, inviting relaxation and tactile comfort.
- Materials Needed:
- 1 yard of washed pastel linen or cotton fabric
- 1.5 yards of matching sheer chiffon fabric for ruffles
- Fabric scissors and sewing pins
- Sewing machine or hand-sewing needle with matching thread
- 16×16 inch plush pillow insert
- How to Make It:
- Cut two 17×17 inch squares from your linen/cotton base fabric.
- Cut a 4-inch wide strip of chiffon that is at least twice the total perimeter length of your pillow cover (around 130 inches).
- Fold the chiffon strip in half lengthwise and run a loose basting stitch along the raw edge.
- Gently pull the bobbin thread to gather the chiffon into an even, dense ruffle.
- Pin the gathered ruffle along the outer edge of the front cushion panel, facing inward.
- Place the back panel on top (right sides facing together), sandwiching the ruffles inside, and sew around the perimeter leaving a 5-inch opening.
- Turn the cover right side out, insert your pillow, and slip-stitch the opening closed.
- Tips & Variations:
- Make a double-layer ruffle with a pastel pink bottom layer and an ivory chiffon top layer.
- Add a vintage floral embroidery motif to the center of the pillow panel.
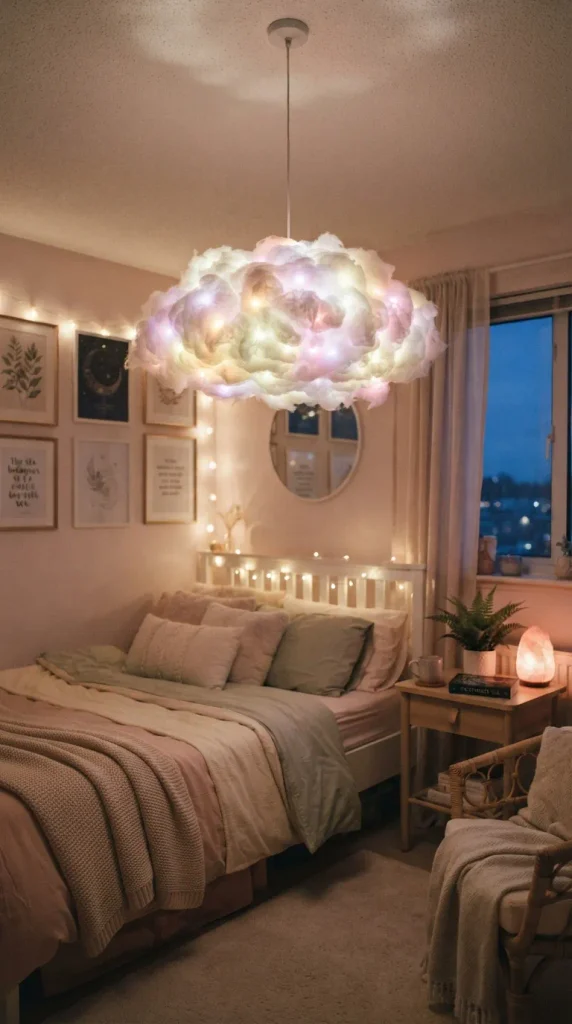
4. Fluffy Cloud Lamp with Twinkle LEDs
- Introduction: Ambient, diffuse lighting is crucial for setting an ethereal evening atmosphere. A DIY cloud pendant produces a gentle, dreamy glow that mimics the warmth of a sunset-lit cloud.
- What This Idea Means: Cloud lighting transforms artificial overhead light into an atmospheric, celestial element that makes a bedroom feel like a serene dreamscape.
- Materials Needed:
- Inexpensive paper lantern (spherical, 12 to 16 inches)
- 2 bags of hypoallergenic polyester fiberfill (stuffing)
- Low-temperature hot glue gun and glue sticks
- Battery-operated warm white or pastel color-changing LED fairy lights
- Clear fishing line for hanging
- How to Make It:
- Expand the paper lantern and secure its internal metal wire expander.
- Pull apart the polyester fiberfill into varying cloud-like tufts to keep the texture natural and airy.
- Apply dots of low-temperature hot glue to sections of the paper lantern.
- Attach the fiberfill tufts, layering them organically to conceal the paper surface completely and create billowy protrusions.
- Thread the LED fairy lights through the inside of the lantern, securing the battery pack near the top opening for easy access.
- Suspend the completed cloud lamp from the ceiling using clear fishing line and a cup hook.
- Tips & Variations:
- Add subtle strands of dangling iridescent crystal drops underneath the cloud to simulate pastel raindrops.
- Use app-controlled smart LED strips inside to adjust colors between cotton candy pink, twilight blue, and sunset orange.
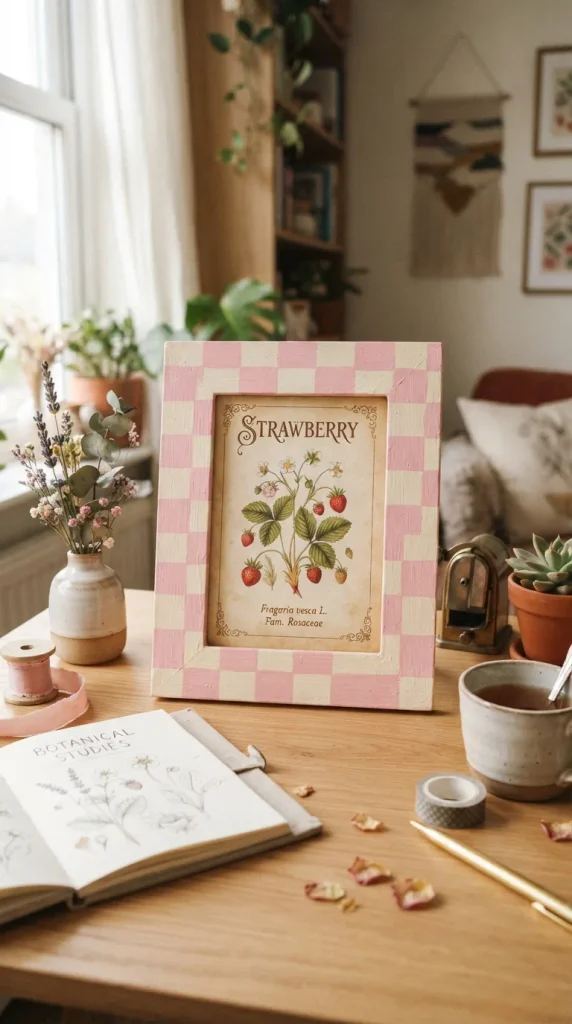
5. Hand-Painted Gingham Wall Mirror or Frame
- Introduction: Gingham is a quintessential soft girl print that evokes nostalgic picnics and vintage French countryside aesthetics. Hand-painting this motif on small decor pieces brings an artisan charm to any tabletop.
- What This Idea Means: Gingham balances sweet innocence with structured pattern design, acting as an understated graphic accent among mostly solid pastels.
- Materials Needed:
- Flat-profile wooden picture or mirror frame
- White, pastel pink (or mint), and medium-toned coordinating acrylic paint
- Painter’s masking tape (0.5-inch width)
- Flat wide paintbrush
- Clear satin sealer
- How to Make It:
- Paint the entire wooden frame in a solid opaque white base coat and let it dry completely.
- Apply vertical strips of painter’s tape across the frame, leaving equal 0.5-inch gaps between each strip.
- Paint the exposed gaps with your light pastel color. Peel the tape while slightly damp and let it dry.
- Apply horizontal strips of painter’s tape with the same spacing.
- Paint horizontal lines with the light pastel color.
- At the intersections where vertical and horizontal pastel lines cross, hand-paint a small square using your slightly darker tone to create the signature woven gingham depth.
- Once fully dry, coat with a clear satin sealer.
- Tips & Variations:
- Try a buttercup yellow and cream palette for a sunny, cheerful cottage vibe.
- Add tiny hand-painted daisies at the intersections for an extra touch of sweetness.
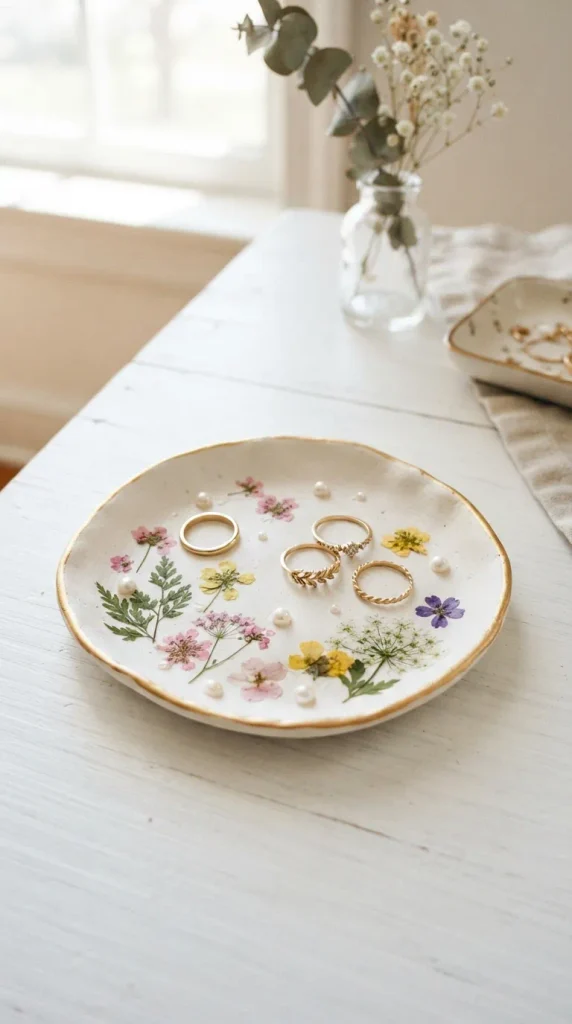
6. Pressed Petal and Pearl Vanity Trinket Trays
- Introduction: Jewelry and perfume bottles deserve an equally graceful display. Resin or polymer clay trinket dishes adorned with genuine dried petals and mother-of-pearl accents make functional organization look effortlessly chic.
- What This Idea Means: This project elevates daily morning routines by turning functional storage into bespoke, miniature art pieces.
- Materials Needed:
- Air-dry modeling clay or two-part clear epoxy resin with silicone dish molds
- Pressed miniature flowers (forget-me-nots, baby blossoms)
- Flatback faux pearls
- Metallic gold liquid paint with a fine brush
- High-gloss finish glaze
- How to Make It:
- Roll out a 0.25-inch slab of white air-dry clay and cut it into an organic pebble or scallop shape.
- Pinch the outer perimeter upward slightly to form a shallow raised dish edge.
- Gently press the tiny dried petals and faux pearls into the damp surface of the clay.
- Allow the dish to cure undisturbed for 48 hours until solid white and bone dry.
- Paint the raised outer rim of the dish with a fine line of metallic gold paint.
- Seal the entire tray with 2 thick coats of high-gloss clear varnish to create a porcelain-like shine.
- Tips & Variations:
- For a glass-like finish, pour a self-leveling 2mm layer of clear UV resin over the cured clay dish and cure under a UV lamp.
- Incorporate crushed sea glass or rose quartz chips around the tray perimeter.
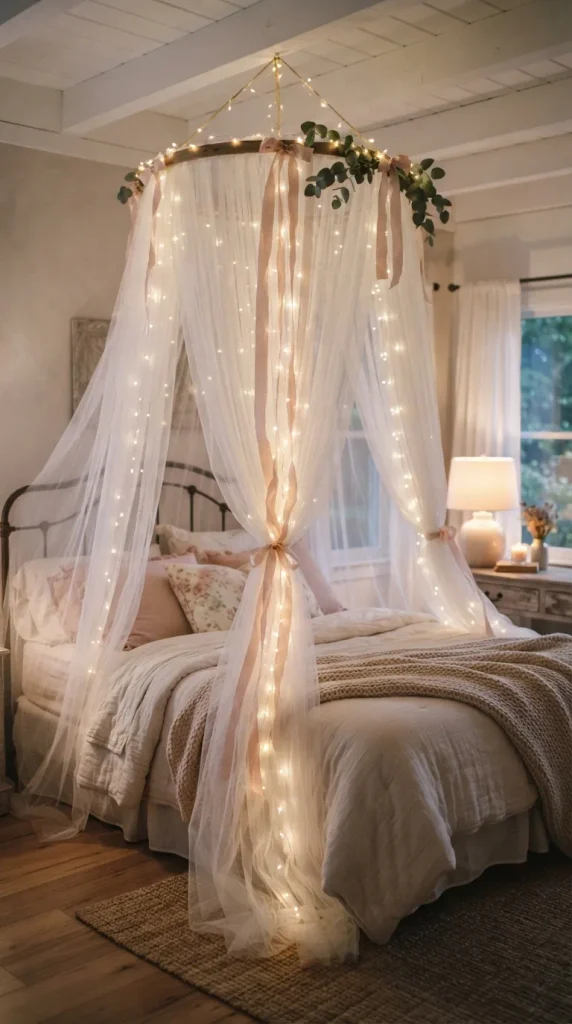
7. Tulle Ribbon Bed Canopy with Hanging Fairy Lights
- Introduction: A draping canopy over the head of your bed instantly establishes an enchanting, princess-like focal point in your room, softening the architectural corners of the walls.
- What This Idea Means: A bed canopy acts as an intimate physical and visual retreat, turning your sleeping area into a cozy, protected sanctuary.
- Materials Needed:
- 10-inch lightweight embroidery hoop or ceiling-mount curtain track
- 15 to 20 yards of soft, wide bridal tulle or sheer organza (in ivory or blush pink)
- Warm white micro-LED curtain lights
- Pastel satin ribbons (1.5-inch width)
- Ceiling hook and drywall anchor
- How to Make It:
- Separate the outer and inner rings of the wooden embroidery hoop.
- Cut your tulle into lengths that reach comfortably from your ceiling to the floor, adding 12 inches for draping.
- Loop the tulle lengths evenly over the inner hoop using simple lark’s head knots, creating full, billowing layers.
- Attach the warm fairy light strands along the inside of the hoop, letting the illuminated wires cascade down among the tulle fabric.
- Tie long satin ribbon streamers around the top hoop to conceal the hardware and create trailing bow accents.
- Securely install a ceiling hook directly above the bed and hang the assembled canopy.
- Tips & Variations:
- Intertwine artificial eucalyptus or cherry blossom vines around the top circular frame.
- Use two contrasting tones of tulle, such as soft cream underneath with sheer lilac draped on top.
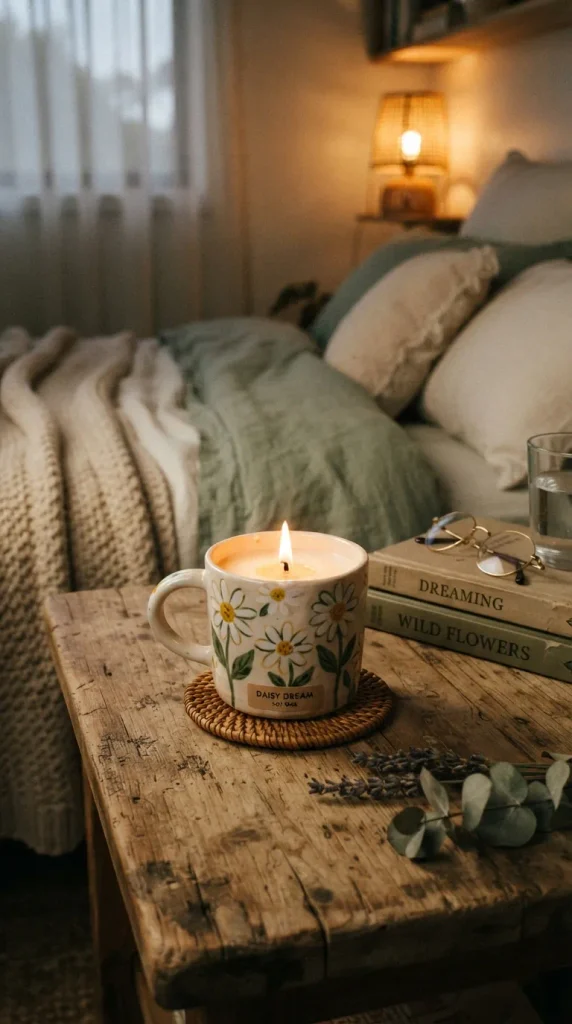
8. Daisy Ceramic Mug & Glassware Candle Vessels
- Introduction: Hand-painted candle holders made from thrifted vintage glassware and ceramic mugs bring warmth, fragrance, and cozy handmade personality to your bedside table.
- What This Idea Means: Repurposing classic homeware into charming scented candles merges sustainability with retro cottage aesthetics.
- Materials Needed:
- Thrifted ceramic mugs, vintage teacups, or clear ribbed glass jars
- Porcelain/glass paint pens (white, pastel yellow, sage green)
- Natural soy wax flakes
- Cotton wicks with metal base tabs
- Sweet floral or vanilla essential oils
- How to Make It:
- Clean the outer surface of your glassware or ceramic mug thoroughly with rubbing alcohol.
- Use paint pens to draw scattered five-petal daisies, complete with yellow center dots, around the vessel.
- Bake the vessels in an oven according to the paint pen manufacturer’s instructions to permanently set the design.
- Center and secure a cotton wick to the bottom inside of the vessel using a glue dot.
- Melt the soy wax flakes in a double boiler to 180°F (82°C), stir in your fragrance oil, and let cool slightly to 135°F (57°C).
- Carefully pour the wax into the prepared vessel, keeping the wick centered with a clothespin until fully solidified.
- Tips & Variations:
- Sprinkle dried lavender buds or rose petals on top of the wax just as it begins to firm up.
- Paint strawberries or cherries instead of daisies for a playful retro look.
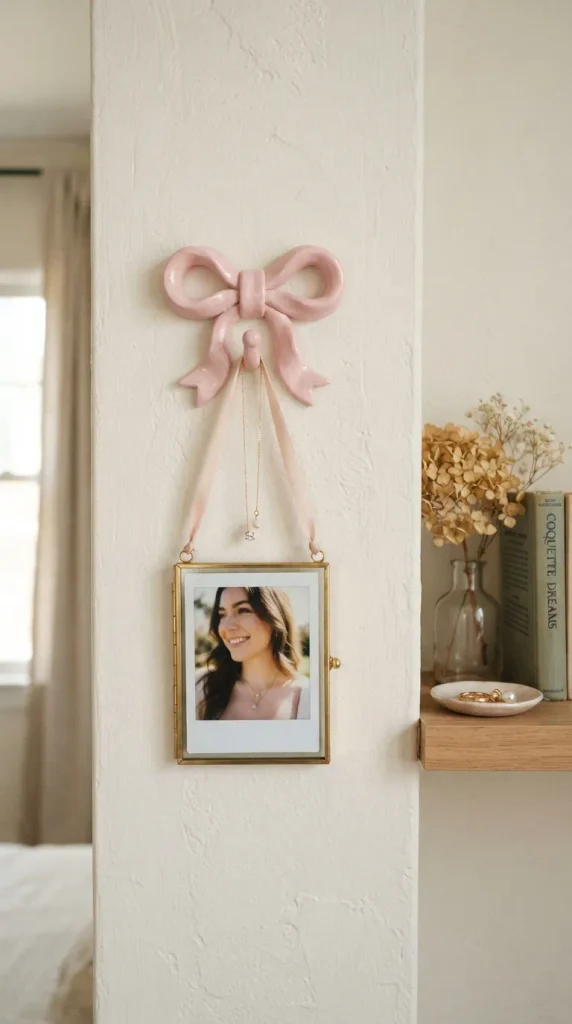
9. Ribbon Bow Wall Sconce and Gallery Hooks
- Introduction: Bow motifs are a classic signature of the coquette and soft girl aesthetic. Adding sculpted or fabric bow accents above prints and hanging fixtures makes ordinary wall hardware feel decorative and sweet.
- What This Idea Means: This project turns utilitarian wall hooks and mountings into intentional, decorative elements that unify the whole room’s aesthetic.
- Materials Needed:
- Air-dry polymer clay or thick double-faced satin ribbon (2-inch width)
- Small brass wall hooks or picture-hanging hardware
- Strong epoxy craft glue
- Pastel paint and satin glaze (if using clay)
- How to Make It:
- If using clay, sculpt a classic dimensional bow by rolling two loops, a center wrap cylinder, and two cascading ribbon tails.
- Smooth the edges and allow the clay bow to dry thoroughly for 24 hours.
- Paint the bow in your desired soft tone (pale peach, baby pink, or cream) and seal with a protective glaze.
- Secure a small brass utility hook to the flat back of the clay bow using strong two-part epoxy.
- If using satin ribbon, tie a large, crisp bow, treat the raw cut ends with clear nail polish to prevent fraying, and glue directly over your existing wall hooks.
- Mount the finished bow hooks on your wall to hold small frames, jewelry, or fairy lights.
- Tips & Variations:
- Sculpt tiny ribbons to glue directly to the corners of your existing picture frames.
- Use velvet ribbon instead of satin during cooler seasons for added texture.
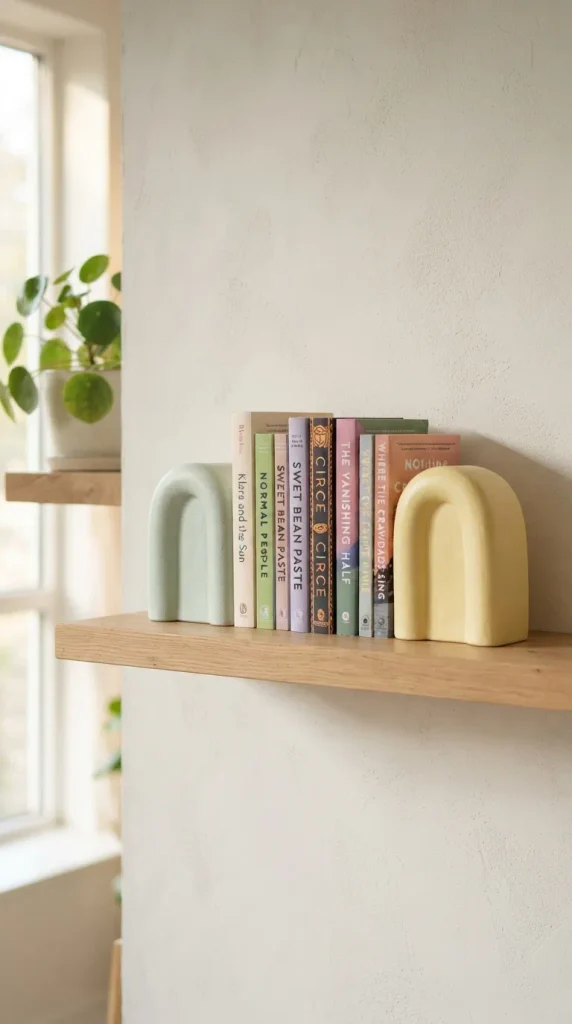
10. Pastel Ceramic Arch Bookends
- Introduction: Bookcases and floating shelves can quickly look cluttered without intentional styling. Sleek, pastel-painted arched bookends offer clean structural lines while maintaining a soft visual weight.
- What This Idea Means: Arches evoke Mediterranean and modern retro design, introducing calming symmetry and organization to your book collections and study desk.
- Materials Needed:
- 2 pre-cut arched wooden blocks or dense floral foam blocks
- Lightweight self-hardening clay or spackle paste
- Pastel matte chalk paints (butter yellow, pale mint, or blush)
- 120-grit and 320-grit sandpaper
- Protective felt adhesive pads
- How to Make It:
- Cut or sand your wooden or foam blocks into smooth, uniform arch silhouettes.
- Coat the blocks with a thin layer of spackle paste or air-dry clay to create an organic, plaster-like stone texture.
- Allow the paste to dry completely, then sand lightly with 320-grit paper to remove sharp imperfections while keeping the tactile texture.
- Apply two coats of pastel chalk paint for an ultra-matte, powdery finish.
- Attach soft felt adhesive pads underneath the bases to protect shelf surfaces from scratches.
- Position your bookends to frame your favorite pastel-spined books and stationery notebooks.
- Tips & Variations:
- Paint two-tone concentric arches using contrasting pastel shades.
- Carve a small hollow into the top curve of the arch before drying to hold a small dried flower stem.
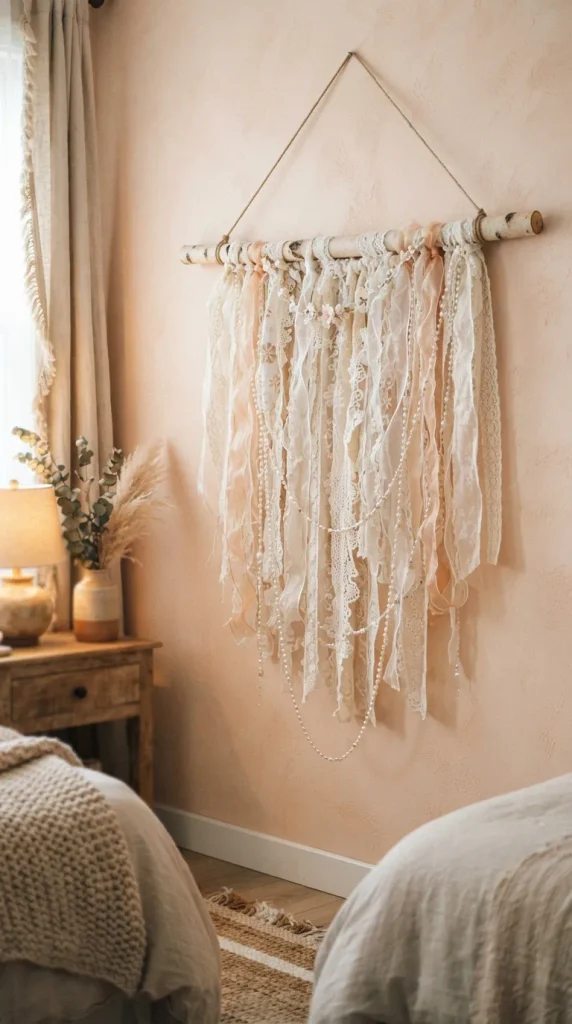
11. Romantic Lace & Pearl Wall Hanging Tapestry
- Introduction: Draping textiles across open wall spaces softens a room’s acoustics and adds textural interest. A handmade lace-and-pearl banner brings delicate, vintage romanticism to bare walls.
- What This Idea Means: This project trades heavy, bohemian macrame for light, vintage-inspired lace and pearl textures that fit the soft girl room palette effortlessly.
- Materials Needed:
- 1 natural birch dowel rod (18 to 24 inches long)
- Assorted vintage lace trims, eyelet lace ribbons, and sheer organza ribbons (1 to 2 inches wide)
- Pre-strung faux pearl garlands
- Fabric shears
- Neutral cotton twine for suspension
- How to Make It:
- Cut your lace trims, organza ribbons, and pearl garlands into strips measuring approximately 28 to 36 inches.
- Secure each strip to the birch dowel using a simple hitch knot, alternating between sheer lace, smooth satin, and pearl strands for varied texture.
- Trim the bottom ends of the fabric into a soft V-shape taper or leave them casually uneven for an effortless look.
- Tie a piece of neutral twine securely to both ends of the birch dowel.
- Hang the tapestry above a desk, vanity, or accent chair.
- Tips & Variations:
- Dip-dye the lower third of the hanging lace strips into a shallow bath of diluted pink or lavender fabric dye for an ombre effect.
- Weave tiny dried bunny tail grasses (lagurus) into the knots along the dowel.
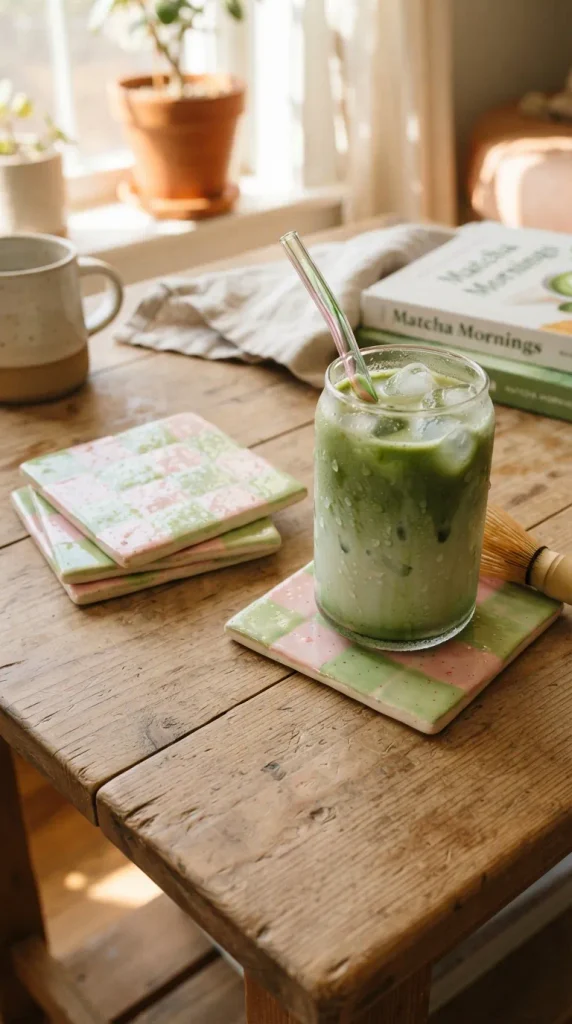
12. Strawberry Milk & Matcha Checkerboard Coasters
- Introduction: Checkerboard patterns are a playful staple of current aesthetic trends. Pairing this graphic print with soft strawberry and matcha tones keeps the look sweet rather than bold or harsh.
- What This Idea Means: Soft-colored checkerboards add energetic pattern play to your desk or nightstand while still blending seamlessly into a pastel environment.
- Materials Needed:
- Blank ceramic, cork, or wooden 4×4-inch square coasters
- Pastel acrylic paints (cream, strawberry pink, matcha green)
- Fine grid ruler and pencil
- Flat edge detailing brush
- Waterproof high-gloss varnish
- How to Make It:
- Base-coat your coaster surface in a smooth, solid ivory or cream acrylic tone.
- Use a ruler and light pencil marks to draw an even 4×4 or 5×5 grid across the coaster surface.
- Using a flat edge detailing brush, carefully paint alternating squares with your pastel pink or green paint.
- Apply a second thin coat to ensure opaque, crisp coverage.
- Allow the paint to dry for 12 hours.
- Apply 2 to 3 generous coats of waterproof high-gloss varnish to protect the surface from hot mug condensation.
- Tips & Variations:
- Use self-hardening polymer clay tiles to create irregular, wavy-grid coasters for a fun hand-molded look.
- Paint a tiny heart or strawberry motif in the center of one grid square.
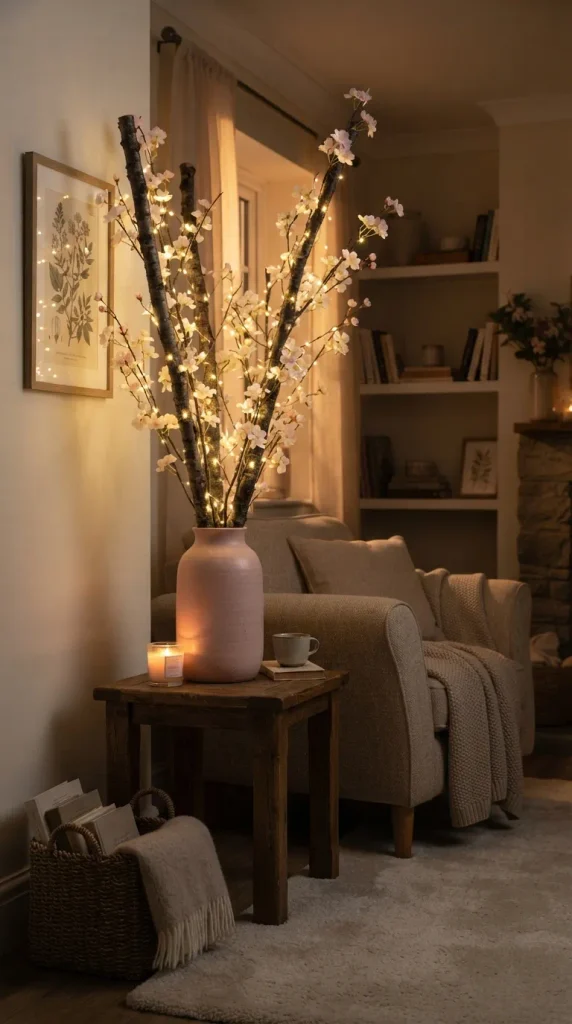
13. DIY Faux Cherry Blossom Branch Lamp
- Introduction: Bringing floral elements into your lighting creates a warm, springtime atmosphere year-round. A lit cherry blossom branch arrangement makes a stunning, sculptural floor or tabletop piece.
- What This Idea Means: Cherry blossoms symbolize fleeting beauty and soft beginnings. Illuminated branches bring a touch of outdoor wonder right into your cozy room.
- Materials Needed:
- Clean, dried decorative branches or artificial birch twigs
- High-quality silk cherry blossom stems (pale pink petals)
- Warm micro-fairy light wire (copper or silver)
- Floral tape (brown or white)
- Ceramic pitcher or tall pastel vase
- How to Make It:
- Arrange the dry branches inside your vase until you achieve a balanced, natural-looking silhouette.
- Use floral tape to secure the silk cherry blossom clusters along the natural stems of the branches.
- Carefully wrap the micro-fairy light wire up and down each branch, tucking the tiny LED bulbs close to the blossom petals.
- Run the end of the wire down into the vase, concealing the battery pack inside or running the cord discreetly to an outlet.
- Turn on the lights in a dim room to enjoy the soft, warm pink glow through the petals.
- Tips & Variations:
- Fill the base of the transparent vase with decorative faux pearls or smooth pink tumbled stones to weight the arrangement.
- Mix cherry blossoms with faux wisteria vines for a draped, cascading look.
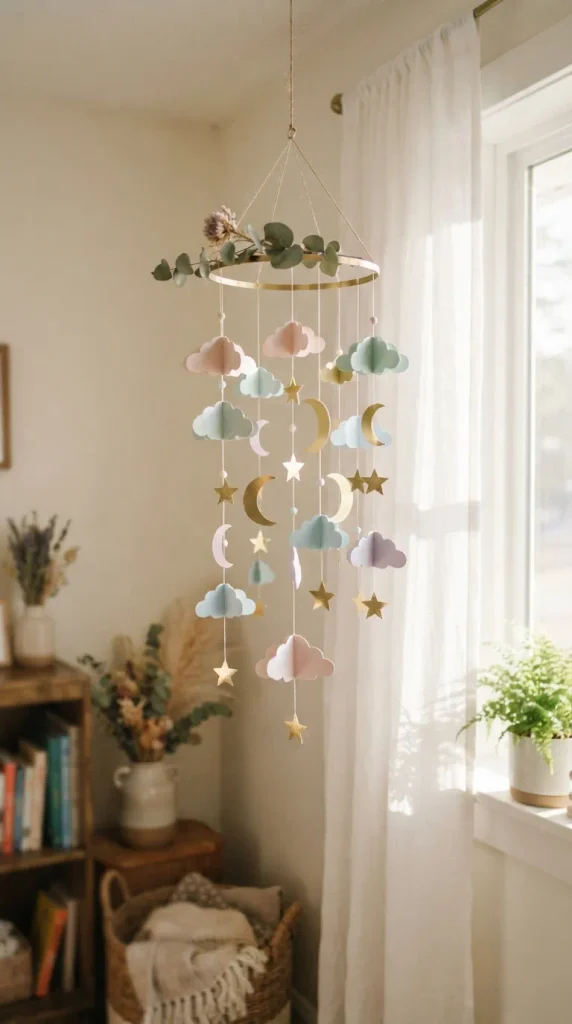
14. Floating Cloud & Star Paper Lantern Mobile
- Introduction: Kinetic, gently moving ceiling decor brings dynamic life and vertical interest to bedroom corners, catching gentle air currents throughout the day.
- What This Idea Means: Mobiles encourage visual calm and mindfulness by mimicking the slow, peaceful drift of clouds across a soft morning sky.
- Materials Needed:
- Heavy pastel cardstock (baby pink, cream, lavender, soft gold)
- Clear nylon thread
- Gold metal macrame hoop (8 to 10 inches)
- Scissors and precision craft knife
- Small wooden or iridescent beads
- How to Make It:
- Cut out pairs of cloud shapes, crescent moons, and stars from your pastel cardstock.
- Score down the center of each shape and glue matching pairs back-to-back around a length of nylon thread to create 3D hanging cutouts.
- Thread a small iridescent bead beneath each paper shape to add weight and keep the strings hanging straight.
- Tie multiple strands of varying lengths securely around the circumference of the gold metal hoop.
- Tie three equidistant strings to the hoop, knot them together at the top center, and suspend from your ceiling.
- Tips & Variations:
- Use glitter or holographic cardstock for the stars to catch and reflect sunlight.
- Spray the paper cutouts with a light lavender essential oil room mist for subtle fragrance.
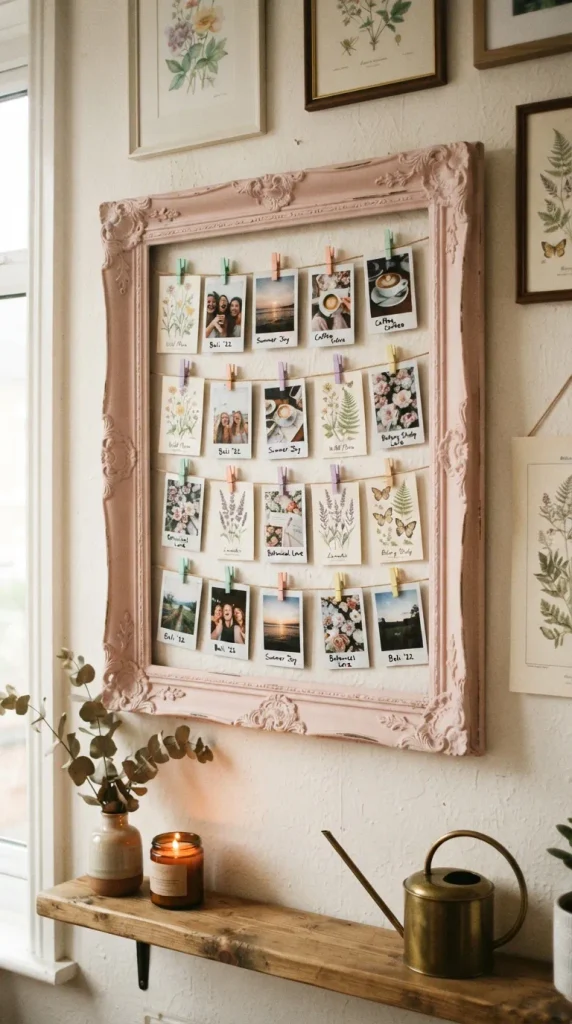
15. Pastel Vintage Frame Polaroid & Postcard Display
- Introduction: Displaying memories, art prints, and concert tickets gives a room soul. An upcycled vintage frame with delicate twine lines turns your favorite snapshots into an evolving gallery.
- What This Idea Means: This project celebrates personal memories and aesthetic appreciation, showcasing daily joys and inspirations in an open, customizable collage.
- Materials Needed:
- Ornate, thrifted vintage picture frame (glass and backing removed)
- Pastel chalk spray paint (blush, soft mint, or vanilla)
- Mini wooden clothespins (painted pastel or natural)
- Jute twine or pastel baker’s twine
- Heavy-duty stapler or hot glue gun
- Your favorite pastel-toned mini prints, polaroids, and art postcards
- How to Make It:
- Clean the thrifted ornate frame thoroughly and paint it with 2 coats of pastel chalk spray paint, letting the sculpted vintage details show through.
- Flip the frame over and measure 3 to 4 horizontal rows evenly across the back opening.
- Secure lengths of twine tautly across the back using heavy-duty staples or hot glue.
- Turn the frame over and mount it securely on your main accent wall.
- Use mini clothespins to clip your polaroid photos, botanical art cards, and sweet inspirational notes along the twine lines.
- Tips & Variations:
- Weave a strand of warm fairy lights along the twine rows alongside the photos.
- Paint the mini wooden clothespins in alternating pastel rainbow tones.
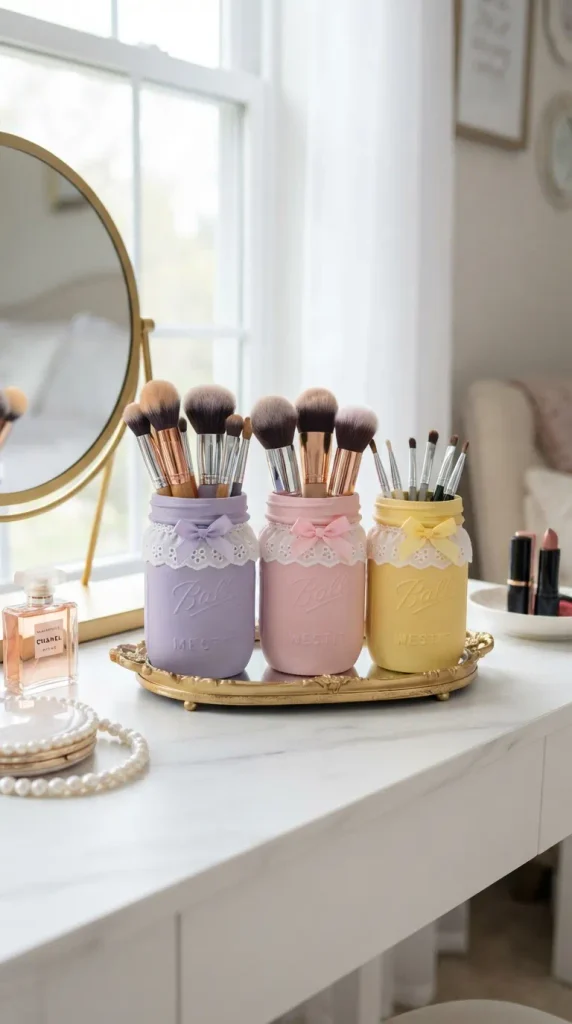
16. Upcycled Lace Trim Pastel Pen & Brush Holders
- Introduction: Keeping your desk and makeup vanity neat is much easier when your organizing tools match your room’s aesthetic. Upcycling glass jars with lace trim and soft paints makes functional storage look cute and tidy.
- What This Idea Means: Functional daily organization doesn’t have to look sterile. Upcycling everyday jars into pastel containers adds handcrafted sweetness to your workspace.
- Materials Needed:
- Clean, empty glass food jars (jam jars, candle jars)
- Pastel acrylic paints
- Cotton eyelet lace ribbon and mini satin ribbon bows
- Mod Podge or hot glue
- Foam paint dabber
- How to Make It:
- Remove all labels and adhesive residue from your glass jars using warm soapy water.
- Use a foam paint dabber to apply 2 to 3 thin, even coats of pastel paint to the outside of the jars, leaving a smooth matte finish.
- Cut a strip of cotton eyelet lace that matches the top rim circumference of the jar.
- Glue the lace along the top collar using Mod Podge or hot glue.
- Add a tiny satin ribbon bow to the center front of the lace trim.
- Let everything dry fully before filling the jars with makeup brushes, pastel pens, or scissors.
- Tips & Variations:
- Leave the glass unpainted and apply lace with decoupage glue for a transparent, antique-glass look.
- Place tiny pink glass filler beads at the bottom of the jars to hold makeup brushes standing upright.
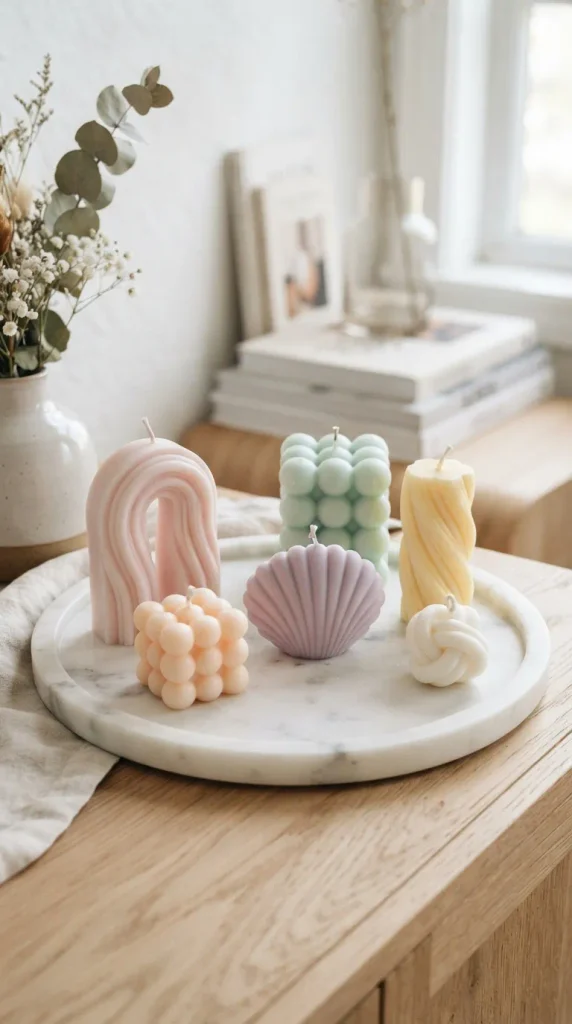
17. Hand-Poured Pastel Scallop & Swirl Sculptural Candles
- Introduction: Pillar candles with sculptural, curvy silhouettes double as aesthetic art pieces on your shelves even when unlit.
- What This Idea Means: Sculptural candles introduce playful shapes and gentle color accents to open surfaces, bridging the gap between functional decor and miniature sculpture.
- Materials Needed:
- Silicone candle molds (in bubble, swirl arch, or shell shapes)
- 100% soy or pillar-blend wax flakes
- Pastel candle dye chips (baby pink, lilac, butter yellow)
- Cotton candle wicks and wick centering clips
- Pouring pitcher and digital thermometer
- How to Make It:
- Thread the cotton wick through the bottom hole of your silicone mold and secure the top with a wick centering clip.
- Melt the pillar wax in a pouring pitcher using a double boiler until it reaches 175°F (80°C).
- Add a tiny shaving of your pastel candle dye chip, stirring thoroughly for 2 minutes to achieve a subtle, creamy tint.
- Let the wax cool to around 135°F (57°C), then slowly pour it into the silicone mold to prevent air bubbles.
- Allow the candle to cool and cure completely at room temperature for 12 to 24 hours.
- Gently peel the flexible silicone mold away from the candle, trim the wick to 0.25 inches, and display on a decorative tray.
- Tips & Variations:
- Create a two-tone ombre candle by pouring a light pastel layer first, letting it partially set, and topping it with a matching cream-colored layer.
- Display the candle unlit on top of your DIY trinket dish to preserve its sculpted shape.
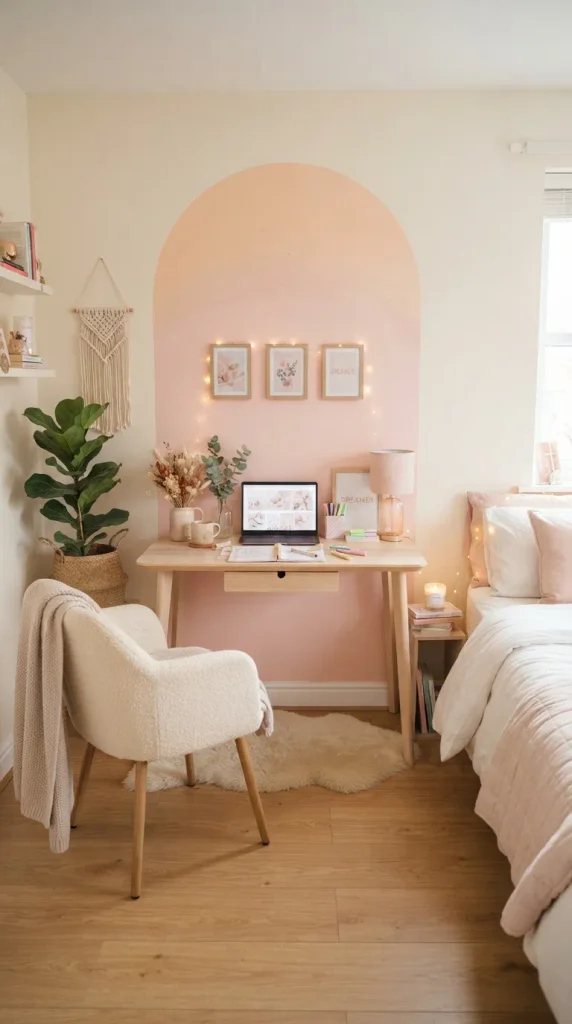
18. Soft Ombre Pastel Arch Wall Mural
- Introduction: Painting a painted wall arch is a designer trick that zones specific furniture pieces—like a desk, vanity, or bed—without needing to paint the entire room.
- What This Idea Means: A painted pastel arch creates an instant architectural focal point, grounding your furniture and bringing a gentle splash of color to flat walls.
- Materials Needed:
- 2 coordinating pastel interior sample paint pots (e.g., pale peach and blush pink)
- Painter’s tape
- String, pencil, and a pushpin (to create a simple DIY compass)
- Angled trim paintbrush and smooth foam paint roller
- Drop cloth
- How to Make It:
- Measure the width of the furniture piece you want to frame and mark the left and right vertical edges on the wall with painter’s tape.
- Place a pushpin in the exact horizontal center of the top of your frame lines with a pencil tied to a string measuring half the width of the arch.
- Swing the string in an even half-circle to trace a smooth arched curve connecting the two vertical side lines.
- Apply painter’s tape along the straight vertical lines and use your angled brush to cut in cleanly around the curved pencil line.
- Roll your lighter pastel shade over the top half and your slightly deeper pastel shade over the bottom half.
- Blend the meeting line in the middle while the paint is still damp using a dry, soft blending brush for a subtle ombre finish.
- Carefully remove the painter’s tape while the paint is slightly tacky to reveal crisp, clean lines.
- Tips & Variations:
- Add a crisp 1-inch painted white border framing the arch for an extra graphic, framed look.
- Hang a minimalist floating wooden shelf across the center of the painted arch.
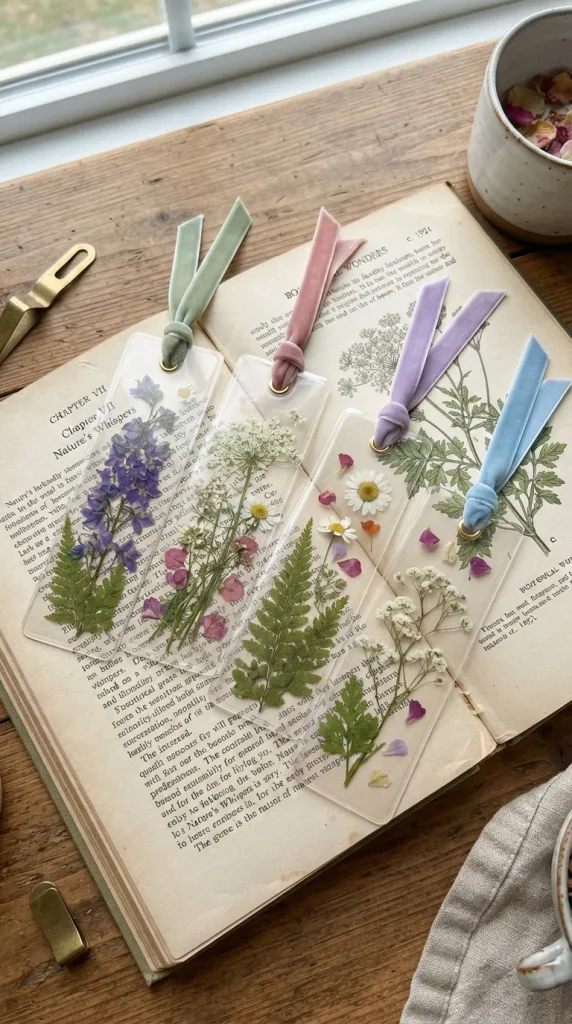
19. DIY Pressed Botanical & Ribbon Hanging Bookmarks
- Introduction: Hanging small aesthetic stationery accents, like laminated botanical ribbon bookmarks, turns your study desk and bookshelf into an inviting, dreamy corner.
- What This Idea Means: Small decorative details celebrate cozy study routines, journaling habits, and reading rituals, infusing everyday learning spaces with charm.
- Materials Needed:
- Heavyweight white watercolor paper or cold-laminating sheets
- Miniature pressed wildflowers and fern fronds
- Single-hole puncher
- Pastel velvet or silk chiffon ribbon (0.5-inch width)
- Clear drying craft glue or laminator
- How to Make It:
- Cut clear laminating sheets or sturdy cardstock into 2×6 inch rectangular strips.
- Arrange tiny pressed petals, stems, and leaf clippings in an aesthetic, minimalist line along each strip.
- Seal the arrangement through your laminator or close the self-adhesive laminating sheet firmly to press out air pockets.
- Trim the outer border smoothly, leaving a clean 2mm clear border around the paper edges.
- Punch a neat hole centered at the top of each bookmark.
- Loop a 6-inch length of pastel chiffon or velvet ribbon through the hole, tying it off with a delicate knot and leaving soft frayed ends.
- Tips & Variations:
- Display a set of 3 bookmarks hanging from mini brass clips on a wall grid above your desk.
- Hand-paint small metallic gold specks around the florals before laminating.
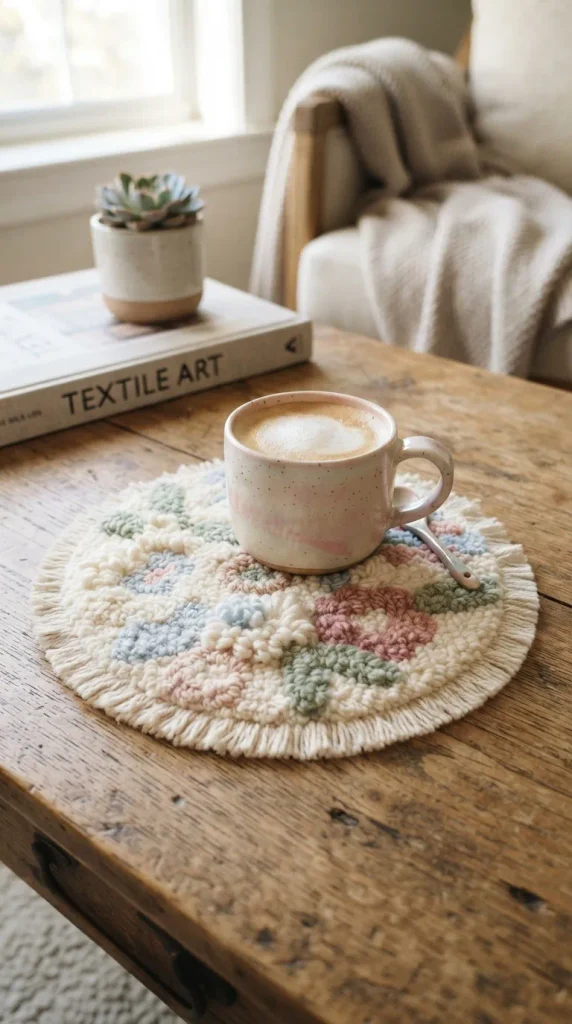
20. Soft Tufted Pastel Mini Rug or Wall Mirror Frame
- Introduction: Punch-needle tufting creates wonderfully plush, loop-textured textile art. A mini tufted piece works beautifully as a soft tabletop mat or as an eye-catching plush frame for a circular mirror.
- What This Idea Means: Tufted textiles provide rich tactile comfort and visual warmth, softening hard wooden and glass surfaces with cozy, handmade texture.
- Materials Needed:
- Adjustable punch needle tool and monks cloth fabric
- 10-inch wooden embroidery frame or wooden stretching frame
- Chunky acrylic yarns (cream, pastel baby blue, butter yellow, blush pink)
- Fabric backing glue (PVA or latex carpet adhesive)
- Felt sheet for backing and scissors
- How to Make It:
- Stretch your monks cloth tightly over your wooden frame until it is as taut as a drumhead.
- Sketch a simple abstract floral, cloud, or wavy line pattern directly onto the cloth with a marker.
- Thread your punch needle tool with your chosen pastel yarn and punch along the design outlines, filling in sections from the back to create dense loops on the front.
- Once your pattern is complete, apply a thin, even coat of fabric glue across the back stitches to permanently lock the yarn loops.
- Once the glue is dry, cut the excess monks cloth, leaving a 0.5-inch border, and fold it over the back.
- Glue a clean piece of pastel felt over the back to hide the raw edges, or secure the tufted ring directly around a circular vanity mirror.
- Tips & Variations:
- Combine flat stitches with tall, looped pile heights to give your design dynamic 3D texture.
- Make smaller circular tufted pieces to use as plush drink mug rugs for your nightstand.