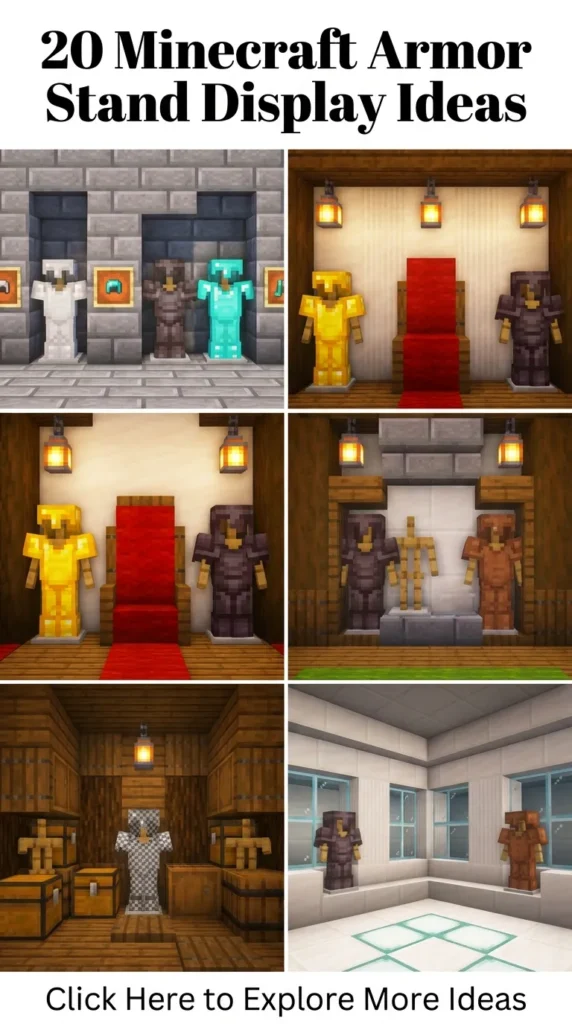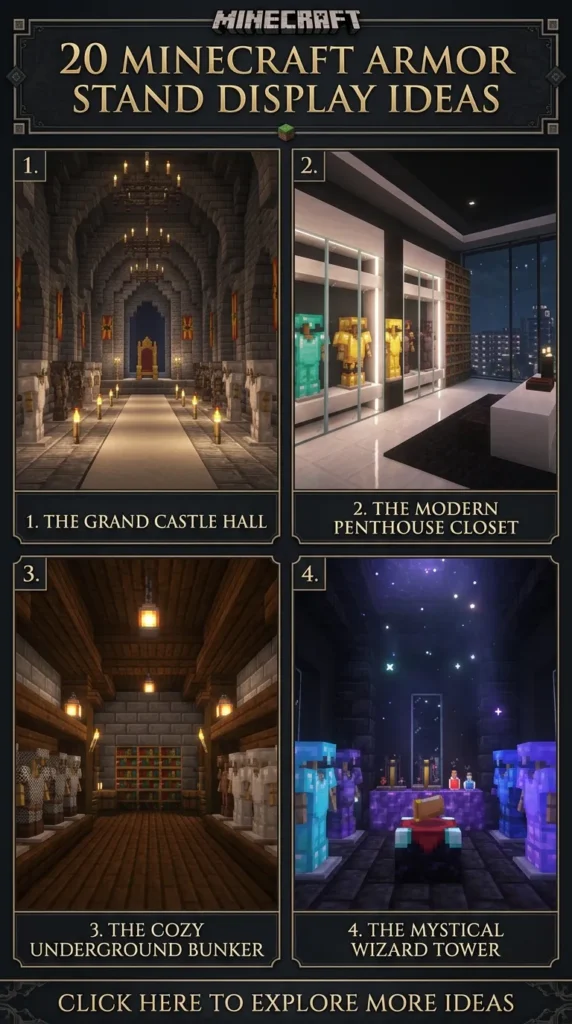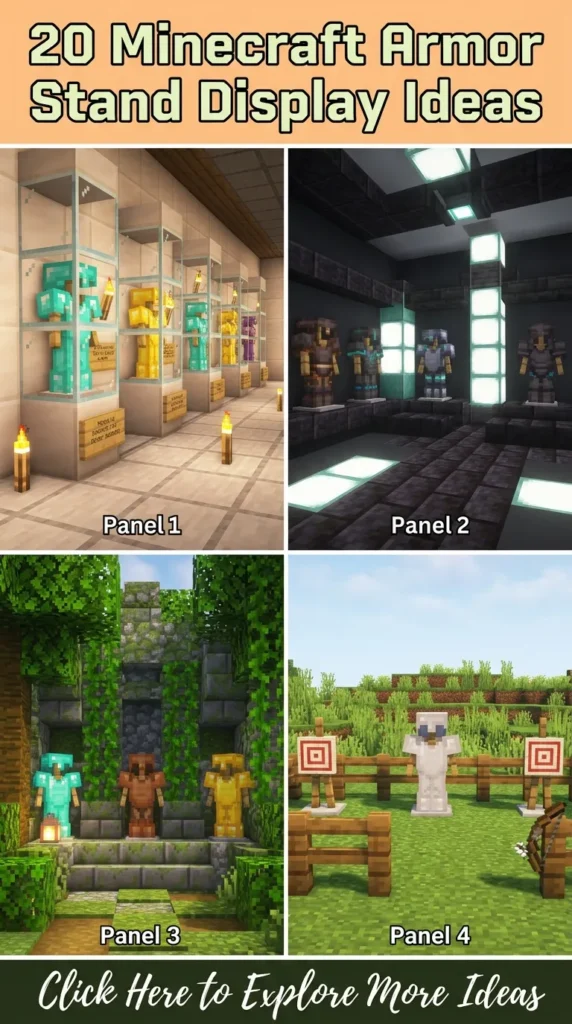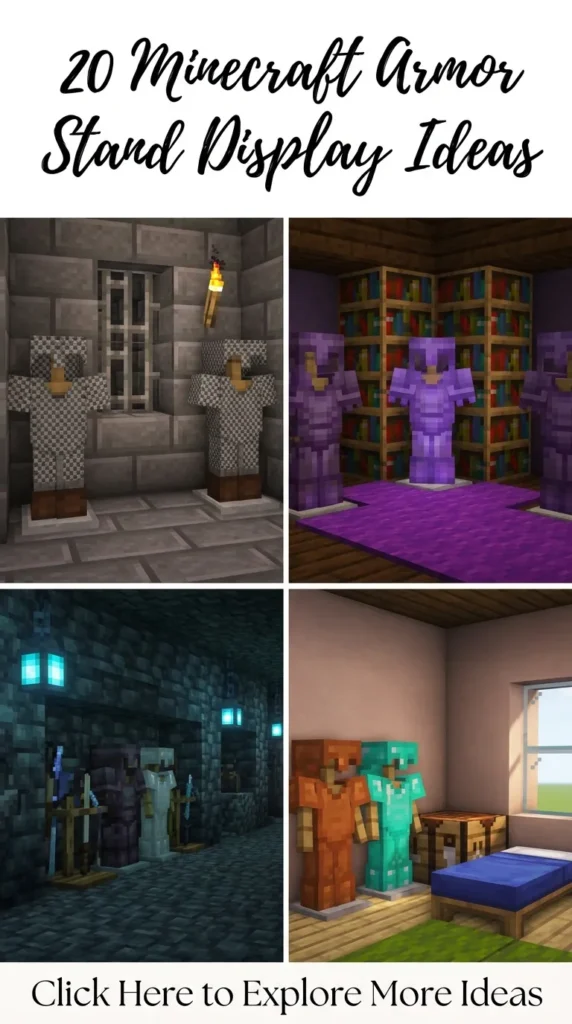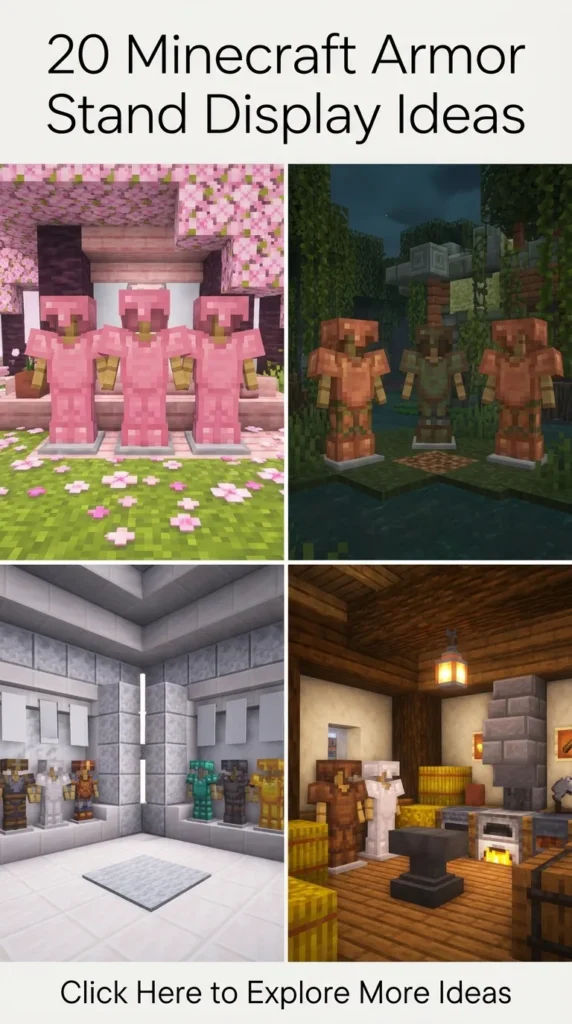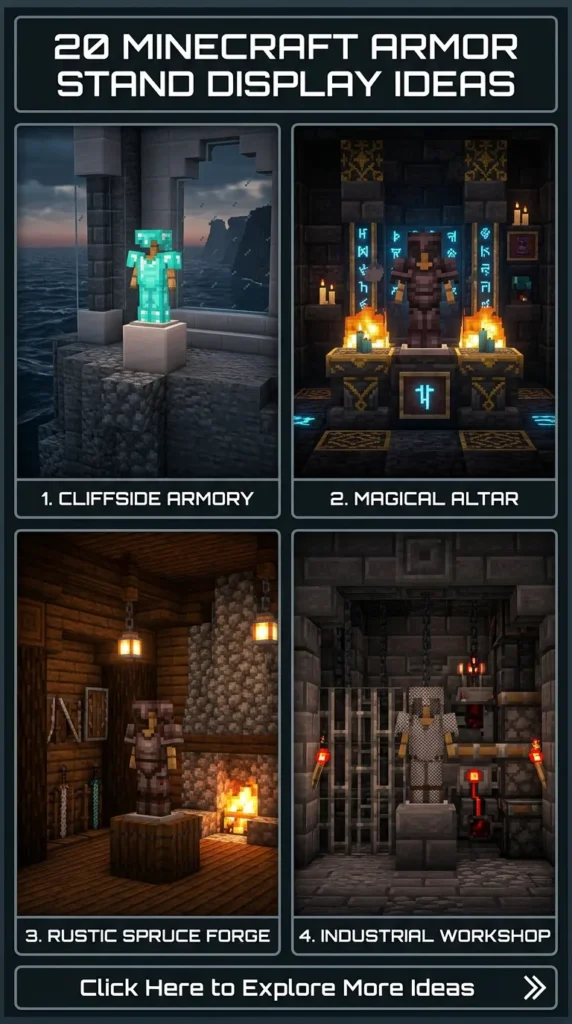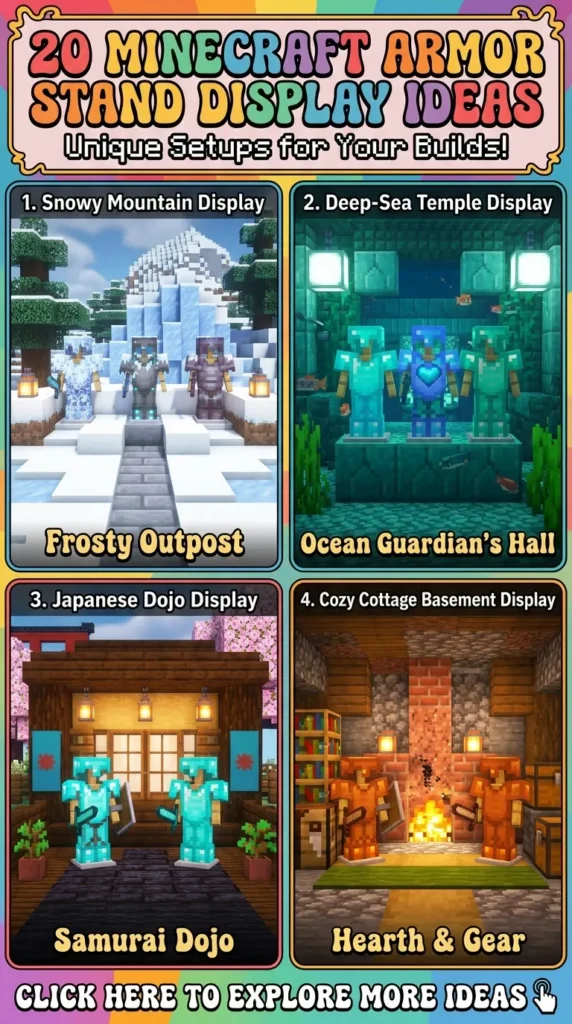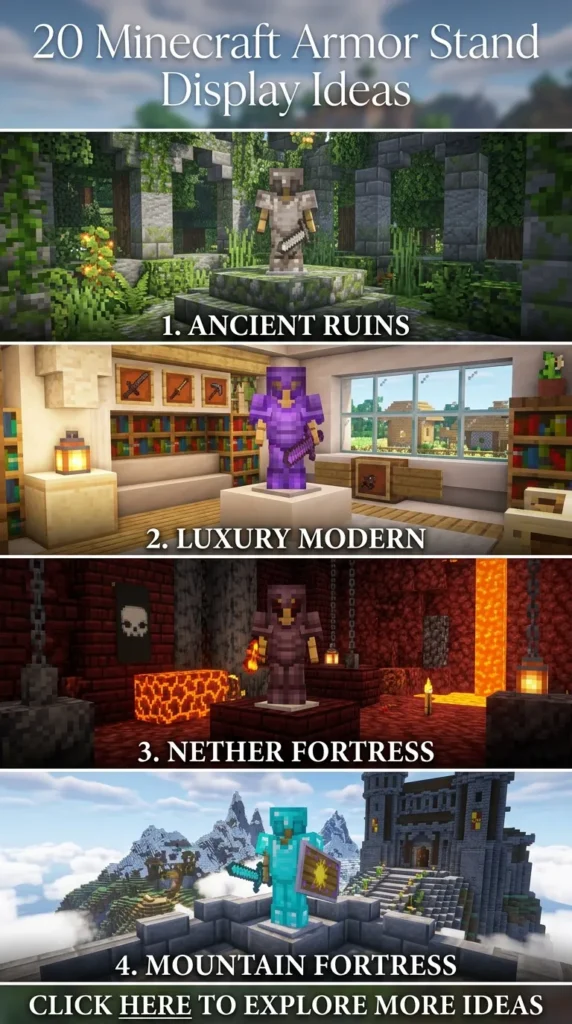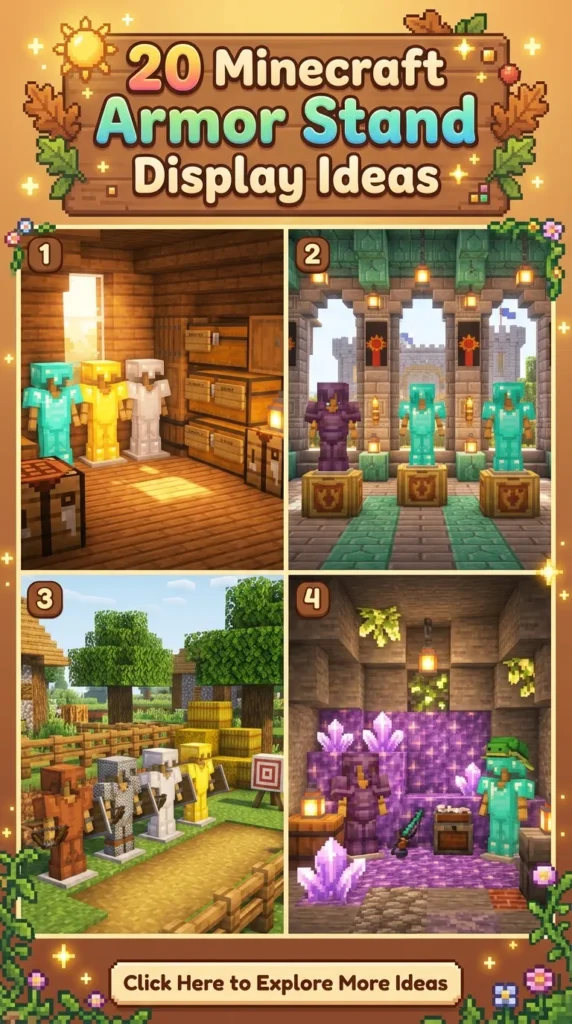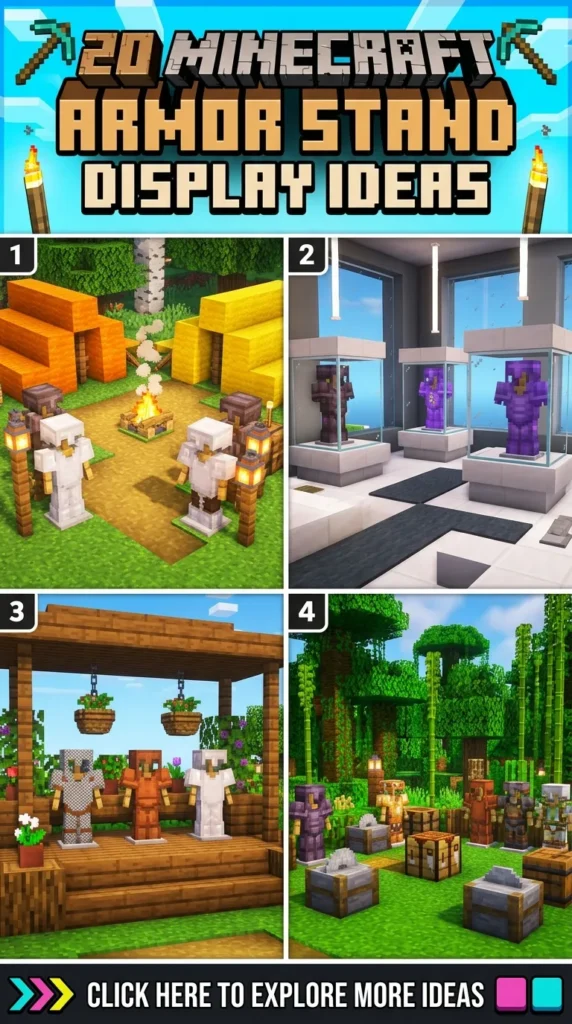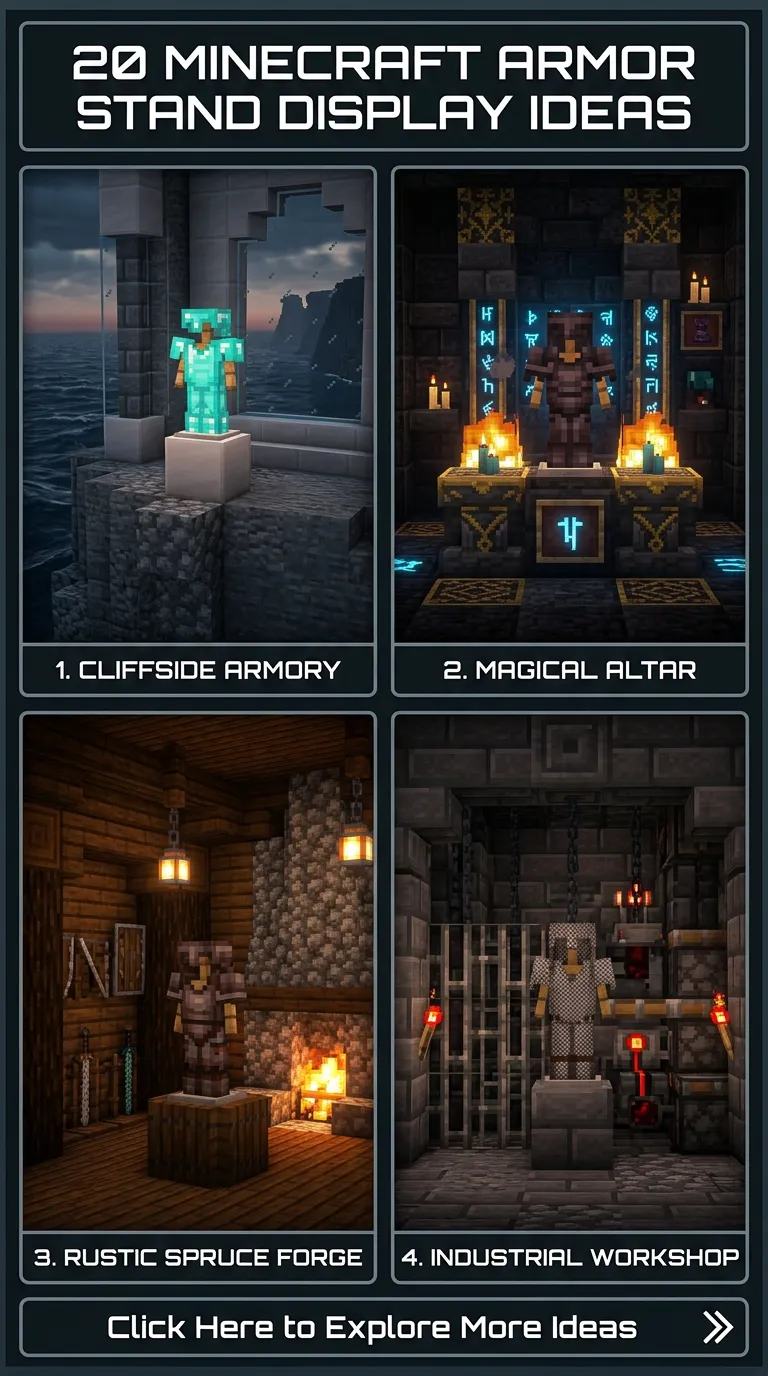
Transforming a functional base into an aesthetic masterpiece often comes down to the smaller, intricate details. While armor stands in Minecraft were originally introduced as a simple tool to store gear, creative builders quickly realized their potential as versatile decorative elements. Whether you want to showcase your hard-earned Enchanted Diamond set, create a thematic trophy room, or design a cozy personal wardrobe inside your survival house, custom armor stand displays elevate your build’s ambiance.
Below are 20 highly aesthetic armor stand display ideas designed to suit every building style—from rustic medieval holds to sleek modern closets and magical shrines.
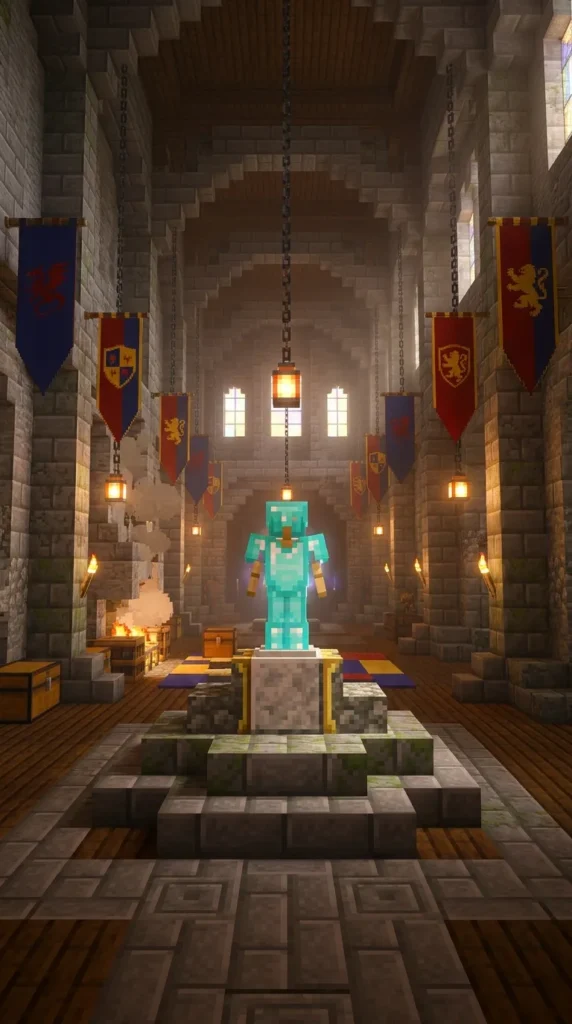
1. The Grand Knight’s Hall & Pedestal
What This Idea Means
The Grand Knight’s Hall display centers your prized armor on an elevated stone or marble-like pedestal, flanked by banners, glowing lanterns, and polished stone pillars. It evokes the feeling of a medieval castle’s central guardroom or a legendary champion’s monument.
How to Make It
- Build the Base: Construct a 3×3 platform using Deepslate Bricks, Polished Granite, or Smooth Quartz. Raise the central block by one slab step.
- Frame the Backing: Place two 4-block-tall polished pillars (Chiseled Stone Bricks or Quartz Pillars) behind the pedestal. Connect them at the top with a polished stone arch or stair structure.
- Position the Armor Stand: Place the armor stand in the center on the elevated step.
- Add Lighting and Banners: Hang custom banners along the pillars and suspend a Soul Lantern or Copper Lantern from the central arch directly above the armor.
Tips, Variations & Materials Needed
- Materials Needed: Smooth Stone Slabs, Polished Deepslate/Quartz, Armor Stand, Lanterns, Custom Banners.
- Variation: Add armor stand poses using redstone triggers (on Java Edition via commands/datapacks or Bedrock pose toggling) to make the armor appear as if holding a sword upright.
- Tip: Surround the pedestal with a low polished stone button trim or carpet layer to blend it seamlessly into the surrounding floor.
2. Enchanted Wizard Tower Wardrobe
What This Idea Means
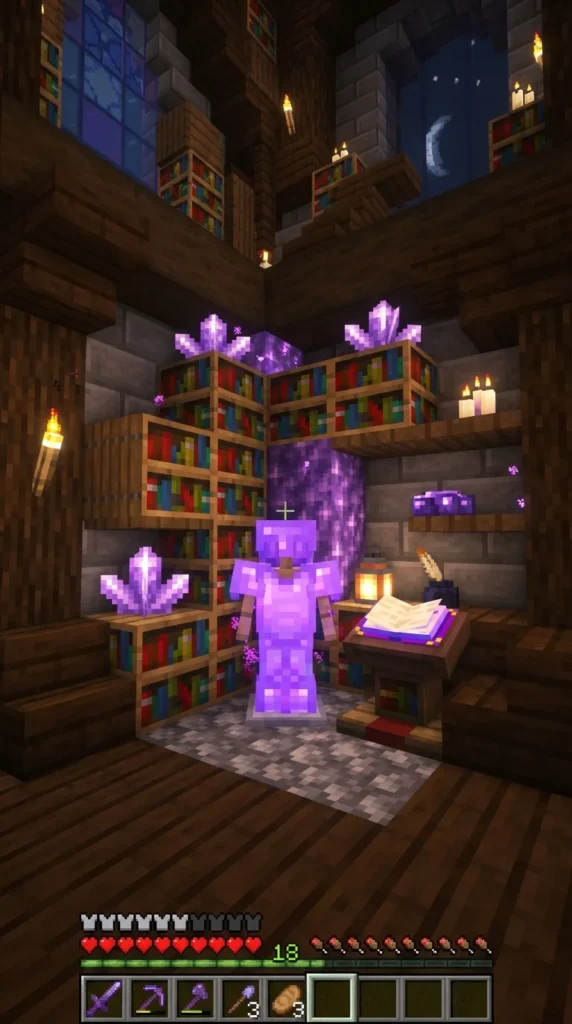
Perfect for spellcasters and potion masters, this display embeds armor stands into arcana-filled alcoves surrounded by floating bookshelves, glowing amethyst clusters, and shimmering enchantment particle effects.
How to Make It
- Recess the Wall: Dig a 2-block-deep, 3-block-tall arch into the wall of your wizard tower or library.
- Build the Archway: Outline the alcove using Dark Oak Stairs and Stripped Mangrove Wood to create a rich, dark frame.
- Incorporate Arcane Decor: Place Bookshelves along the inner sides of the alcove, and mount Amethyst Clusters on the back wall. Place an Enchanting Table or Lectern directly in front of the base.
- Set Up the Stand: Place the armor stand inside, equipped with full Enchanted Diamond or Netherite gear to catch the purple glint.
Tips, Variations & Materials Needed
- Materials Needed: Bookshelves, Amethyst Clusters, Dark Oak Wood, Lectern, Glowing Item Frames, Armor Stand.
- Variation: Hide an invisible light source (like a Light Block or hidden Glowstone under a carpet) inside the alcove floor to illuminate the enchanted glitter.
- Tip: Place an End Rod overhead so particles drift subtly downward over the display.
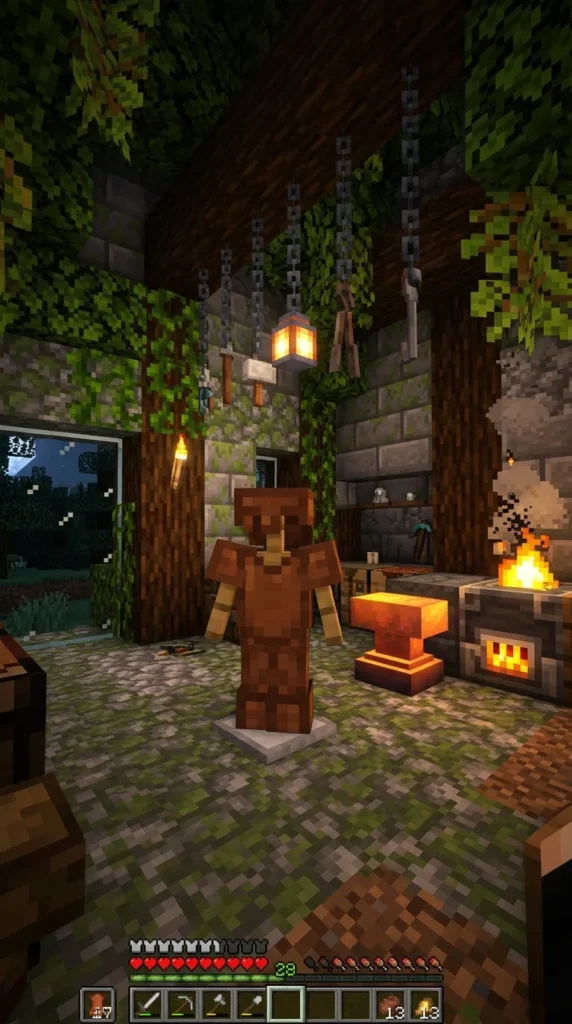
3. Rustic Overgrown Forge & Anvil Display
What This Idea Means
This design captures the cozy, rugged aesthetic of a working blacksmith shop or an abandoned forest forge. Moss, creeping vines, lava streams, and iron tools give the display a warm, lived-in feel.
How to Make It
- Construct the Hearth: Build a backdrop using Cobblestone, Mossy Cobblestone, and Cracked Stone Bricks. Leave a 1×2 niche in the middle for lava behind iron bars.
- Place the Anvil & Workstation: Position an Anvil and a Blast Furnace next to the designated armor spot.
- Mount the Display: Set the armor stand on top of an Oak Log block, surrounded by hanging chains and Grindstones.
- Decorate with Greenery: Place Moss Carpet, Oak Leaves, and Vines dripping down the stone backing.
Tips, Variations & Materials Needed
- Materials Needed: Mossy Cobblestone, Anvil, Blast Furnace, Chains, Oak Leaves, Armor Stand, Iron Bars.
- Variation: Equip the armor stand with Leather Armor dyed in rustic brown or dark red tones to look like a blacksmith’s working apron.
- Tip: Add a Smithing Table right beside the stand with an Item Frame displaying a Smithing Template.
4. Cozy Cottagecore Dressing Nook
What This Idea Means
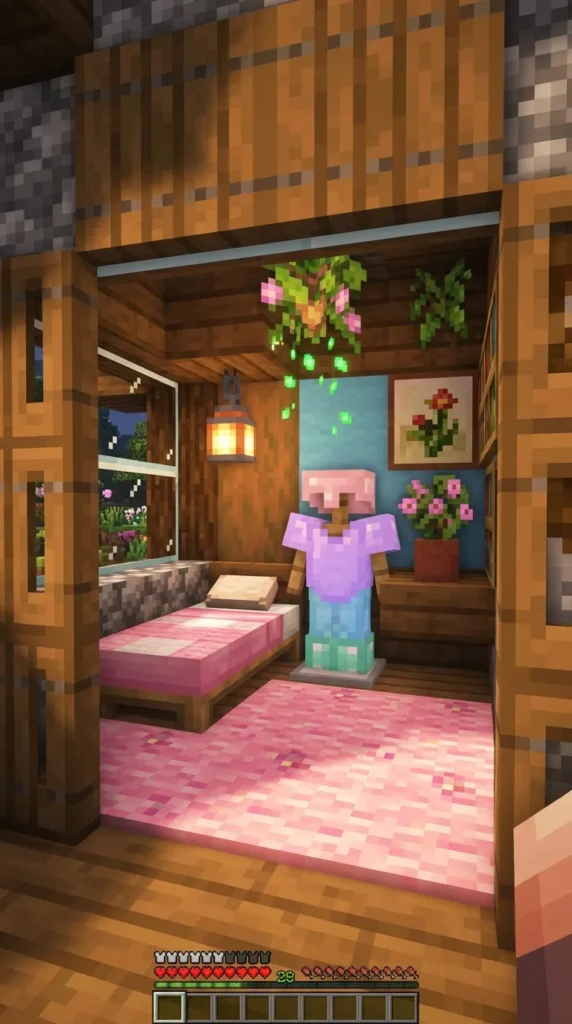
A soft, inviting aesthetic that fits seamlessly into wooden survival houses, greenhouses, or floral cottages. It treats the armor stand like a realistic dress mannequin in a sunlit bedroom.
How to Make It
- Nook Alcove: Frame a 2×3 area in a bedroom using Spruce Trapdoors, Spruce Logs, and White Terracotta backings.
- Floor & Rug Setup: Place pastel carpets (Pink, Light Gray, or Moss) beneath the stand in a layered arrangement.
- Accessorize: Place Potted Azalea, Spore Blossoms on the ceiling above for floating floral particles, and a small bookshelf module next to it.
- Display Setup: Equip the stand with custom-dyed pastel Leather Armor or simple Chainmail for a light, rustic wardrobe look.
Tips, Variations & Materials Needed
- Materials Needed: Spruce Trapdoors, Carpet, Flower Pots, Potted Azaleas, Spore Blossom, Leather Armor.
- Variation: Use Trapdoors on the sides of the stand as open closet door panels.
- Tip: Place a Candle stack on top of a nearby barrel to give off soft, warm ambient light.
5. Nether Armory Showcase with Lava Curtain
What This Idea Means
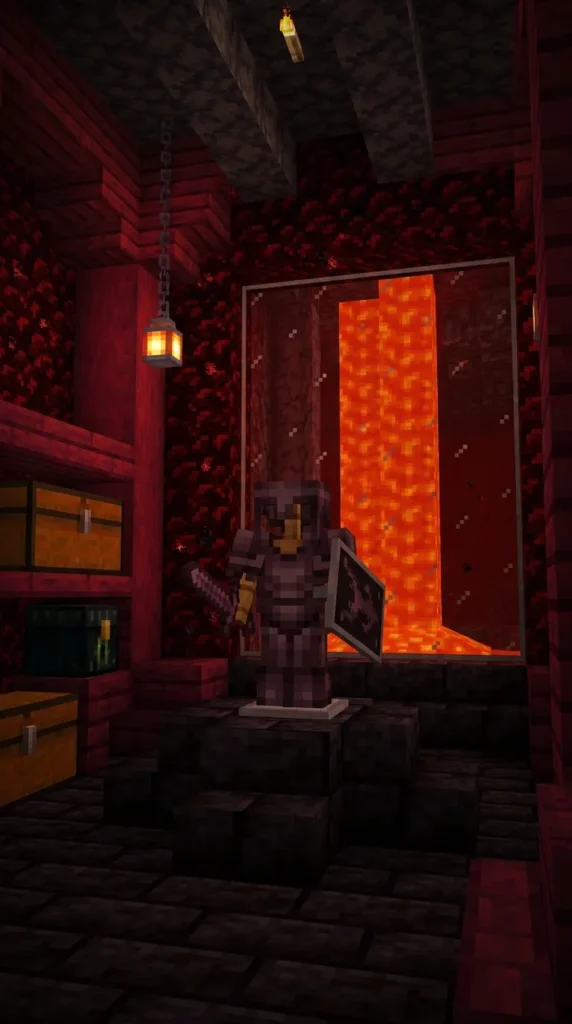
An intimidating, high-contrast display designed for Netherite armor or heavily enchanted gear. The armor stands in front of a safe lava waterfall shielded by glass or iron bars.
How to Make It
- Build the Nether Frame: Frame a 3×4 wall section with Nether Bricks, Red Nether Bricks, and Crying Obsidian.
- Construct the Lava Backing: Leave a 1-block channel at the top rear for lava to flow down into a void hole, sealed off in front by Tinted Glass or Iron Bars.
- Platform Placement: Place a Polished Blackstone Brick pedestal directly in front of the lava wall.
- Mount Armor: Stand your Netherite set on the pedestal, flanked by Wither Skeleton Skulls mounted on fence posts.
Tips, Variations & Materials Needed
- Materials Needed: Nether Bricks, Crying Obsidian, Tinted Glass, Lava Bucket, Polished Blackstone, Netherite Armor.
- Variation: Add Soul Campfires beneath iron trapdoors in the floor to create rising blue smoke behind the display.
- Tip: Swap normal red lava for a Soul Sand fire basin if you prefer a cold blue flame aesthetic.
6. Underground Secret Bunker Vault
What This Idea Means
Designed for high-tech bases, survival vaults, or underground safehouses. This display looks like an industrial containment unit or high-security suit display.
How to Make It
- Recess into Deepslate: Cut a 3x3x3 chamber into Tuff or Deepslate walls.
- Enclose with Glass: Wall off the front of the display with Glass Panes or Tinted Glass.
- Industrial Lighting: Line the top and bottom interior with Sea Lanterns concealed behind Iron Trapdoors.
- Mechanical Detail: Frame the sides with Lightning Rods, Chains, and End Rods to simulate mechanical hydraulic clamps holding the armor.
Tips, Variations & Materials Needed
- Materials Needed: Deepslate Tiles, Sea Lanterns, Iron Trapdoors, Glass Panes, Lightning Rods, Armor Stand.
- Variation: Connect a Redstone Piston door that lowers the glass pane wall at the push of a button or lever.
- Tip: Use Redstone Lamps along the floor to act as warning lights around the vault perimeter.
7. Japanese Dojo Armor Shrine (Samurai Style)
What This Idea Means
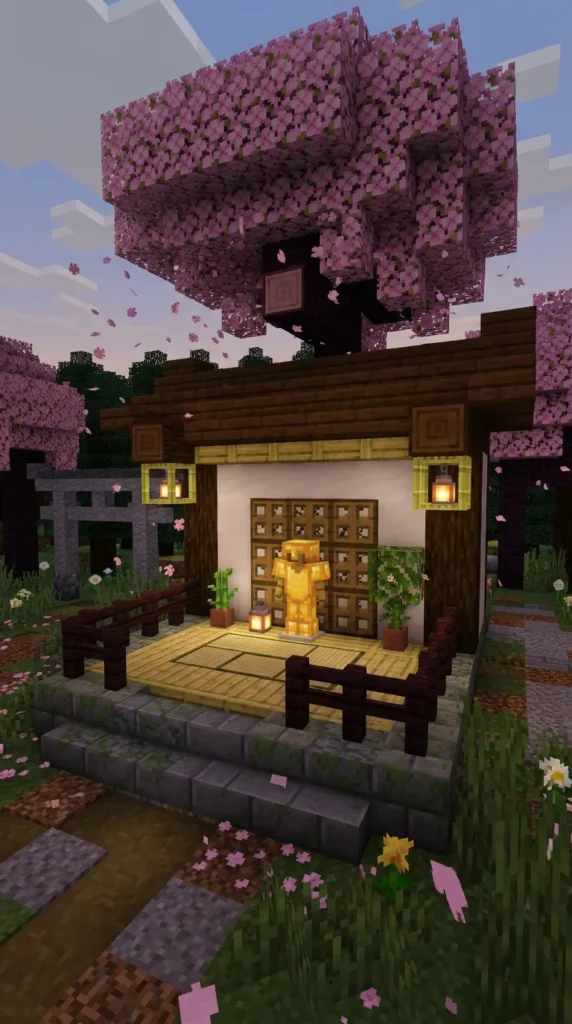
Inspired by traditional Japanese architecture, this display treats armor as a sacred relic or ancestral Samurai suit displayed on a raised tatami-style stage.
How to Make It
- Stage Construction: Build a raised platform using Stripped Bamboo Wood or Dark Oak Wood rimmed with Birch Trapdoors.
- Shoji Screen Backing: Create a faux paper wall behind the stand using White Concrete, Quartz, or Light Gray Terracotta framed by Spruce Trapdoors.
- Decorations: Place Cherry Blossom Leaves (or Pink Wool) draping overhead, with Bamboo in Flower Pots flanking the platform.
- Mount Equipment: Equip the stand with Golden or Iron Armor, holding a Netherite Sword in its main hand.
Tips, Variations & Materials Needed
- Materials Needed: Stripped Bamboo, Dark Oak Wood, Spruce Trapdoors, White Concrete, Flower Pots, Bamboo, Armor Stand.
- Variation: Place custom banners with minimalist Japanese motifs on both sides of the backdrop.
- Tip: Light the base with Candles or Redstone Torches placed under trapdoors for subtle, ambient lighting.
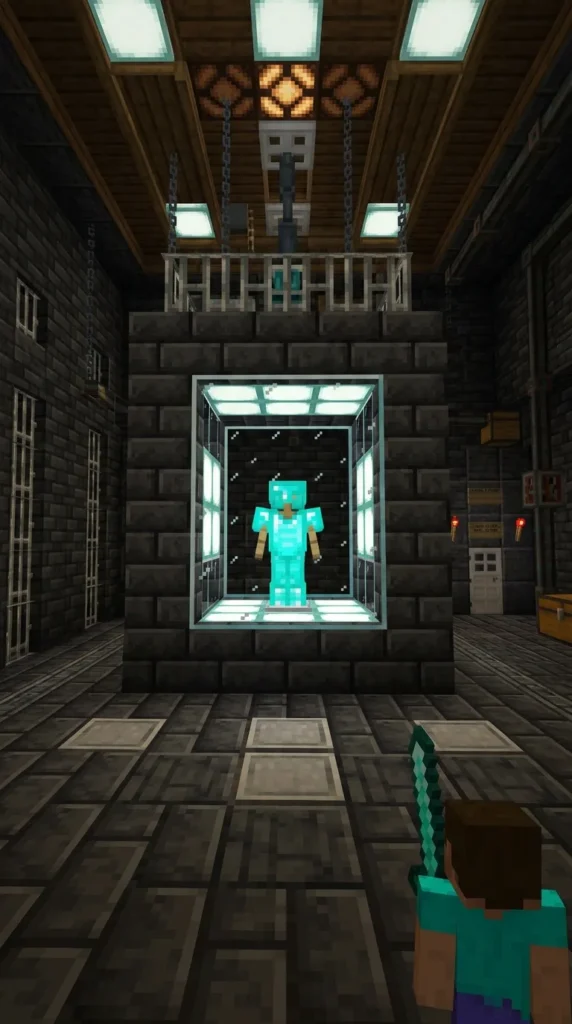
8. Sunken Shipwreck Deep-Sea Diver Display
What This Idea Means
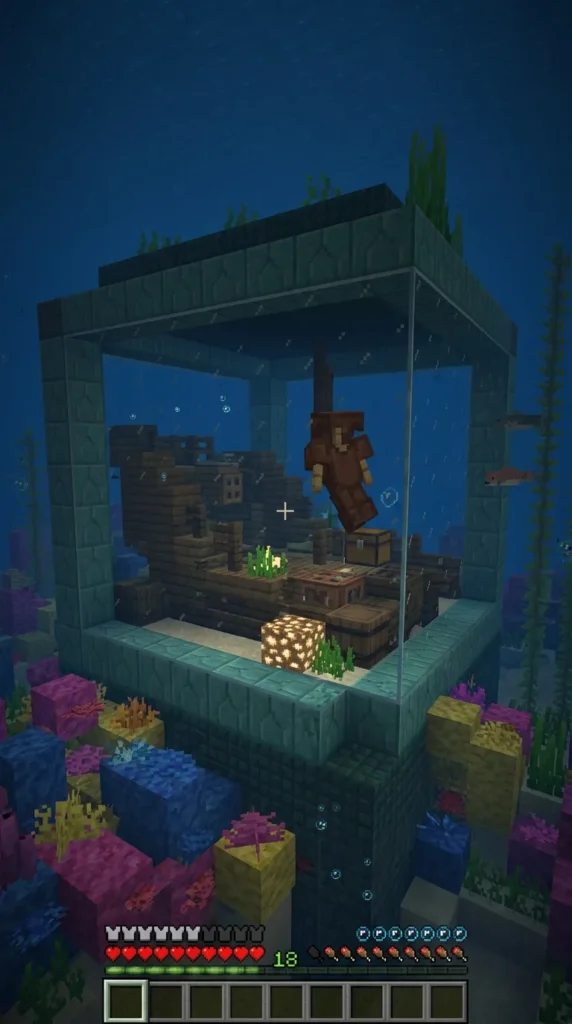
A unique aquatic display that looks like an old-fashioned diving suit or underwater relic preserved inside a glass aquarium or flooded ruin.
How to Make It
- Build an Aquarium Enclosure: Build a 3x3x4 glass tank filled with source water blocks.
- Decorate the Floor: Lay down Prismarine Bricks, Sand, Coral Blocks, Sea Pickles, and Kelp inside the water tank.
- Position the Armor Stand: Place the stand underwater on top of a Chiseled Prismarine block.
- Equip the Suit: Dress the stand in Leather Armor dyed brown/orange (to look like copper vintage diving suits) or Turtle Shell helmet.
Tips, Variations & Materials Needed
- Materials Needed: Glass, Water Buckets, Coral Blocks, Sea Pickles, Prismarine, Turtle Shell, Armor Stand.
- Variation: Place Glow Squid inside the tank or Soul Lanterns underwater for a glowing abyssal look.
- Tip: Use Sea Pickles underwater directly next to the armor stand for soft, natural lighting without taking up bulk.
9. Modern Glass & Quartz Luxury Closet
What This Idea Means
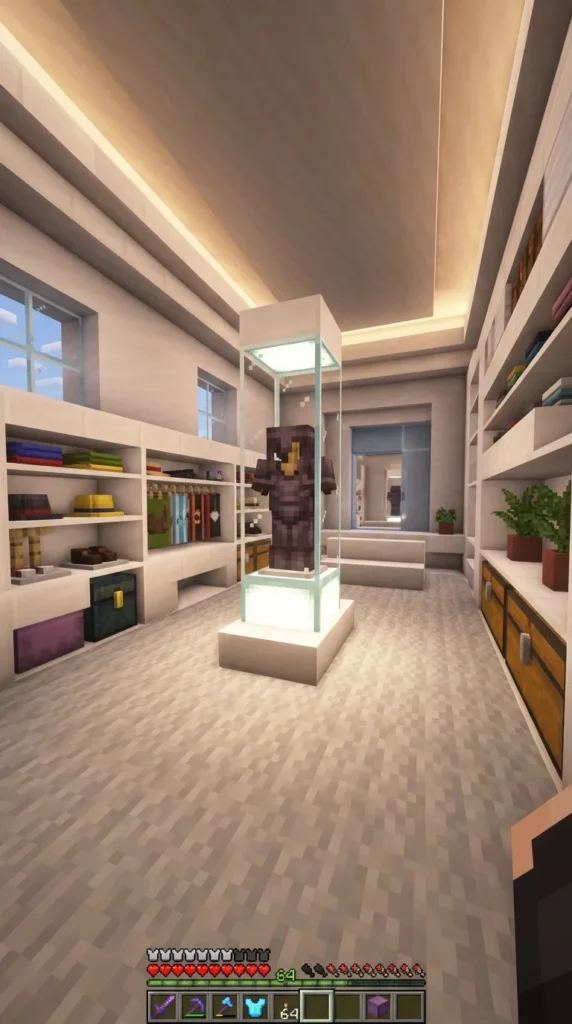
Ideal for modern houses, mansions, and aesthetic penthouses. This setup mimics high-end luxury boutique displays with minimalist lines, bright neutral tones, and crisp backlighting.
How to Make It
- Build Minimalist Wall: Lay a backdrop of Smooth Quartz or White Terracotta.
- Floor Framing: Set Light Gray Carpet or Polished Diorite as the flooring.
- Install Recessed Lighting: Hide Sea Lanterns or Froglights in the ceiling above, covered with White Stained Glass.
- Glass Closet Enclosure: Surround individual armor stands in sleek 1×1 glass columns with Iron Trapdoor tops and bottoms.
Tips, Variations & Materials Needed
- Materials Needed: Smooth Quartz, Sea Lanterns, White Stained Glass, Light Gray Carpet, Iron Trapdoors.
- Variation: Build a walk-in closet array with 4-6 adjacent glass pods displaying different armor sets side-by-side.
- Tip: Place Item Frames above each glass pod containing icons representing the specialized enchantments of each set.
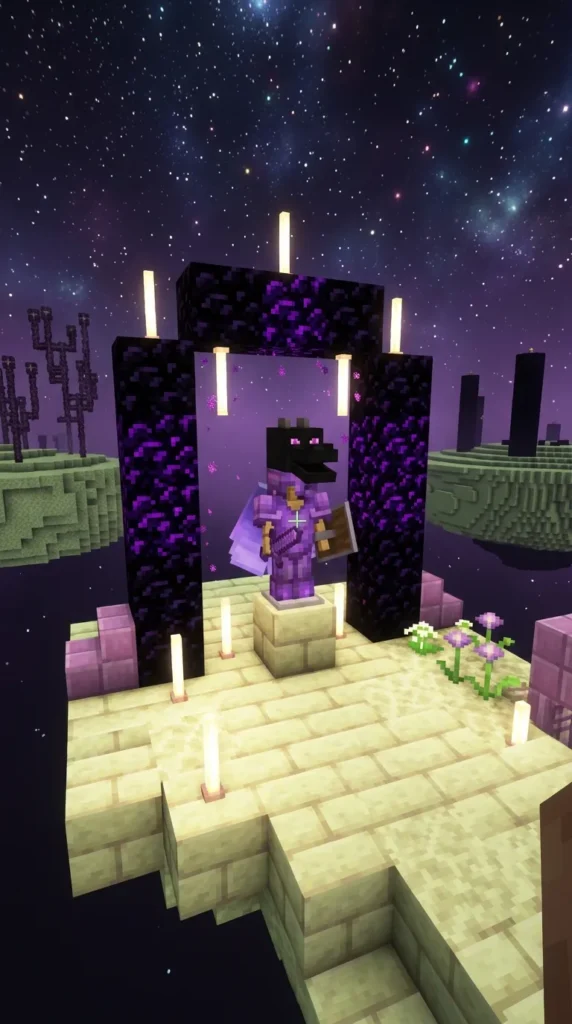
10. Celestial End-Portal Guardian Stand
What This Idea Means
A cosmic, mystical display that leverages the rich purples, dark textures, and galaxy vibes of End City materials and Obsidian.
How to Make It
- Platform Base: Create an octagon or square base out of End Stone Bricks and Purpur Slabs.
- Portal Backing: Build a frame behind the stand using Obsidian and Crying Obsidian.
- Lighting: Place End Rods upright on top of End Stone Brick Walls like minimalist torches around the stand.
- Mount Armor: Equip the stand with Elytra and a Dragon Head, or Enchanted Diamond gear.
Tips, Variations & Materials Needed
- Materials Needed: End Stone Bricks, Purpur Slabs, Obsidian, Crying Obsidian, End Rods, Elytra, Dragon Head.
- Variation: Place an End Crystal behind protective glass behind the armor stand to create a floating, beaming core effect.
- Tip: Incorporate Chorus Fruit plants near the base to add natural alien vegetation.
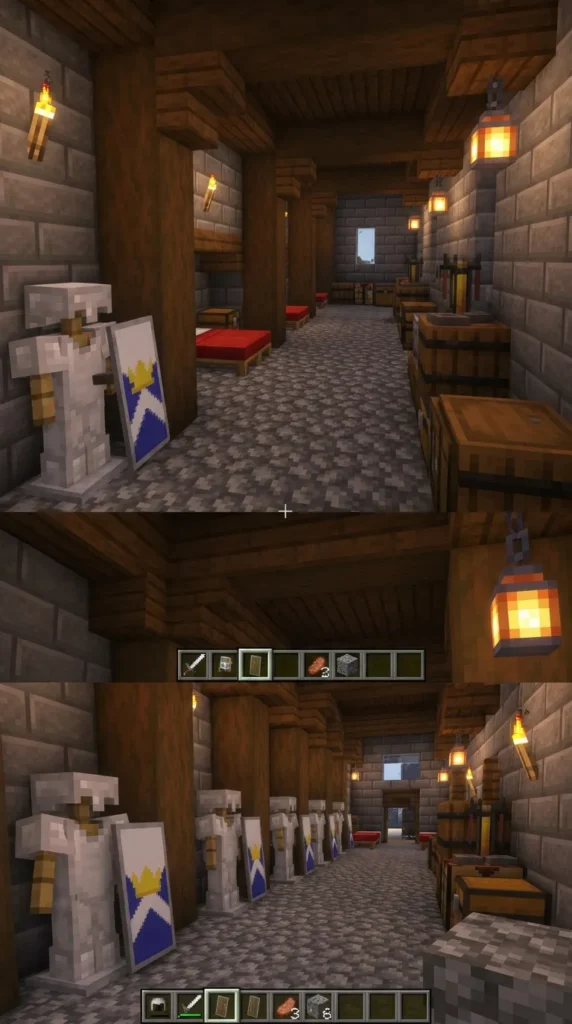
11. Royal Castle Guard Barracks Display
What This Idea Means
A functional, multi-stand armory setup designed to look like a full garrison’s equipment locker inside a castle guardhouse or fortress wall.
How to Make It
- Wall Niche: Line up a long wall section using Stone Bricks and Spruce Wood Pillars.
- Dividers: Build 1-block wide vertical dividers using Spruce Fence or Dark Oak Fences between each armor stand bay.
- Gear Storage: Place Chests or Barrel modules underneath each stand where extra tools and supplies are stored.
- Equip Sets: Place multiple armor stands in a row, fully geared in Iron or Chainmail armor with shields in off-hands.
Tips, Variations & Materials Needed
- Materials Needed: Stone Bricks, Spruce Pillars, Barrels, Fences, Armor Stands, Shields, Iron Armor.
- Variation: Hang weapon racks (Item Frames with Swords and Axes) above each individual armor station.
- Tip: Keep lighting rustic with Wall Lanterns placed on every third pillar to avoid visual clutter.
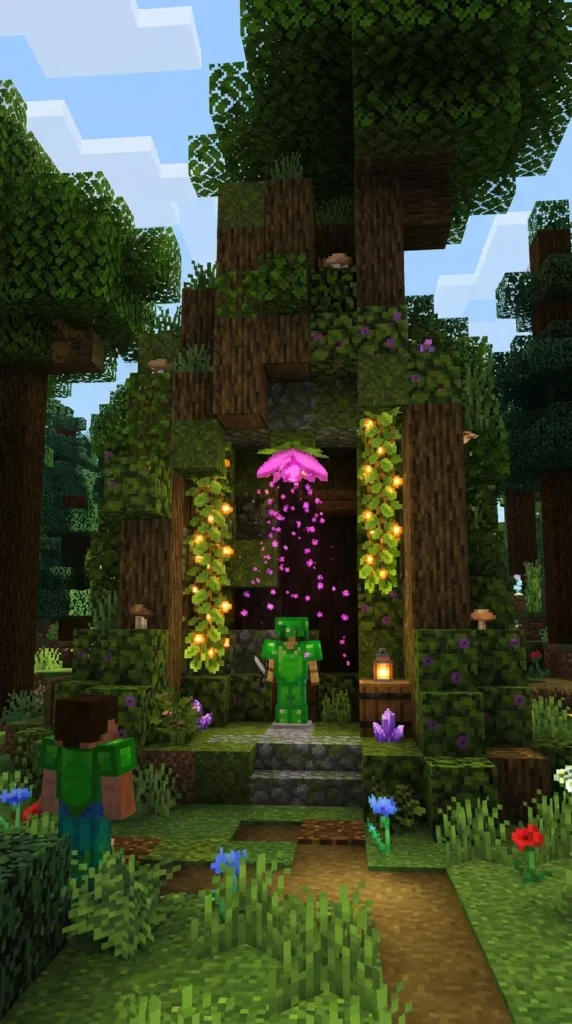
12. Nature Spirit Woodland Sentinel
What This Idea Means
An organic, fantasy-inspired display where the armor stand appears integrated into a hollowed-out ancient tree or magical fairy grove.
How to Make It
- Trunk Construction: Build a hollow trunk section using Oak Logs, Stripped Oak, and Rooted Dirt.
- Niche Interior: Carve out a 2-block high cavity inside the tree trunk and line it with Glow Lichen and Moss Blocks.
- Foliage Decoration: Canopy the top with Oak Leaves, Flowering Azalea, and hanging Cave Vines with Glow Berries.
- Armor Setup: Equip the stand with Leather Armor dyed in natural greens and browns, or Gold Armor to look like a sun spirit.
Tips, Variations & Materials Needed
- Materials Needed: Oak Logs, Rooted Dirt, Moss Blocks, Glow Berries, Azalea Leaves, Armor Stand.
- Variation: Place Spore Blossoms high in the canopy to shower green particles around the spirit stand.
- Tip: Surround the base of the trunk with wild mushrooms, Ferns, and Moss Slabs.
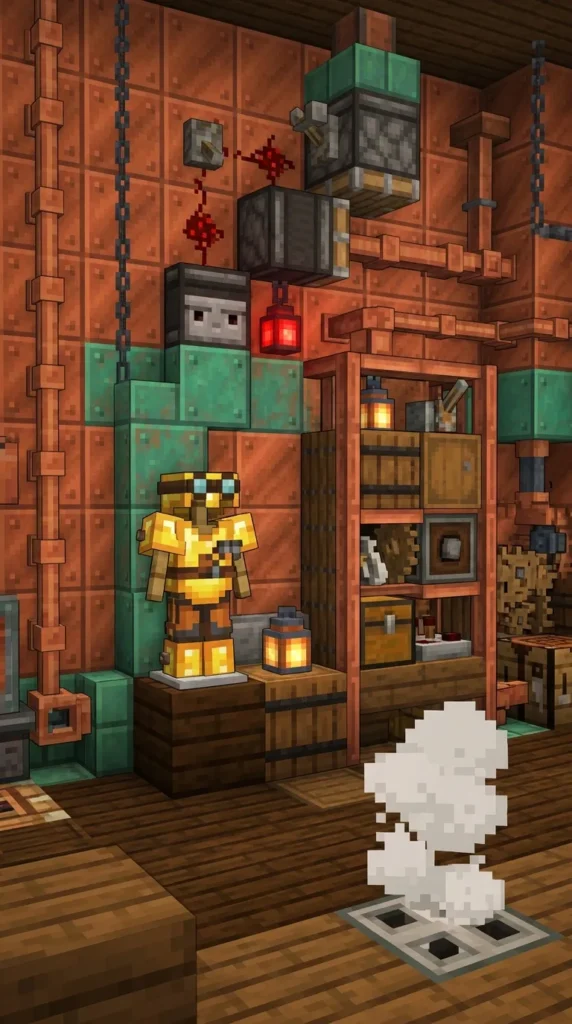
13. Steampunk Copper Brass Engine Wardrobe
What This Idea Means
A industrial, Victorian-futuristic display featuring oxidized copper blocks, glowing redstone components, lightning rods, and exposed pipes.
How to Make It
- Background Frame: Construct a wall module using Cut Copper, Weathered Copper, and Mud Bricks.
- Piping Detail: Run Lightning Rods horizontally and vertically behind and beside the armor stand location to look like brass steam pipes.
- Machinery Accents: Mount Observers, Redstone Repeaters, and Grindstones surrounding the frame.
- Armor Setup: Outfit the stand in Gold Armor or Leather Armor dyed warm orange/copper tones.
Tips, Variations & Materials Needed
- Materials Needed: Cut Copper, Lightning Rods, Grindstones, Observers, Redstone Components, Armor Stand.
- Variation: Combine un-oxidized orange copper with fully oxidized green copper for high visual contrast.
- Tip: Place a Smoker underneath an Iron Trapdoor below the stand so smoke billows up through the grate.
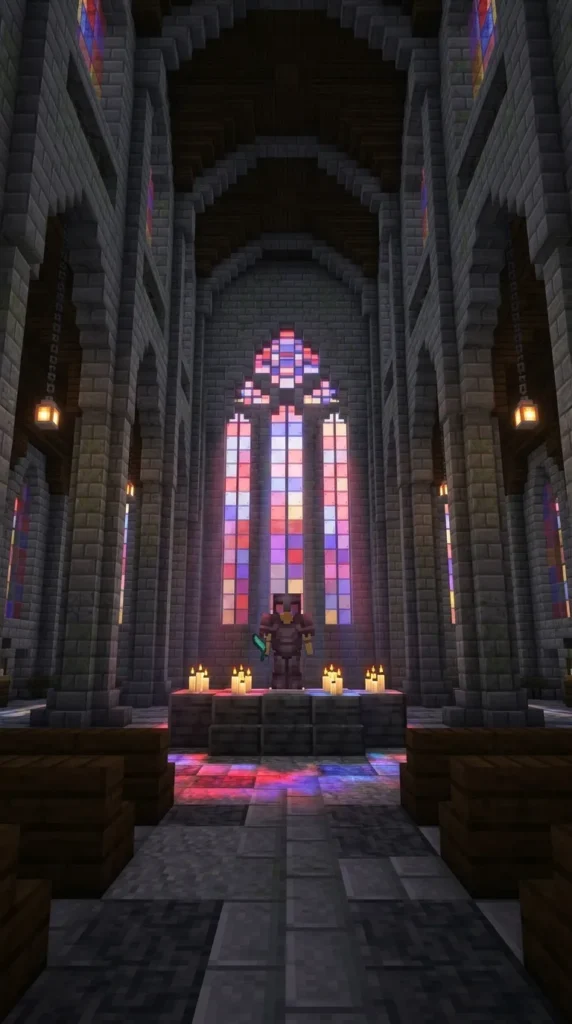
14. Gothic Cathedral Stained Glass Trophy
What This Idea Means
A dramatic, high-ceiling display where light shines through colorful stained glass windows directly onto your favorite armor sets, casting artistic shadows.
How to Make It
- Window Frame: Build a tall 3×7 pointed arch window using Deepslate Tile Stairs and Walls.
- Stained Glass Design: Fill the window with vibrant Red, Blue, Yellow, and Purple Stained Glass patterns.
- Altar Base: Build a 3-step elevated altar out of Polished Deepslate in front of the window base.
- Stand Placement: Place the stand at the apex of the altar, haloed by the glass behind it.
Tips, Variations & Materials Needed
- Materials Needed: Deepslate Tiles, Stained Glass Panes, Candles, Armor Stand, Enchanted Gear.
- Variation: Place lit Candle clusters on the steps of the altar to enhance the solemn cathedral vibe.
- Tip: If playing with shaders, position this window facing East so morning sunlight streams directly through the glass onto the armor.
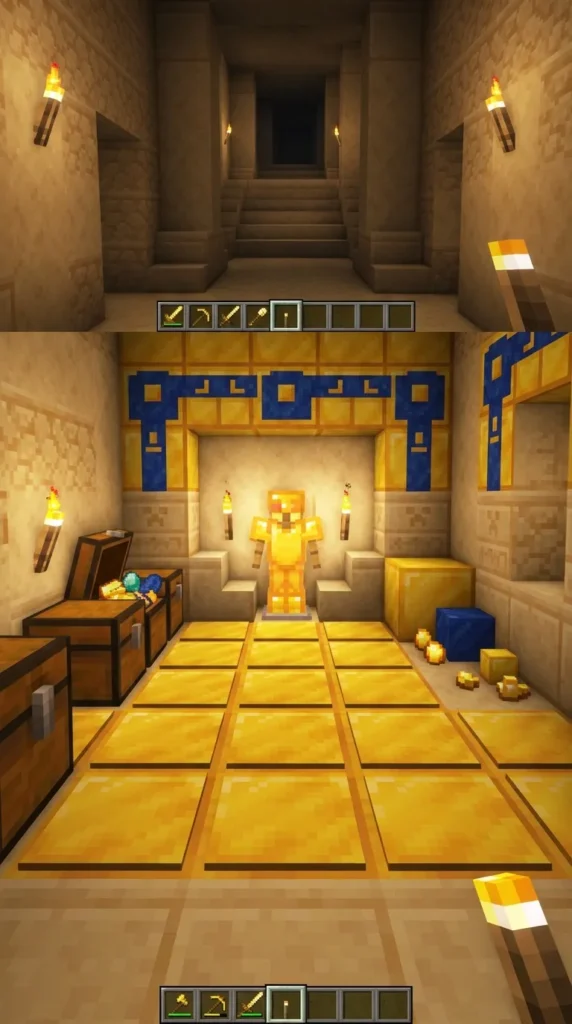

15. Desert Pharaoh Gold & Lapis Tomb
What This Idea Means
Designed for desert pyramids, sandstone mansions, or Egyptian-themed builds. This display places Golden Armor inside a luxurious tomb filled with gold treasure and lapis lazuli.
How to Make It
- Tomb Arch: Build a wall alcove out of Smooth Sandstone, Cut Sandstone, and Chiseled Sandstone.
- Inlay Accents: Inlay Lapis Lazuli Blocks and Gold Blocks into the walls around the arch.
- Treasure Floor: Cover the surrounding floor with Gold Pressure Plates, Raw Gold Blocks, and Treasure Chests.
- Armor Setup: Equip the stand with full Golden Armor, holding a Golden Sword or Trident.
Tips, Variations & Materials Needed
- Materials Needed: Sandstone, Lapis Lazuli Blocks, Gold Blocks, Chests, Golden Armor, Armor Stand.
- Variation: Add Birch Trapdoors or Sandstone Stairs to form a royal sarcophagus structure around the stand.
- Tip: Place Sea Lanterns behind Sandstone Stairs to give off a subtle hidden glow without exposing bright light blocks.
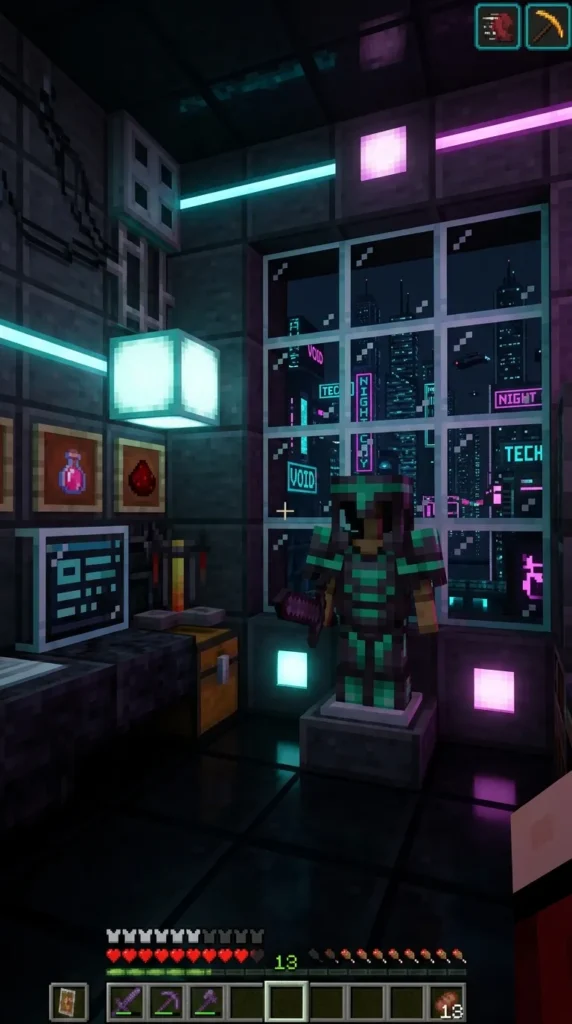
16. Cyberpunk Neon Netherite Display
What This Idea Means
A futuristic, neon-drenched display suited for sci-fi, cyberpunk, or synthwave aesthetic bases. Uses high-contrast light blocks and dark materials.
How to Make It
- Chamber Base: Build a dark box using Gray Concrete or Polished Basalt.
- Neon Trim: Frame the inner edges of the display box with Froglights (Ochre, Verdant, or Pearlescent) or Sea Lanterns layered with colored glass.
- Glass Panel: Place Magenta or Cyan Stained Glass Panes around the armor display.
- Armor Setup: Outfit the stand in Netherite Armor trimmed with bright Armor Trims (like Emerald, Amethyst, or Diamond trims).
Tips, Variations & Materials Needed
- Materials Needed: Gray Concrete, Froglights, Colored Stained Glass, Netherite Armor with Armor Trims.
- Variation: Use multiple contrasting colors (e.g., Pink and Cyan) on opposite sides for classic cyberpunk lighting.
- Tip: End Rods mounted horizontally act as great neon light tubes.
17. Winter Citadel Frost Armor Shrine
What This Idea Means
An icy, majestic display set within a snowy mountain castle or icy fortress. Features packed ice, blue ice, snow layers, and cool blue ambient lighting.
How to Make It
- Ice Niche: Construct a backdrop using Packed Ice and Blue Ice, detailed with Quartz Pillars.
- Icicle Details: Hang Dripstone (or glass panes) and place Pointed Dripstone beneath to look like hanging icicles.
- Base Platform: Build a raised pedestal out of Snow Blocks topped with a layer of Smooth Quartz Slabs.
- Armor Setup: Equip Diamond Armor or Leather Armor dyed pale icy blue.
Tips, Variations & Materials Needed
- Materials Needed: Packed Ice, Blue Ice, Snow Blocks, Quartz Pillars, Soul Lanterns, Diamond Armor.
- Variation: Add Soul Fire on Soul Soil in front of the display for cold blue flames that won’t melt the ice.
- Tip: Place Light Gray Stained Glass around the stand to give it a frozen-in-ice appearance.
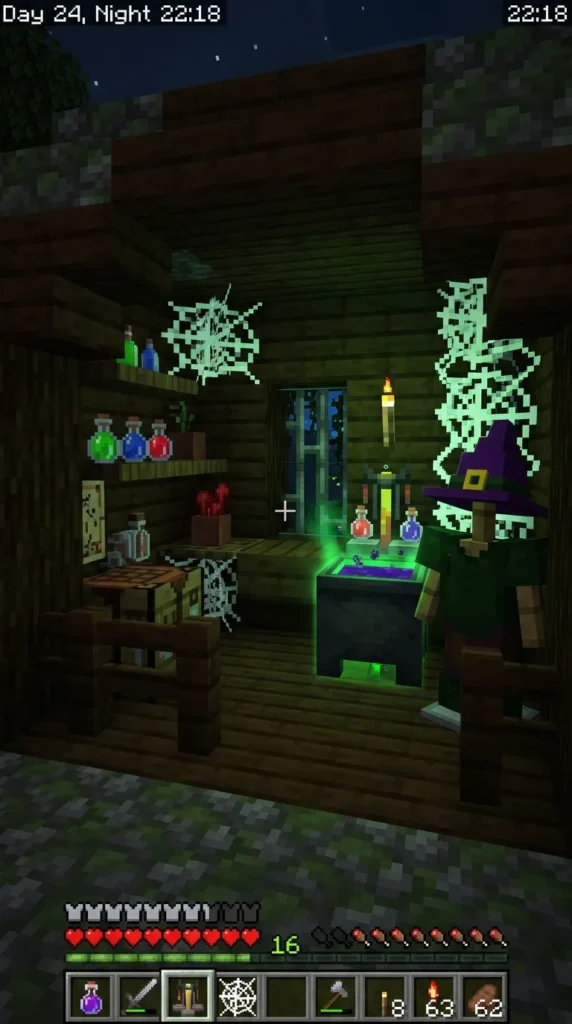
18. Witch’s Alchemical Brew Closet
What This Idea Means
A creepy, magical display tucked away inside a witch’s hut, brewing room, or dark dungeon. Filled with potions, cauldron steam, and spooky oddities.
How to Make It
- Alcove Frame: Build a dark wood frame out of Mangrove, Dark Oak, or Crimson Wood.
- Alchemical Surroundings: Place a Cauldron filled with colored water in front, flanked by Brewing Stands and Potions on shelves (Item Frames).
- Background Detail: Place Cobwebs in the corners and Cobblestone Walls for a weathered, dusty look.
- Armor Setup: Equip dyed Leather Armor (dark purple, black, or olive green) with a Leather Cap or Turtle Helmet.
Tips, Variations & Materials Needed
- Materials Needed: Dark Oak Logs, Brewing Stand, Cauldron, Potions, Cobwebs, Dyed Leather Armor.
- Variation: Place a Campfire hidden beneath the Cauldron so bubbles and steam rise up in front of the armor display.
- Tip: Put a Wither Skeleton Skull or Carved Pumpkin on top of the stand for a Halloween-esque dark magic vibe.
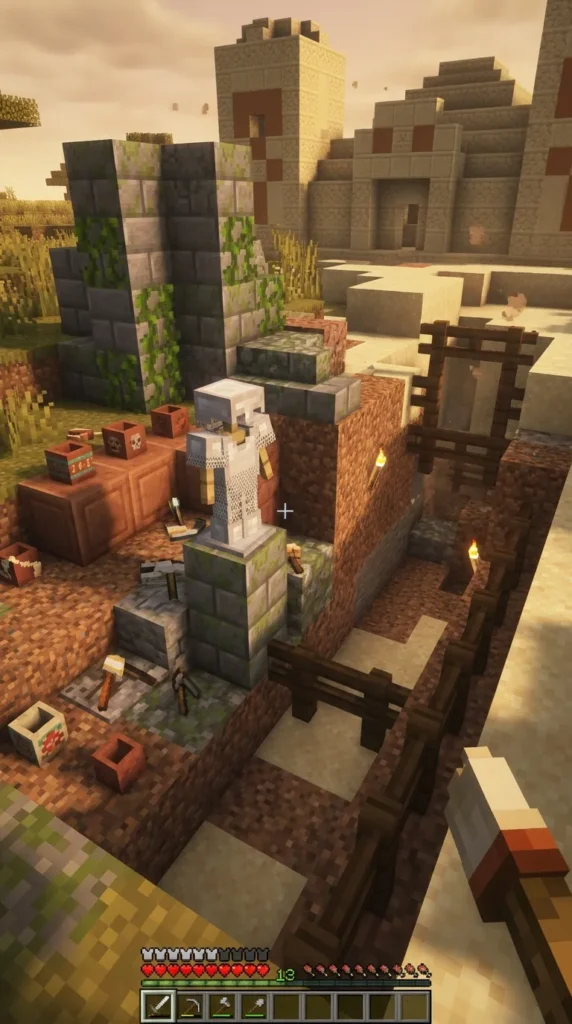
19. Ancient Ruin Archaeology Armor Vault
What This Idea Means
Designed to look like an excavated archaeological relic discovered inside jungle ruins, ocean ruins, or ancient trail ruins.
How to Make It
- Ruin Wall: Build a weathered wall using Mud Bricks, Mossy Stone Bricks, Crack Stone Bricks, and Coarse Dirt.
- Overgrowth: Let Suspicious Sand/Gravel, Vines, and Moss creep heavily across the display area.
- Relic Platform: Set the armor stand on a partially broken Chiseled Stone Brick pillar that looks decayed.
- Armor Setup: Outfit the stand with weathered Chainmail or Leather Armor with Wayfinder/Raiser Armor Trims.
Tips, Variations & Materials Needed
- Materials Needed: Mud Bricks, Mossy Stone Bricks, Vines, Suspicious Sand, Decorated Pots, Chainmail Armor.
- Variation: Place Decorated Pots and Candles around the base to look like historical artifacts left behind by ancient civilizations.
- Tip: Use Leaf blocks with string underneath to stop them from growing uncontrollably over the display.
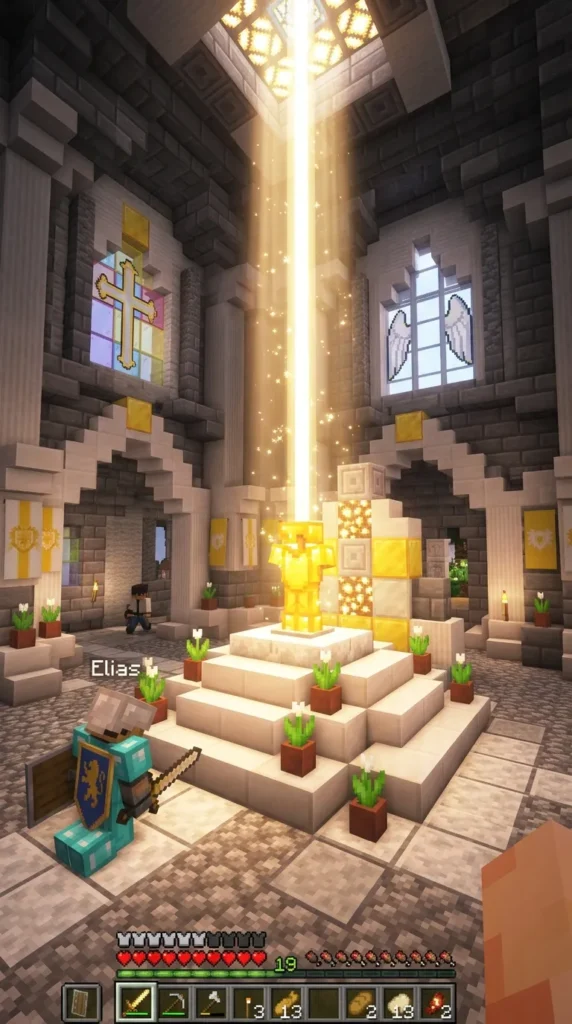
20. Paladin Sacred Light Shrine
What This Idea Means
A holy, radiant display meant to showcase high-tier holy gear. Bathed in bright, golden sunlight and glowing white hues, perfect for paladin or angel-themed builds.
How to Make It
- Sunlit Shaft: Build a vertical ceiling shaft directly above the display leading all the way up to the sky to let natural sunlight hit the stand.
- Golden Frame: Frame the display using Smooth Quartz, Calcite, and Gold Ore/Raw Gold Blocks.
- Glow Details: Hide Sea Lanterns behind White Carpet on the floor around the pedestal.
- Armor Setup: Equip Golden Armor or Enchanted Diamond Armor with Vex/Rib Armor Trims in Gold.
Tips, Variations & Materials Needed
- Materials Needed: Quartz, Calcite, Gold Blocks, Sea Lanterns, White Carpet, Golden Armor.
- Variation: Surround the base with White Tulips and Birch Leaves for a soft, serene garden shrine feel.
- Tip: Place an End Rod directly above the armor stand to serve as a focused downlight during nighttime hours.