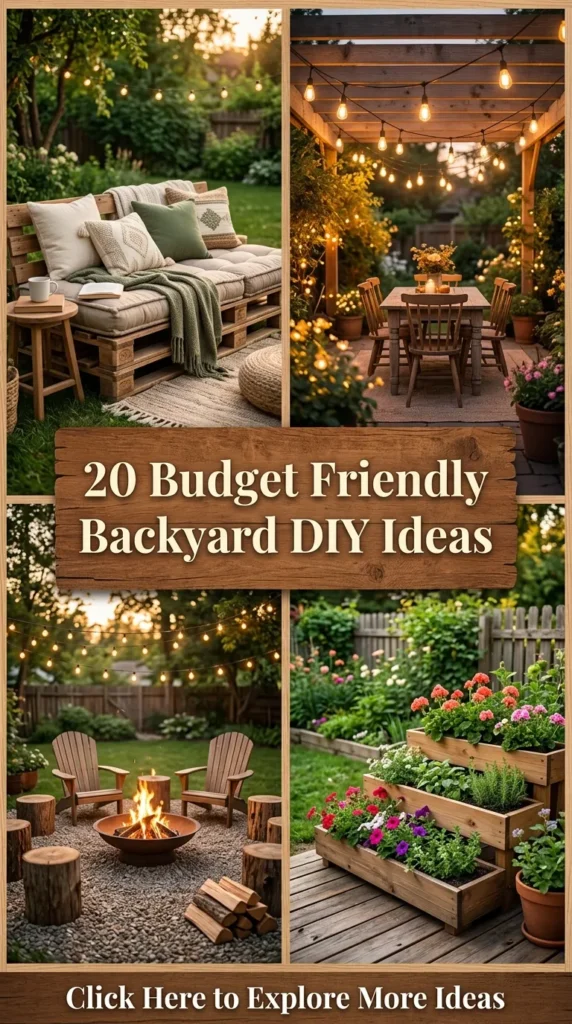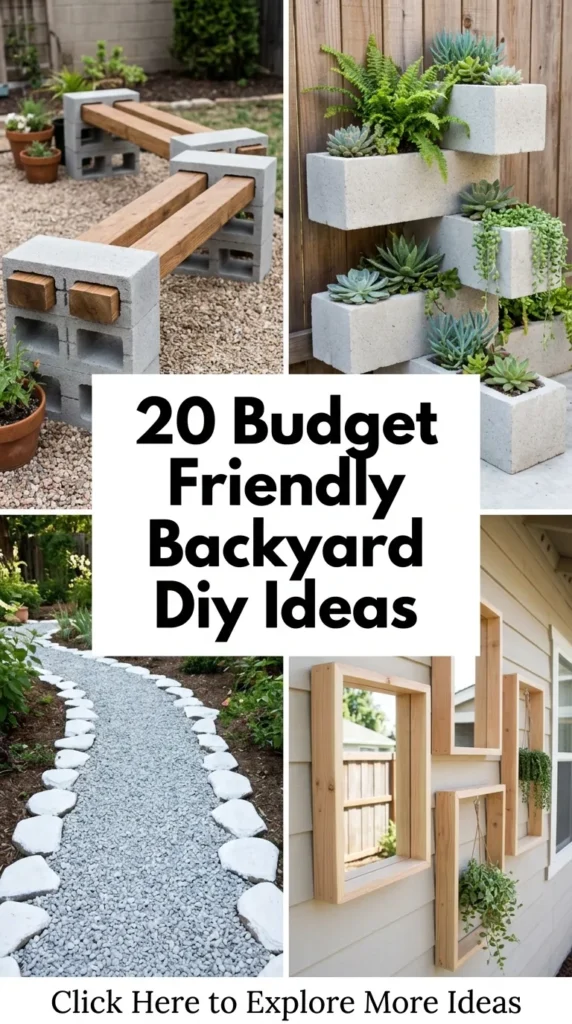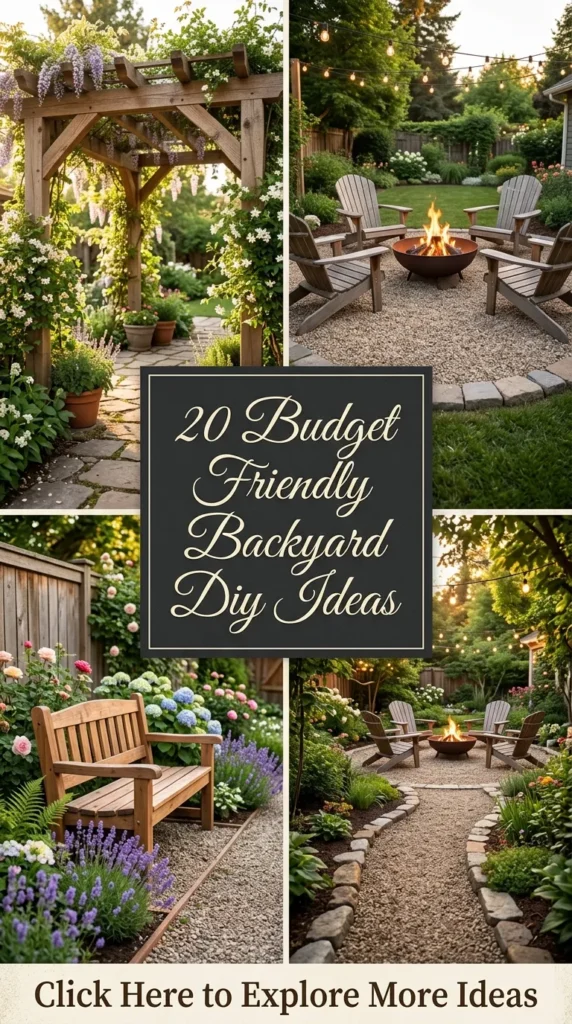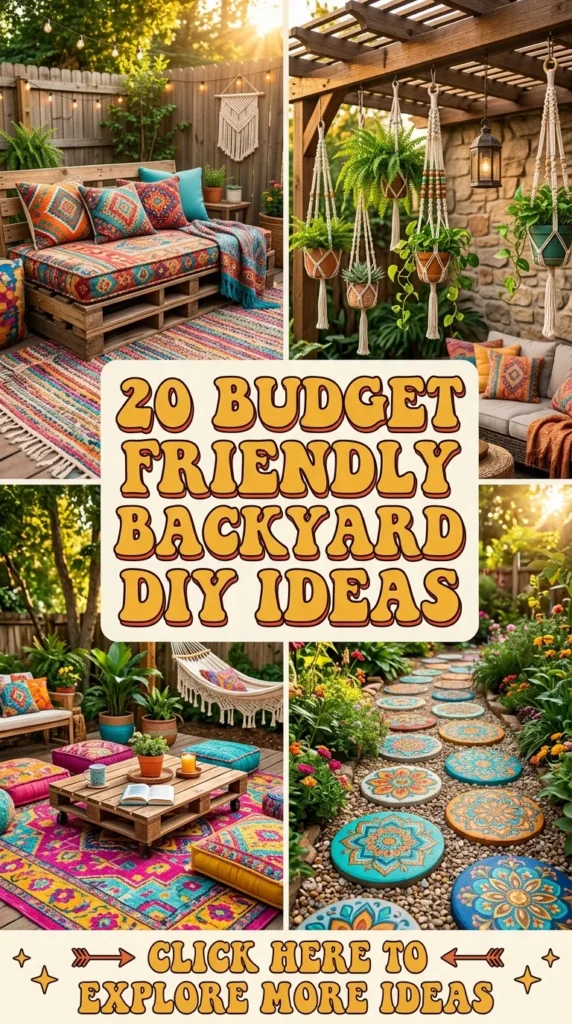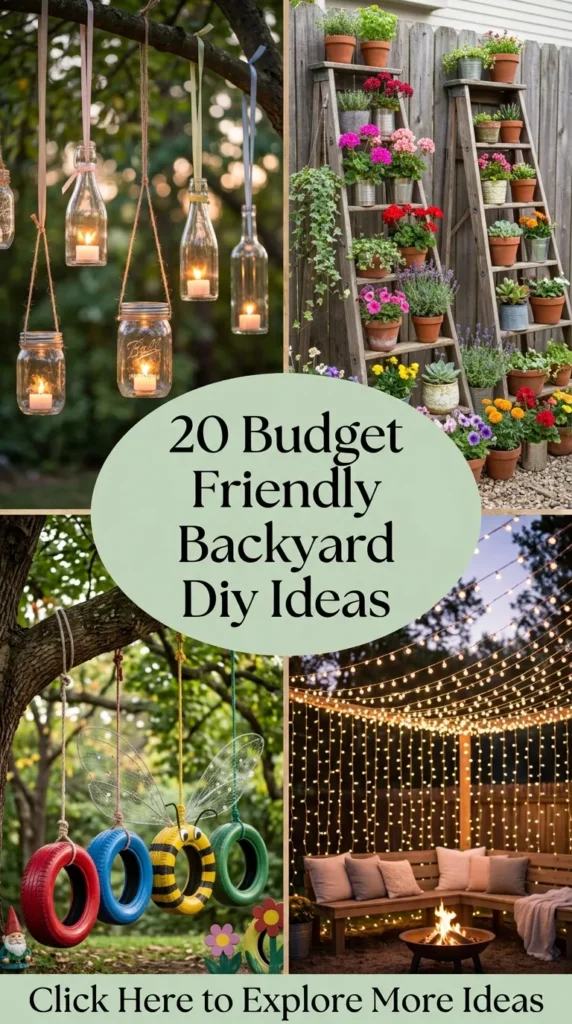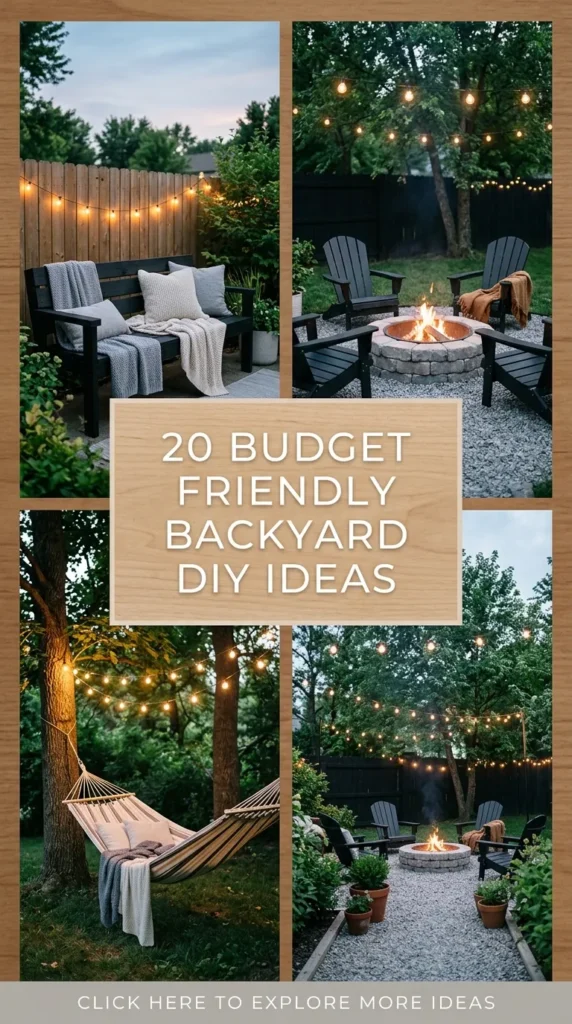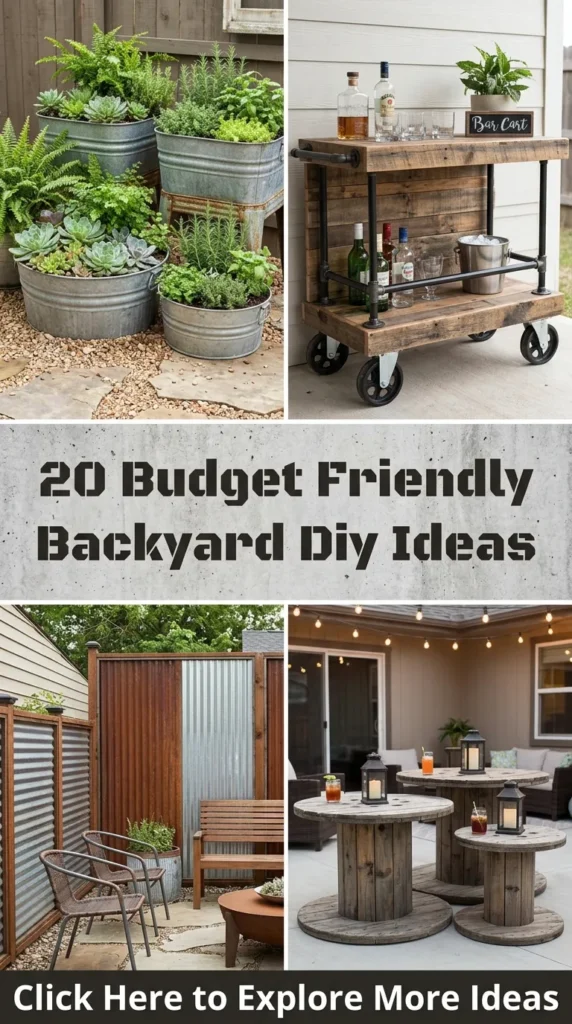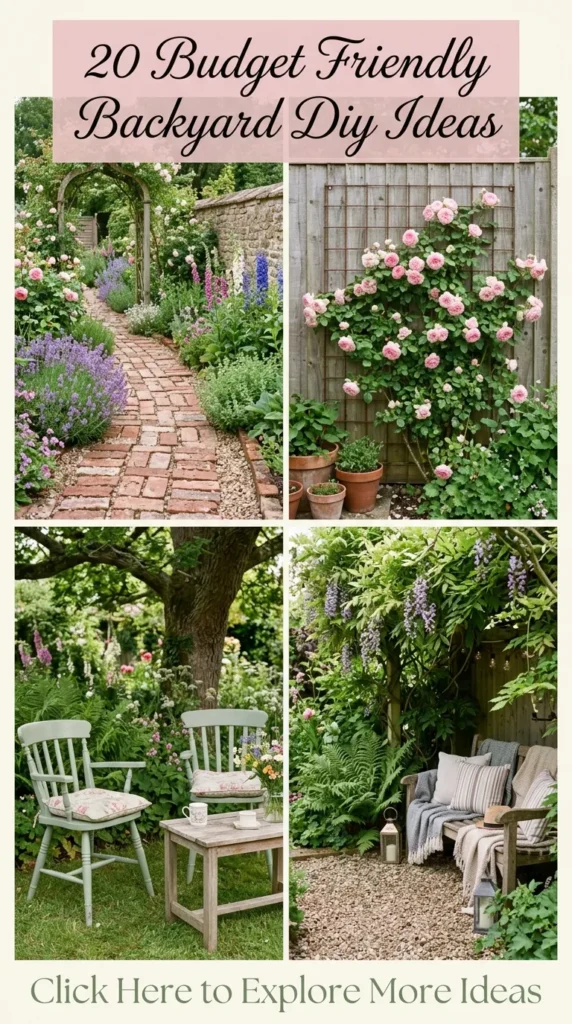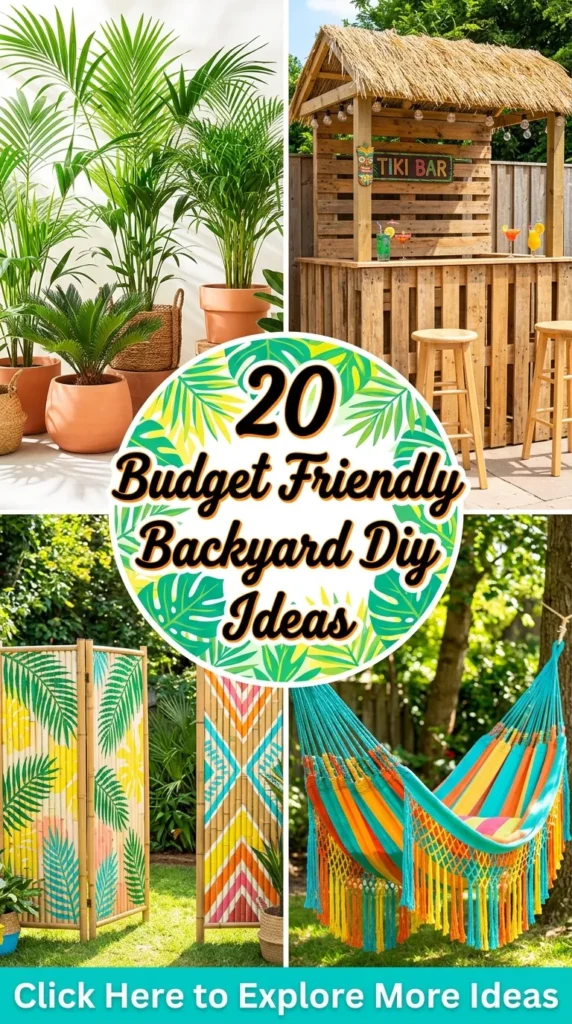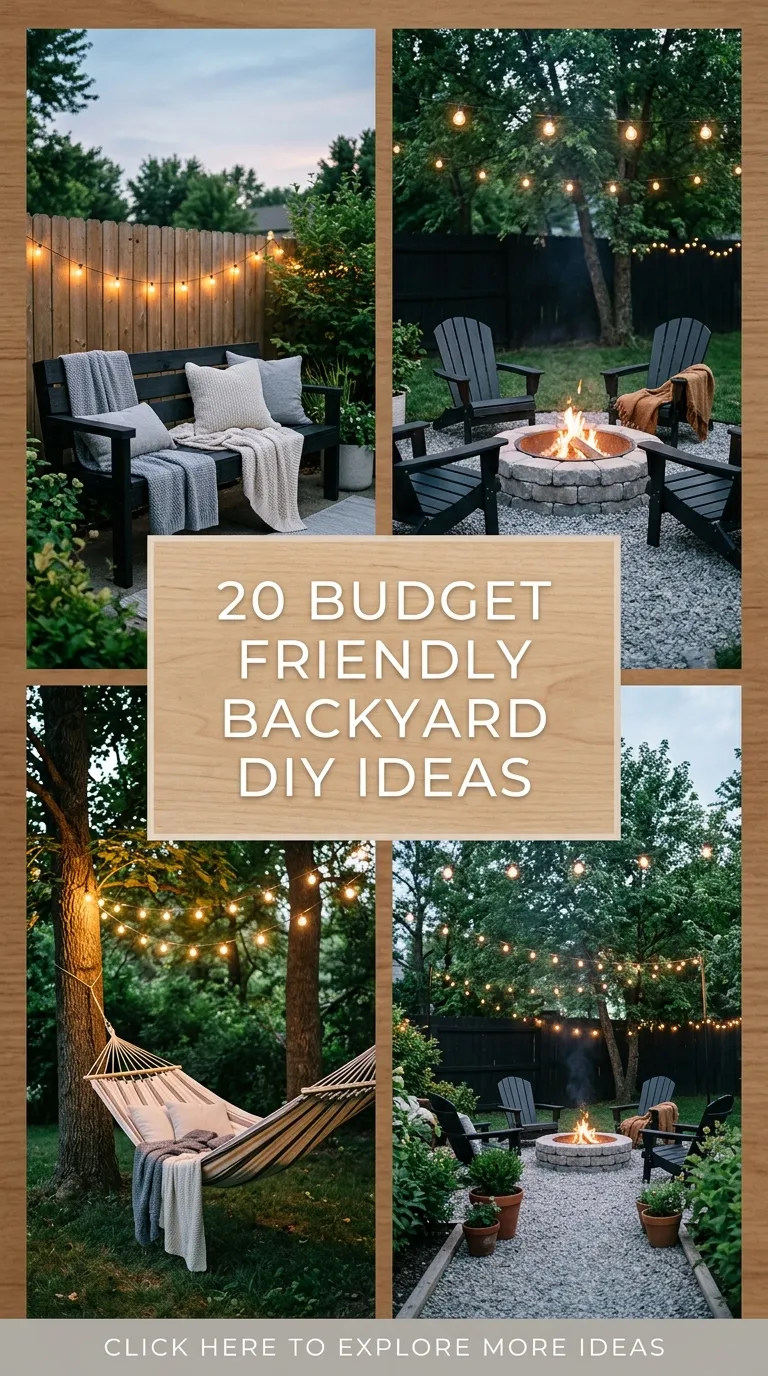
Transforming an outdoor space into a peaceful, photo-worthy sanctuary does not require a massive landscape redesign or a exorbitant budget. With a few creative techniques, repurposed materials, and a weekend of effort, you can turn any ordinary lawn, patio, or neglected corner into an inviting retreat.
This guide highlights 20 aesthetic, budget-friendly DIY projects designed to elevate your backyard’s visual charm, functional comfort, and atmosphere. Each project includes a breakdown of what the concept entails, step-by-step instructions, essential materials, and practical design variations.
1. String Light Canopy with Wooden Posts
Introduction
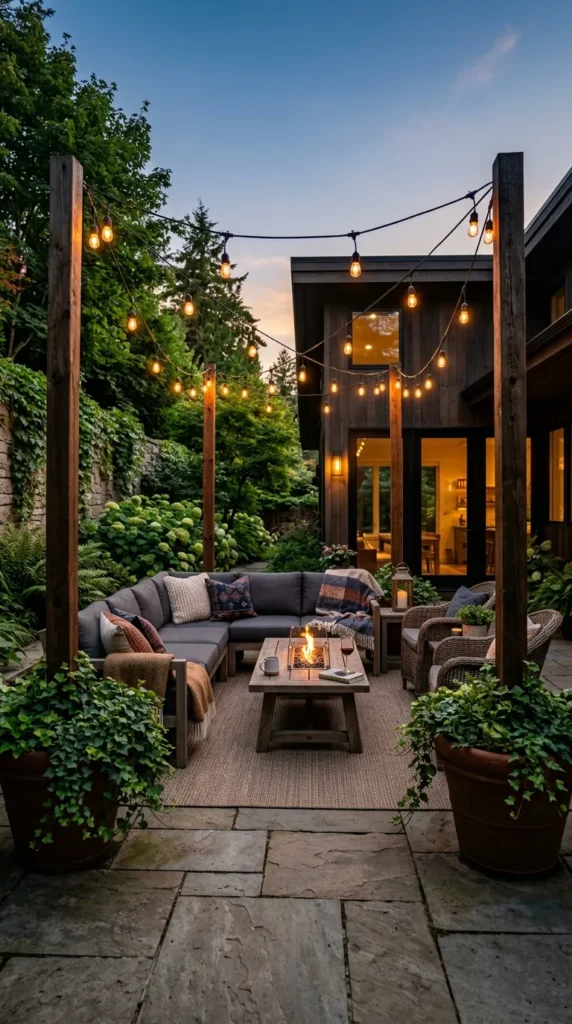
Illumination defines the mood of an outdoor space after sunset. A string light canopy creates a warm, floating glow over a patio, dining area, or seating nook, turning simple evenings into magical outdoor gatherings.
What This Idea Means
Instead of attaching lights solely along house eaves, this method uses freestanding wooden posts anchored in decorative planters or gravel buckets. It allows you to suspend overhead globe lights across open areas without structural attachment points.
How to Make It
- Prepare the Anchors: Place heavy-duty wooden posts (4×4 pressure-treated timber, approximately 8 to 10 feet tall) into large ceramic or metal planter pots.
- Secure with Concrete: Mix quick-setting concrete according to package instructions and pour it into each pot around the upright posts. Hold the posts straight using a spirit level until the concrete sets completely.
- Finish the Planters: Once cured, cover the hardened concrete base with a layer of drainage gravel, soil, and decorative greenery or cascading flowers.
- Attach Hardware: Screw heavy-duty eye hooks near the top of each timber post.
- String the Lights: Drape commercial-grade outdoor string lights between the posts, securing them with zip ties or carabiners. Connect to an outdoor-rated extension cord or timer.
Tips and Variations
- Solar Option: Use solar-powered string lights to eliminate the need for trailing power cables.
- Climbing Vines: Plant ivy or sweet peas at the base of the posts to cover the timber over time.
- Zig-Zag Pattern: Criss-cross string lights across the yard to create a rich overhead grid.
What You Need to Make It
- 4×4 pressure-treated wood posts (8–10 ft tall)
- Heavy ceramic or plastic planters
- Quick-setting concrete mix and water
- Heavy-duty screw eye hooks
- Outdoor commercial-grade string lights
- Drainage gravel, potting soil, and plants
2. Cinder Block & Wood Bench
Introduction
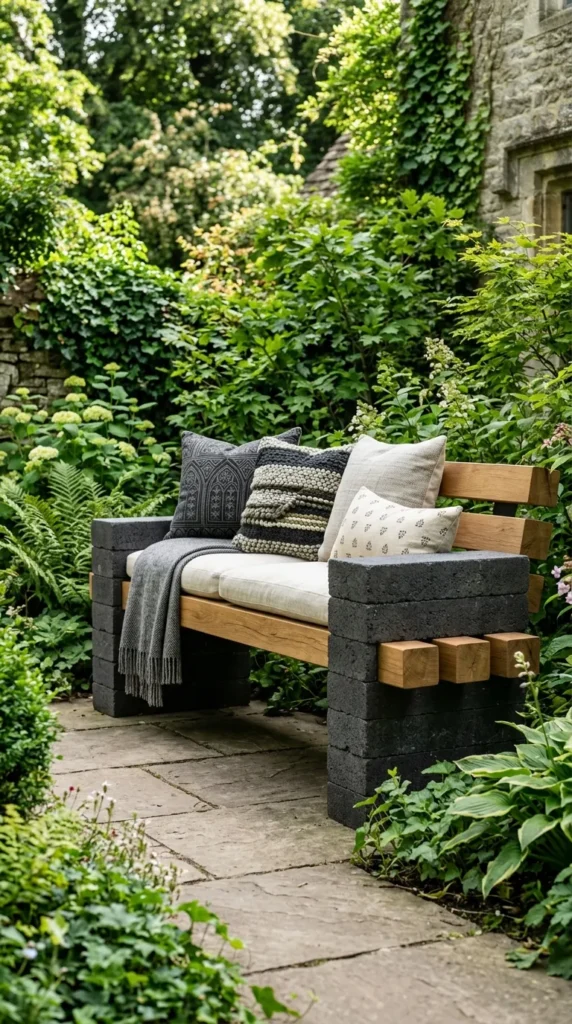
Modern minimalism meets rustic utility with a cinder block and timber bench. This robust outdoor seating solution can be built in an afternoon without complex carpentry skills.
What This Idea Means
By utilizing the open cores of concrete cinder blocks, heavy wooden beams can be slotted through to form a sturdy, structural bench. The blocks act as solid legs while the timber creates the seating surface.
How to Make It
- Prepare the Base: Clear a flat, level patch of ground using pavers or packed gravel to ensure stability.
- Stack the Blocks: Position two columns of cinder blocks upright on each side, placing them close enough to bridge the timber lengths. Stack them 2 to 3 blocks high using construction adhesive between layers.
- Insert the Timber: Slide 4×4 pressure-treated timber posts through the rectangular holes in the upper cinder blocks, bridging the distance between the two end columns.
- Sand and Paint: Sand the wooden beams to prevent splinters. Paint or stain the wood and cinder blocks in coordinating neutral tones like matte charcoal or crisp white.
- Add Textiles: Layer weather-resistant bench cushions, throw pillows, and outdoor blankets across the top timber.
Tips and Variations
- Planter Tops: Use the top open cores of the cinder blocks as mini planters for succulents or herbs.
- L-Shaped Sectional: Build three block bases to form an L-shaped corner bench for group gatherings.
What You Need to Make It
- 12–16 standard concrete cinder blocks
- Construction-grade adhesive
- 4×4 pressure-treated wood beams (6–8 ft long)
- Outdoor wood stain or exterior paint
- Outdoor bench cushions and throw pillows
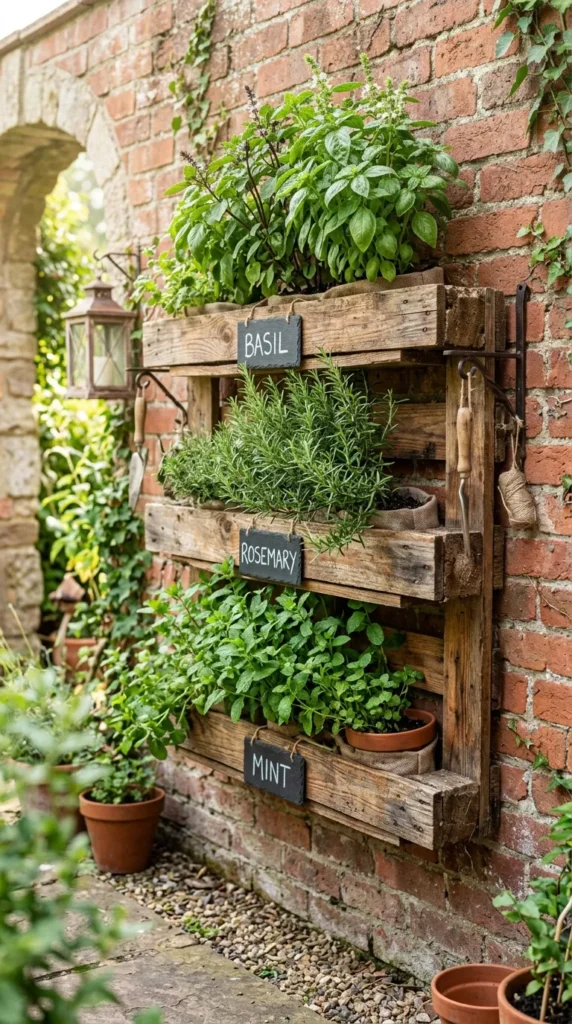
3. Pallet Wood Vertical Herb Garden
Introduction
Vertical gardening optimizes footprint while introducing lush greenery against fences or exterior walls. Upcycled wooden pallets offer a ideal frame for growing fresh cooking herbs and small flowers.
What This Idea Means
A vertical herb garden repurposed from shipping pallets mounts plant containers upward rather than outward, turning blank structural walls into vibrant, edible accent features.
How to Make It
- Prep the Pallet: Inspect a clean shipping pallet (look for an “HT” stamp indicating heat-treated wood). Sand away rough edges and splinters.
- Seal and Paint: Apply a coat of weather-resistant wood stain or non-toxic exterior paint to protect the timber against moisture rot.
- Create Shelf Bottoms: Attach scrap wood strips or heavy-duty landscape fabric across the bottom of each pallet rung to form self-contained planter boxes.
- Mount Securely: Anchor the pallet firmly to a exterior wall, sturdy fence, or free-standing post using heavy-duty brackets.
- Plant the Herbs: Fill each shelf slot with potting soil and plant culinary herbs such as basil, thyme, rosemary, mint, and cilantro.
Tips and Variations
- Chalkboard Labels: Paint the front face of each pallet rung with chalkboard paint to label your herbs.
- Drip Irrigation: Run a flexible micro-drip irrigation line down the back for automated watering.
What You Need to Make It
- Clean, heat-treated wooden pallet (marked HT)
- Sandpaper and paint/stain
- Landscape fabric or scrap timber
- Heavy-duty mounting wall brackets and screws
- High-quality potting soil
- Assorted herb starts
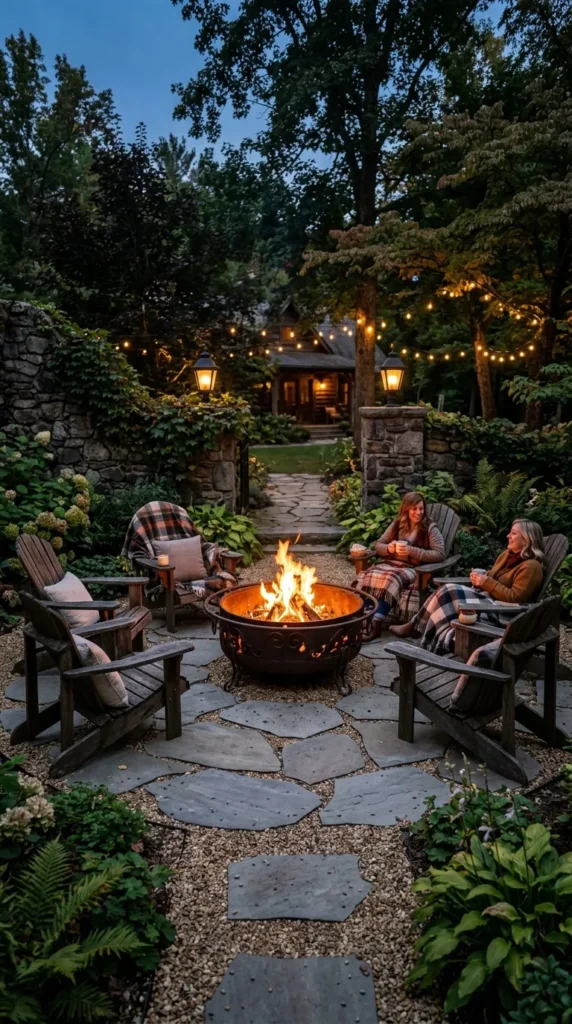
4. Pea Gravel & Flagstone Fire Pit Zone
Introduction
A defined fire pit zone serves as an inviting visual anchor for starlit conversations, s’mores, and cozy evening gatherings.
What This Idea Means
By excavating a small section of lawn and installing a layer of pea gravel interspersed with flat flagstones, you create a distinct, fire-safe patio area without laying concrete.
How to Make It
- Outline the Area: Mark out a circular or square area (roughly 10–12 feet across) using landscape spray paint.
- Excavate: Dig out grass and topsoil inside the perimeter to a depth of about 3 to 4 inches.
- Lay Landscape Fabric: Line the excavated pit with heavy-duty weed barrier fabric to prevent plant growth.
- Position Flagstones: Lay large, flat flagstones inside the circle where chairs and feet will rest.
- Fill with Gravel: Pour pea gravel around the flagstones until the surface is level. Tamp down firmly.
- Add the Fire Pit: Place a steel fire bowl or build a low stone masonry ring directly in the center.
Tips and Variations
- Steel Ring Liner: Use a pre-built steel fire ring as a guide and stack fire-rated bricks around it.
- Adirondack Seating: Surround the pit with classic wooden Adirondack chairs painted in warm, earthy tones.
What You Need to Make It
- Landscape spray paint and shovel
- Heavy-duty weed barrier fabric
- Flat flagstones or large pavers
- Bags of pea gravel
- Fire pit bowl or fire-rated masonry bricks
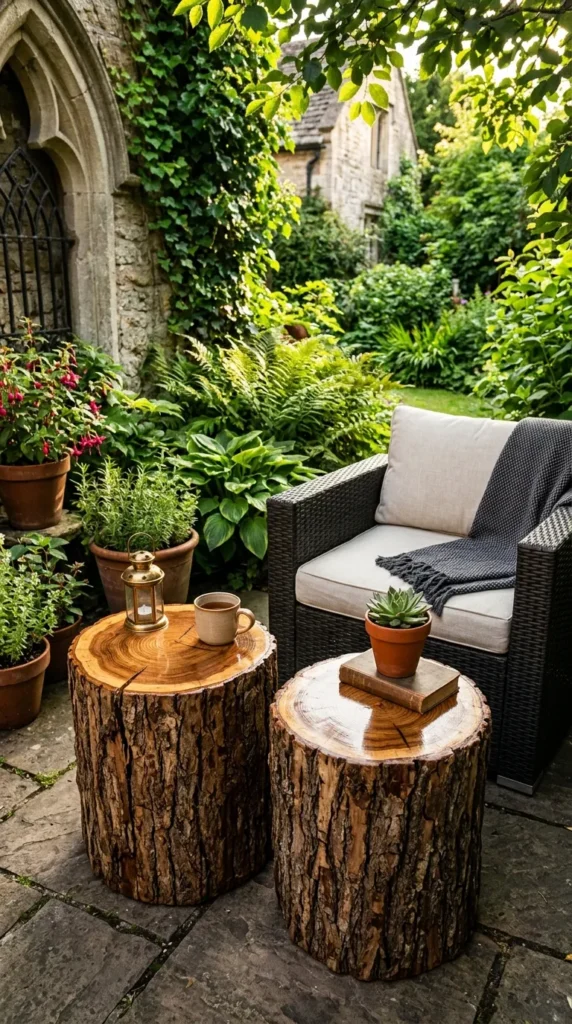
5. DIY Tree Stump Side Tables
Introduction
Bring organic, earthy elements into your outdoor seating layouts by converting reclaimed tree stumps into polished rustic side tables.
What This Idea Means
Hardwood tree trunks salvaged from fallen branches or local tree services are stripped, sanded, and sealed to yield solid, weather-resistant natural end tables.
How to Make It
- Source the Wood: Obtain dry, seasoned tree trunk segments (12–18 inches in diameter).
- Debark the Log: Use a chisel, crowbar, or draw knife to strip off loose bark down to the smooth inner wood.
- Sand Smooth: Sand the top flat surface and sides using coarse-grit sandpaper first, progressing to fine-grit for a sleek finish.
- Level the Base: Ensure both the top and bottom cuts are plumb so drinks won’t tip over.
- Seal for Outdoors: Apply 2–3 coats of clear exterior marine varnish or polyurethane to preserve the natural grain and guard against insect or moisture damage.
Tips and Variations
- Hairpin Legs: Attach 2-inch metal hairpin legs to the bottom for a mid-century modern aesthetic.
- Dip-Painted Base: Paint the bottom third of the stump in a crisp white or matte black shade for a modern contrast.
What You Need to Make It
- Seasoned tree trunk segment
- Wood chisel or pry bar
- Orbital sander with various sandpaper grits (60 to 220)
- Exterior polyurethane or clear spar varnish
- Paintbrush
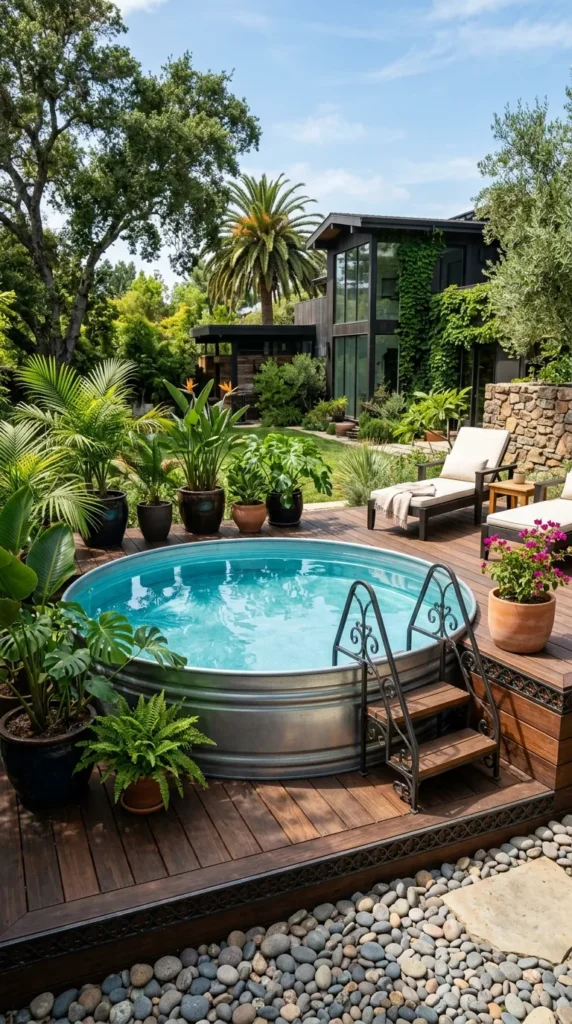
6. Stock Tank Dip Pool or Water Feature
Introduction
Stock tanks—traditionally used for watering livestock—have become popular budget-friendly alternatives to traditional plunge pools and garden ponds.
What This Idea Means
A galvanized steel stock tank is placed in the backyard as either an refreshing summer plunge pool or a serene decorative aquatic garden feature with small fountains.
How to Make It
- Level the Ground: Dig and level a designated area, laying down a compacted sand or pea gravel foundation.
- Position the Tank: Set a 6-to-8-foot galvanized metal stock tank on the prepared base.
- Install Plumbing/Filtration: For a dip pool, drill inlet and outlet holes using a hole saw bit and fit an above-ground pool filter pump to keep water clean.
- Treat the Water: Treat with mild pool chlorine or non-chlorine water treatments suitable for galvanized metal.
- Decorate the Perimeter: Enclose the tank base with river rocks, potted palms, or a low timber step deck.
Tips and Variations
- Solar Water Fountain: If using as a quiet water feature rather than a pool, add floating solar fountains and aquatic lilies.
- Exterior Painting: Paint the outer metal rim with rust-resistant outdoor paint in a muted shade like sage green or cream.
What You Need to Make It
- 6ft to 8ft galvanized stock tank
- Sand or gravel for base leveling
- Hole saw bit and metal drill
- Small above-ground pool pump and hoses
- Water treatment chemicals (for plunge pools)
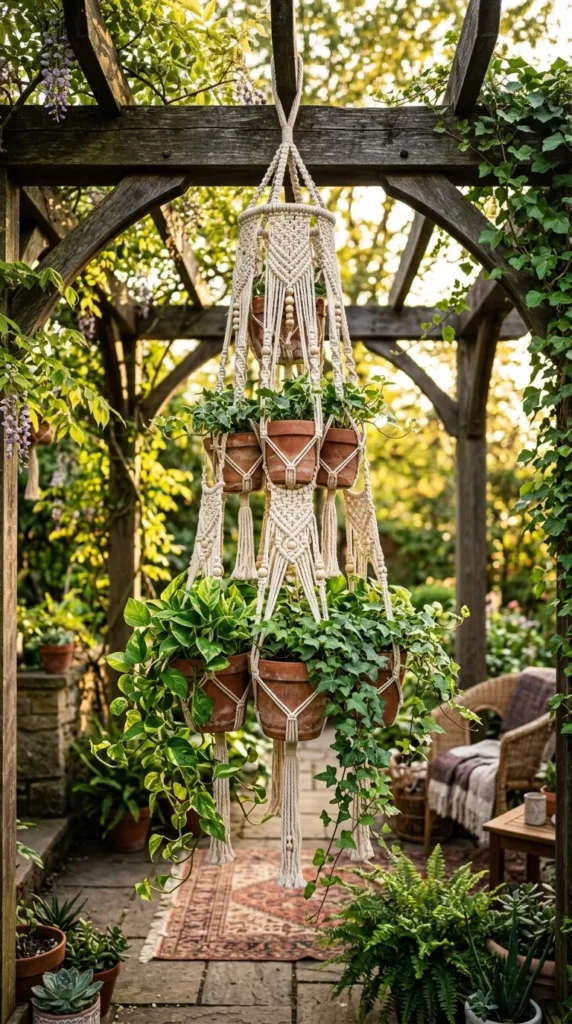
7. Hanging Macrame Plant Chandelier
Introduction
Vertical interest elevates outdoor areas by bringing green foliage up to eye level. A macrame plant chandelier suspended from a pergola or tree branch creates a bohemian focal point.
What This Idea Means
Combining simple knot-tying techniques with natural cotton or hemp cord, this project yields a multi-tiered hanger capable of suspending several potted plants at varying heights.
How to Make It
- Prepare Materials: Cut heavy-duty weather-treated cotton cord or jute twine into equal long strands.
- Attach to a Hoop: Secure the strands around a sturdy metal or wooden hoop using lark’s head knots.
- Knot the Cradles: Tie square knots down the lengths of cord to create net-like baskets or cradles that securely hold plant pots.
- Gather at the Bottom: Bring all hanging cords together at the bottom base and bind securely with a wrapping knot.
- Insert Pots & Hang: Insert lightweight terracotta or ceramic pots holding trailing ivy, pothos, or ferns, and suspend the fixture using an S-hook.
Tips and Variations
- Fairy Light Integration: Weave micro battery-powered fairy lights through the macrame cords for evening illumination.
- Weather Resistance: Use synthetic macrame cord (polyester/nylon) if hanging in unsheltered outdoor locations exposed to rain.
What You Need to Make It
- Heavy-duty macrame cord or thick jute rope
- 10–12 inch metal or wooden hoop
- Stainless steel S-hooks
- Lightweight pots with potted greenery
- Scissors and tape measure
8. Upcycled Tire Ottoman & Seating
Introduction
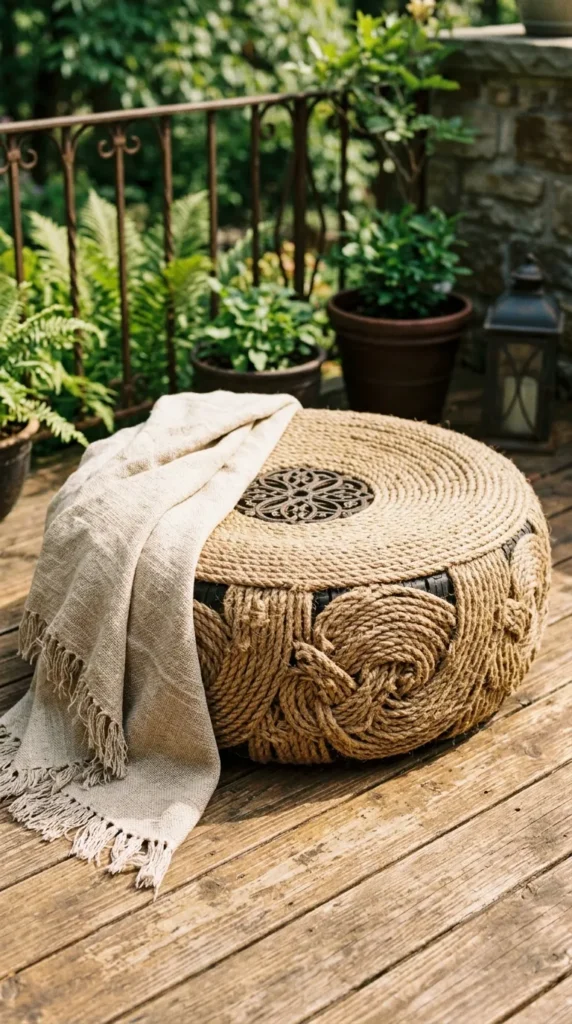
Diverting discarded vehicle tires from landfills offers an eco-friendly foundation for comfortable, durable outdoor ottomans and footrests.
What This Idea Means
A clean, scrap tire is completely wrapped in thick jute rope or woven fabric, creating a textured pouf that hides the rubber core entirely.
How to Make It
- Clean the Tire: Scrub an old tire thoroughly with soap, water, and a stiff brush to remove road grime and oils; let dry.
- Attach Plywood Caps: Cut two circular pieces of 1/2-inch plywood to match the outer diameter of the tire. Screw them directly into the top and bottom rubber rims.
- Wrap with Rope: Starting from the center top of the plywood disc, coil thick natural jute or sisal rope outward, securing it with hot glue or construction adhesive as you go.
- Cover the Sides: Continue coiling the rope continuously around the side walls until the entire tire is covered.
- Seal for Weathering: Apply a generous layer of clear outdoor sealer or varnish over the rope to protect against weather exposure.
Tips and Variations
- Cushioned Top: Add foam padding under outdoor fabric on the top plywood disc for softer seating.
- Furniture Feet: Screw short wooden furniture legs into the bottom plywood sheet to elevate the ottoman off the patio.
What You Need to Make It
- Scrap vehicle tire
- 1/2-inch outdoor-grade plywood
- Jute or sisal rope (3/8″ or 1/2″ thickness)
- Heavy-duty construction adhesive and hot glue gun
- Screws and power drill
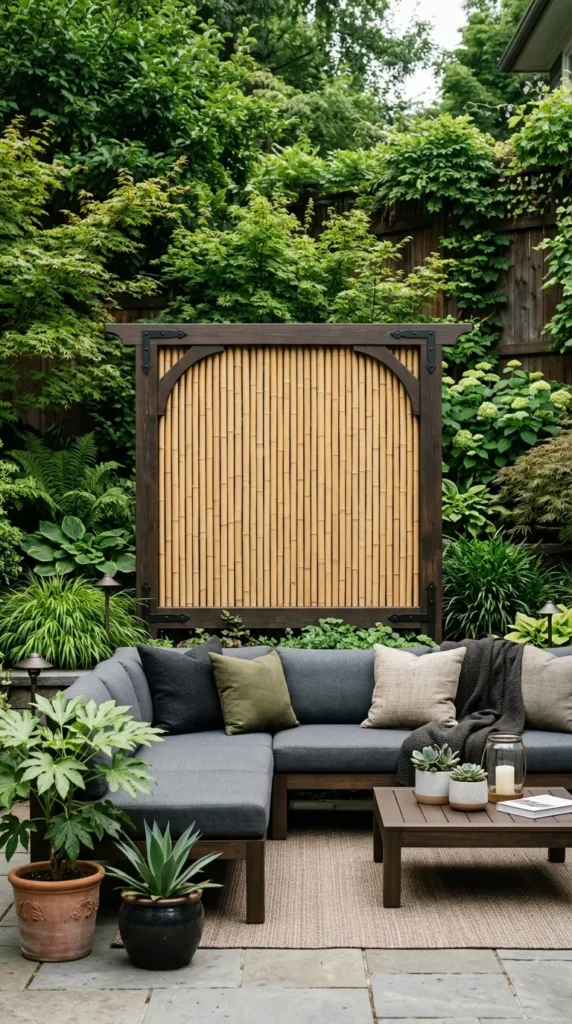
9. Bamboo Privacy Screen
Introduction
Privacy is essential for transforming a open backyard into a cozy personal sanctuary. A bamboo privacy screen provides a modern visual barrier without constructing permanent structural walls.
What This Idea Means
Natural bamboo poles are mounted within a clean timber frame or strung together along existing wire fences to block sightlines from neighbors while maintaining an airy, modern look.
How to Make It
- Construct Frame: Build a simple rectangular frame using 2×4 pressure-treated wood pieces sized to your target area.
- Cut Bamboo: Trim uniform bamboo poles to match the height of your wood frame.
- Attach Bamboo Poles: Line up the bamboo poles side-by-side inside or across the front of the frame. Secure them using exterior wood screws or heavy galvanized wire.
- Anchor Framework: Secure the frame to concrete footings, fence posts, or heavy planter boxes to hold it steady against strong winds.
- Apply Protective Finish: Brush on a clear exterior sealant to preserve the natural golden hue of the bamboo.
Tips and Variations
- Planter Base: Mount the screen onto the back of a large rectangular trough planter filled with tall decorative grasses.
- Horizontal Stacking: Arrange bamboo poles horizontally instead of vertically for a sleek contemporary layout.
What You Need to Make It
- Natural bamboo poles (uniform diameter)
- 2×4 pressure-treated lumber for frame
- Galvanized wire or exterior wood screws
- Post anchors or mounting hardware
- Exterior sealant or clear deck stain
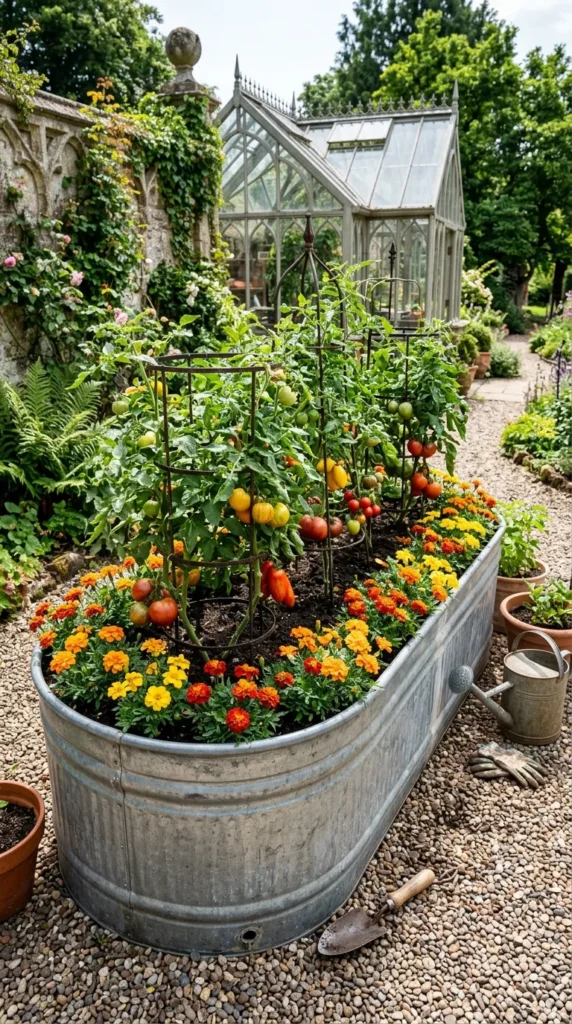
10. Galvanized Tub Raised Garden Beds
Introduction
Raised garden beds streamline soil management, improve drainage, and make vegetable gardening accessible without deep ground digging.
What This Idea Means
Repurposing large galvanized metal stock tubs or utility buckets creates clean, rustic raised planting beds suitable for vegetables, herbs, or flowering annuals.
How to Make It
- Drill Drainage Holes: Flip the metal tub over and drill several 1/2-inch drainage holes across the bottom surface to prevent waterlogging.
- Position the Bed: Place the tub in a location receiving full sunlight (typically 6-8 hours daily).
- Layer Drainage Foundation: Fill the bottom 2–3 inches with coarse gravel, twigs, or wood chunks (Hugelkultur method) to reduce the total amount of soil needed.
- Add Growing Medium: Fill the tub with a rich mix of organic compost and high-quality potting soil.
- Plant Your Garden: Sow seeds or set starts for vegetables (like tomatoes, peppers, and lettuce) or pollinator-friendly blooms.
Tips and Variations
- Casters for Mobility: Bolt heavy-duty locking caster wheels to the bottom of smaller metal tubs to roll them around your patio.
- Paint Contrasts: Paint the metal exterior with dark matte black heat-resistant spray paint for an industrial design aesthetic.
What You Need to Make It
- Galvanized steel wash tubs or troughs
- Power drill with 1/2-inch metal drill bit
- Coarse gravel or scrap wood for base layer
- High-grade potting mix and organic compost
- Vegetable or flower plants
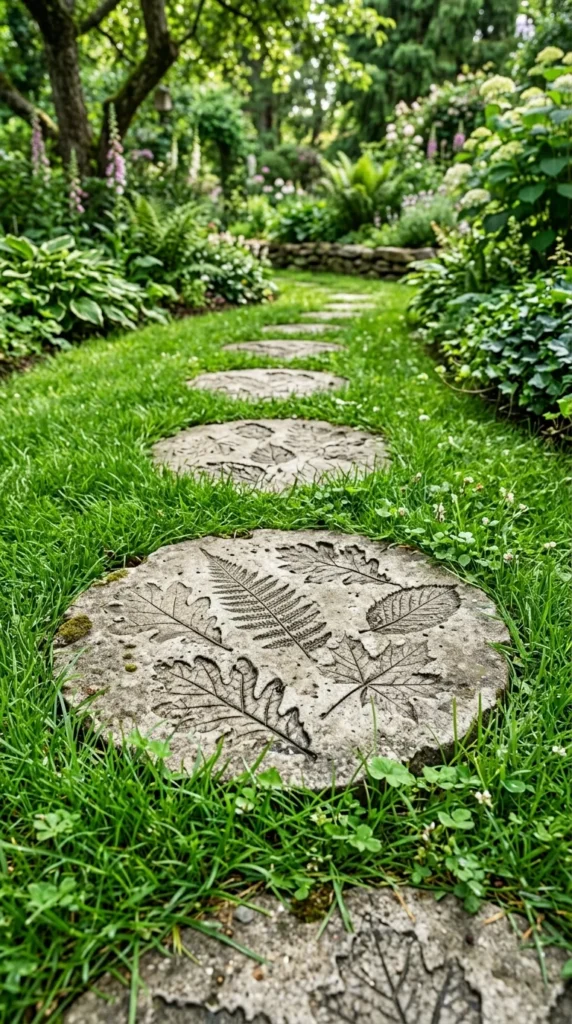
11. DIY Concrete Step Path with Leaf Impressions
Introduction
A garden path leads guests gracefully through distinct zones of your yard. Crafting custom concrete stepping stones stamped with real leaf patterns adds subtle organic detail to your walkway.
What This Idea Means
By casting quick-setting concrete into simple moulds and pressing large leaves (like rhubarb or hosta leaves) into the wet concrete, you leave behind detailed fossil-like leaf impressions.
How to Make It
- Prepare Moulds: Use shallow round plastic trays, disposable cake pans, or custom square wood frames as moulds. Coat inside surfaces with non-stick cooking spray.
- Mix Concrete: Mix concrete to a smooth, thick consistency similar to peanut butter.
- Pour Concrete: Fill each mould halfway, lay wire mesh or hardware cloth for structural reinforcement, then fill to the top and smooth with a trowel.
- Stamp Impressions: Press a large, heavy-veined leaf (veins down) firmly onto the wet concrete surface. Smooth gently with a roller.
- Cure and Unmould: Let the concrete set undisturbed for 24–48 hours. Peel away the leaf and unmould the cured stone. Set stones along your garden walkway.
Tips and Variations
- Color Pigments: Add iron oxide concrete dye to the mix for charcoal, terra cotta, or soft green shades.
- Highlight Veins: Brush a thin dark stain or acrylic wash into the leaf impressions after curing to make details pop.
What You Need to Make It
- Commercial concrete mix and water
- Large leaves (hosta, rhubarb, or burdock)
- Shallow plastic trays or timber formwork
- Non-stick cooking spray
- Wire mesh or hardware cloth for reinforcement
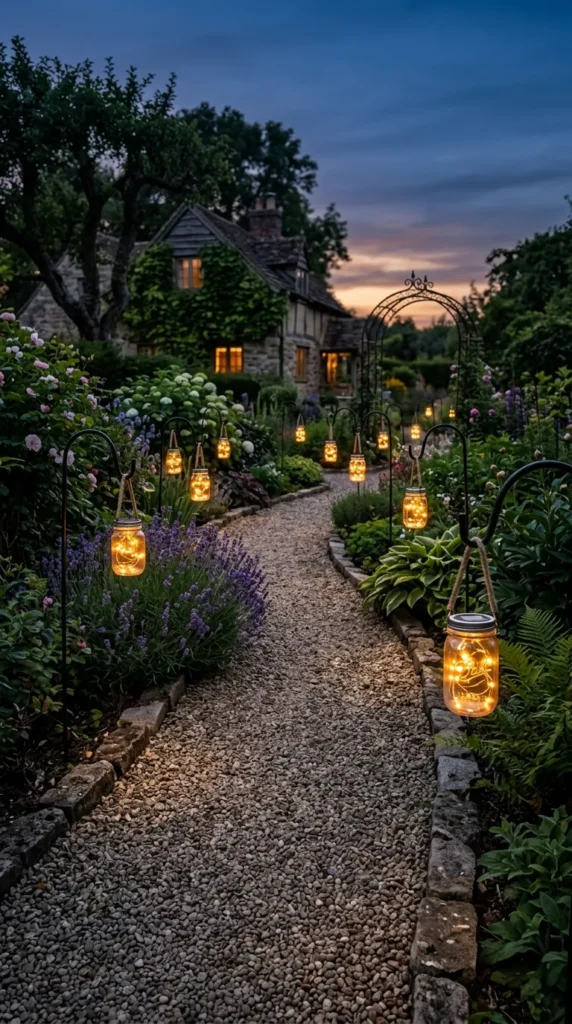
12. Solar Powered Lantern Pathways
Introduction
Lighting garden paths provides both safety and aesthetic warmth. Converting simple glass jars into solar lanterns offers a low-maintenance, cord-free outdoor lighting solution.
What This Idea Means
Standard mason jars are fitted with compact solar lids or insertable solar light components, transforming simple glass jars into glowing stakes or hanging lights that charge automatically during the day.
How to Make It
- Prep the Jars: Clean wide-mouth mason jars or vintage glass jars.
- Attach Solar Tops: Replace standard flat lid inserts with specialized solar-panel lid inserts containing built-in rechargeable batteries and micro-LEDs.
- Add Hangers: Twist thick copper or steel wire around the mouth of each jar, forming a secure top loop for hanging.
- Mounting: Hang the jars from Shepard’s hooks along your pathway, or place them directly onto flat stone border walls.
- Charge and Glow: Place where direct sunlight hits during the day; the lights will automatically turn on at dusk.
Tips and Variations
- Frosted Finish: Spray the inside of the glass jars with frosted glass spray paint to diffuse the light into a soft glow.
- Glass Fillers: Fill the bottom third of the jars with sea glass, glass marbles, or small river stones to add weight and refraction.
What You Need to Make It
- Wide-mouth mason jars with screw bands
- Solar LED insert lids (available online/craft stores)
- Galvanized or copper craft wire
- Wire cutters and pliers
- Shepherd’s hooks (optional)
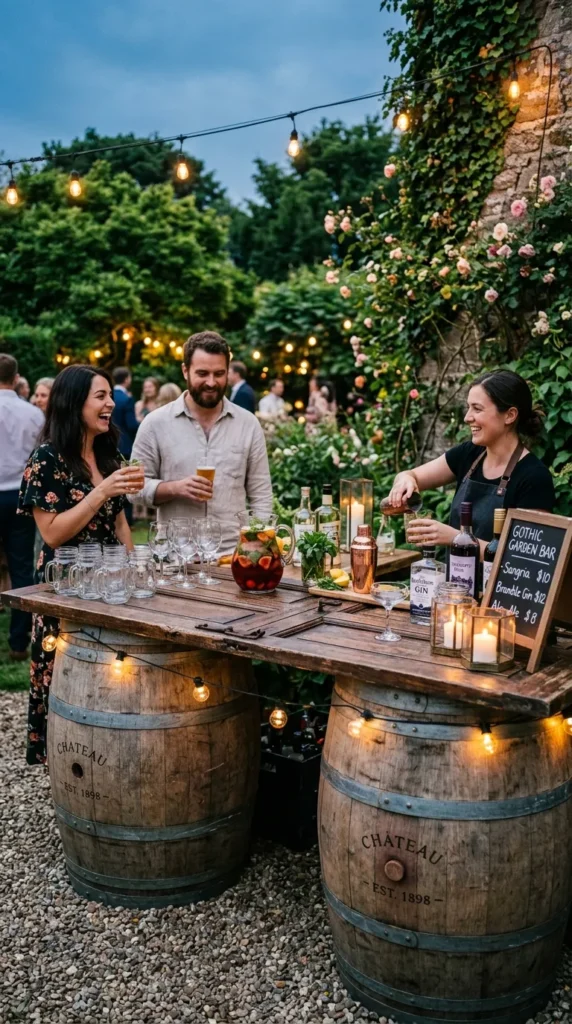
13. Repurposed Door Outdoor Bar
Introduction
An outdoor bar creates a centralized hub for drinks, snacks, and entertaining guests. Upcycling a discarded wooden panel door yields a sturdy garden bar filled with character.
What This Idea Means
A solid core wooden door is mounted horizontally over two support posts or barrels, topped with a protective surface, and converted into a fold-down or stationary serving station.
How to Make It
- Refurbish the Door: Sand away loose flaking paint. Keep worn textures for a shabby-chic aesthetic, or paint with exterior paint in a bold accent shade.
- Build Base Supports: Use two sturdy wooden barrels, cinder block piers, or wall brackets anchored to your exterior wall as support legs.
- Secure the Countertop: Attach the door horizontally atop the supports using heavy-duty L-brackets and wood screws.
- Protect the Top: Seal the top surface with a clear marine-grade sealant or cap with a glass/zinc sheet to create a level, wipeable surface.
- Add Hardware Accessories: Screw on a wall-mounted bottle opener, towel hooks, and a small hanging stemware rack beneath the main top.
Tips and Variations
- Fold-Down Design: Use heavy-duty wall hinges so the entire bar surface folds down flat against a wall when not in use.
- Planter Inset: Cut out one panel section of the door to drop in a stainless-steel ice bucket or planter box.
What You Need to Make It
- Solid core vintage wooden door
- Support bases (wine barrels, wood posts, or wall brackets)
- Heavy-duty L-brackets and exterior screws
- Exterior spar urethane/varnish
- Wall-mounted bottle opener and towel hooks
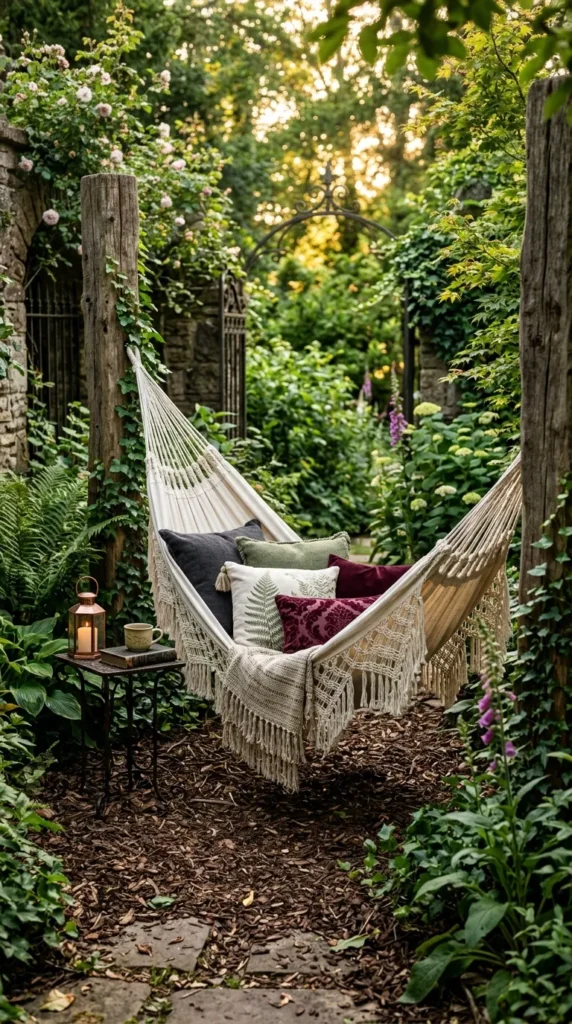
14. DIY Hammock Lounge Nook
Introduction
Nothing invites relaxing outdoor downtime like a comfortable hammock tucked under shaded foliage or surrounded by garden greenery.
What This Idea Means
Constructing a dedicated hammock zone involves establishing two strong anchor points—either using sturdy trees, a custom timber frame, or embedded posts—to create a dedicated relaxation corner.
How to Make It
- Select Location: Identify two healthy trees 10–15 feet apart, or set two 6×6 pressure-treated timber posts deep into the ground with concrete.
- Install Hardware: Wrap tree-saver straps around the trunks, or attach heavy-duty lag eye bolts into timber posts at a height of roughly 5 to 6 feet.
- Hang the Hammock: Attach a woven cotton or canvas hammock using heavy-duty carabiners and sturdy nautical rope.
- Ground Cover: Define the relaxation nook below by laying down wood mulch or a soft outdoor accent rug.
- Styling: Add outdoor pillows, a side table, and nearby potted plants to complete the secluded lounge vibe.
Tips and Variations
- Spreader Bar vs. Brazilian: Choose a woven Brazilian-style hammock for a snug cocoon feel, or a wooden spreader-bar style for flat sunbathing.
- Pergola Integration: Hook the hammock onto existing structural posts of a patio cover or garden pergola.
What You Need to Make It
- Woven fabric or rope hammock
- Tree-saver straps OR 6×6 timber posts with concrete
- Heavy-duty lag eye bolts and carabiners
- Wood mulch or outdoor area rug
- Weatherproof throw pillows
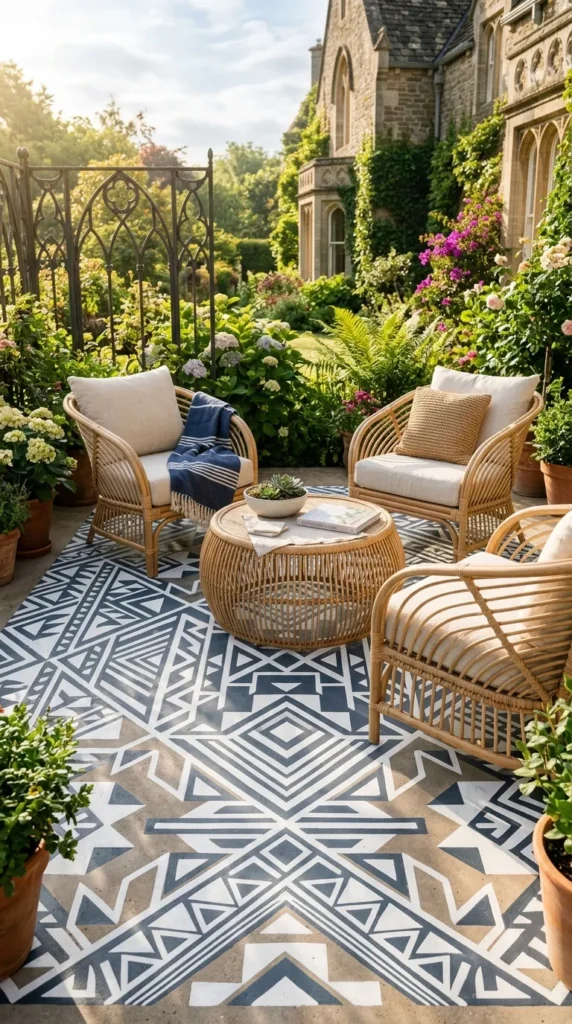


15. Painted Geometric Patio Rug
Introduction
A high-contrast outdoor rug anchors furniture groupings, but fabric rugs often fade or hold moisture over time. Painting a faux rug directly onto a concrete or wooden deck surface offers a durable, customizable alternative.
What This Idea Means
Using exterior porch and floor paint along with painter’s tape, you stencil or paint geometric patterns straight onto your patio floor to mimic the appearance of a woven outdoor rug.
How to Make It
- Clean the Surface: Power-wash the patio or deck floor to remove dirt, mold, and loose flaking coatings. Allow to dry completely.
- Apply Base Coat: Paint the overall background color using high-durability exterior porch and floor paint.
- Tape the Pattern: Use painter’s tape to layout geometric lines, herringbone patterns, or borders.
- Paint the Design: Paint inside the taped lines using a contrasting floor paint color. Apply two coats for solid coverage.
- Remove Tape & Seal: Peel back the tape while the second coat is slightly damp to get crisp lines. Apply a clear exterior floor sealer once cured.
Tips and Variations
- Tile Stencils: Use large plastic tile stencils for intricate Moroccan or Mediterranean tile patterns.
- Distressed Finish: Lightly sand the dried painted pattern for a soft, vintage weathered rug appearance.
What You Need to Make It
- Exterior porch and floor paint (two contrasting colors)
- High-tack painter’s tape
- Paint rollers, tray, and detail brushes
- Floor stencil (optional)
- Clear exterior acrylic floor sealer
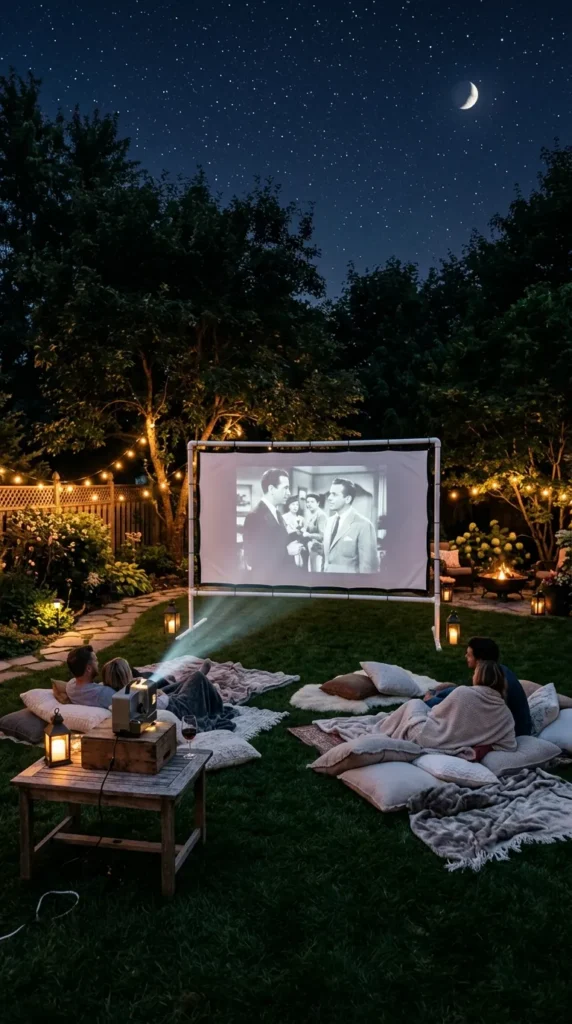
16. Outdoor Movie Screen with PVC Pipe and Canvas
Introduction
Turn summer nights into open-air cinema experiences by building a lightweight, reusable outdoor projection screen.
What This Idea Means
A rigid frame constructed from simple PVC plumbing pipes supports a stretched white canvas or blackout cloth drop sheet, creating a crisp, portable projection surface.
How to Make It
- Build the Frame: Cut 1.5-inch PVC pipes to length and assemble a rectangular frame using elbow and T-connectors. Include two T-joint feet at the base for stability.
- Prep the Screen Sheet: Hem a thick white blackout cloth or heavy canvas drop cloth to match the inner dimensions of your PVC frame.
- Add Grommets: Install metal grommets every 10–12 inches along the edges of the canvas screen.
- Attach Screen: Secure the canvas inside the PVC frame using elastic ball bungee cords, keeping the fabric taut and wrinkle-free.
- Anchor Against Wind: Use tent stakes and guy lines connected to the top corners to anchor the frame securely to the lawn.
Tips and Variations
- Wall-Mounted Version: Mount the canvas frame permanently onto a flat exterior wall or wooden fence if portable setup isn’t needed.
- Projector Setup: Pair with a compact portable Bluetooth digital projector and a wireless soundbar.
What You Need to Make It
- 1.5-inch PVC pipes and matching connectors (elbows, Ts)
- Heavy white canvas or blackout cloth
- Grommet kit and hammer
- Elastic ball bungee cords
- Tent stakes and guy ropes
17. Hanging Mason Jar Fairy Light Tree
Introduction
Transform a prominent backyard tree into an enchanted focal point by suspending glowing glass jars from its branches.
What This Idea Means
Dozens of glass mason jars holding micro-LED lights or battery candles are hung at varying heights from tree limbs, casting a romantic glow across the yard.
How to Make It
- Gather Jars: Collect clear glass jars in varied shapes and sizes.
- Wrap Wire Handles: Wrap thick copper or silver craft wire around the necks of the jars, forming a secure arch handle over each opening.
- Insert Lights: Place warm-white fairy light strings (with waterproof battery packs glued beneath the jar lids) or solar LED cork lights inside each jar.
- Hang at Varied Heights: Use ribbon, twine, or S-hooks to suspend the jars from low-hanging tree branches at different heights.
- Set Timers: Set lights to automatic 6-hour timers so they turn on every evening without manual effort.
Tips and Variations
- Colored Glass: Use tinted glass spray paint on jars to cast soft shades of blue, amber, or green.
- Seasonal Touches: Add small seasonal accents inside the jars, like pinecones in winter or dried lavender in summer.
What You Need to Make It
- Assorted glass jars
- Copper or silver craft wire
- Wire cutters and pliers
- Battery-powered or solar LED fairy lights
- Twine or ribbons for hanging
18. Mosaic Tile Stepping Stones
Introduction
Add vibrant color and artistic detail to garden pathways by turning broken ceramics, tiles, and glass into custom mosaic stepping stones.
What This Idea Means
Scrap ceramic tiles, broken dishes, and stained glass pieces are pressed face-up into freshly poured concrete inside shallow moulds to create durable, decorative garden stones.
How to Make It
- Collect Materials: Gather scrap colorful tiles, broken floral china plates, or glass gems. Break large pieces safely inside a cloth bag using a hammer.
- Prepare Moulds: Use shallow cake pans or rubber stepping stone moulds lined with plastic wrap or coated with petroleum jelly.
- Mix and Pour Concrete: Pour concrete into the mould, filling it roughly 2 inches deep and tapping out air bubbles.
- Arrange Mosaic: Press ceramic and glass pieces flat into the wet concrete top, arranging them into geometric patterns, floral shapes, or abstract art.
- Smooth and Seal: Let concrete set partially, then gently wipe tile surfaces clean with a damp sponge. Allow to cure for 48 hours, then apply grout sealer over the stone.
Tips and Variations
- Handprints & Dates: Combine mosaic pieces with family handprints and dates to capture family memories in garden paths.
- Glow-in-the-Dark Additions: Mix glowing glass pebbles into the mosaic for subtle luminescence at night.
What You Need to Make It
- Concrete or sand-topping mix
- Scrap ceramic tiles, china, or stained glass
- Shallow rubber or plastic moulds
- Safety goggles, heavy cloth bag, and hammer
- Sponge and clear stone/grout sealer
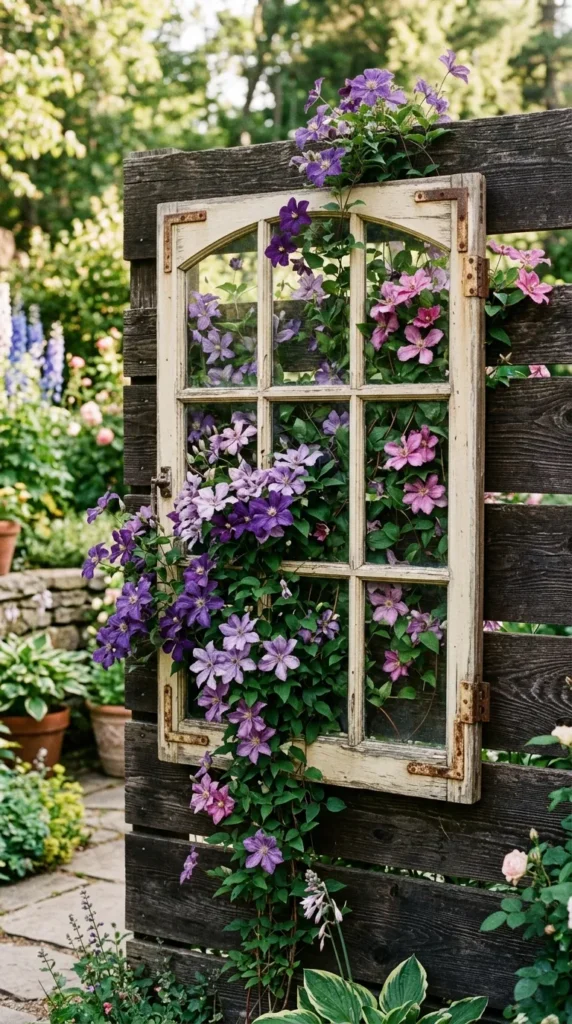
19. Upcycled Window Frame Wall Trellis
Introduction
Blank exterior walls or timber fences gain architectural interest when decorated with upcycled vintage window frames that double as plant trellises.
What This Idea Means
An old wooden window frame with glass panes removed is mounted onto a vertical wall or fence, offering a rigid support framework for climbing vines and flowers.
How to Make It
- Remove Glass Carefully: Take out any remaining glass panes safely from the old window frame.
- Clean and Sand: Sand off loose paint. Coat with a clear matte exterior sealant to preserve the chippy, vintage patina without further weathering.
- Install Support Wire: Staple or screw heavy galvanized wire mesh across the open back openings to give climbing plants points to grab onto.
- Mount Frame: Anchor the frame securely to a fence or exterior wall using heavy-duty masonry or wood fasteners, leaving a 1-inch gap behind for airflow.
- Plant Climbers: Plant climbing species—such as clematis, jasmine, or climbing roses—at the base and guide tendrils onto the frame.
Tips and Variations
- Mirror Backing: Glue weatherproof acrylic mirror panels into the frame openings to reflect garden greenery and make small yards feel larger.
- Planter Box Mount: Attach a small wooden trough planter box directly to the bottom edge of the frame.
What You Need to Make It
- Vintage wooden window frame
- Heavy wire mesh or chicken wire
- Staple gun and heavy-duty staples
- Exterior sealant spray
- Wall-mounting brackets and screws
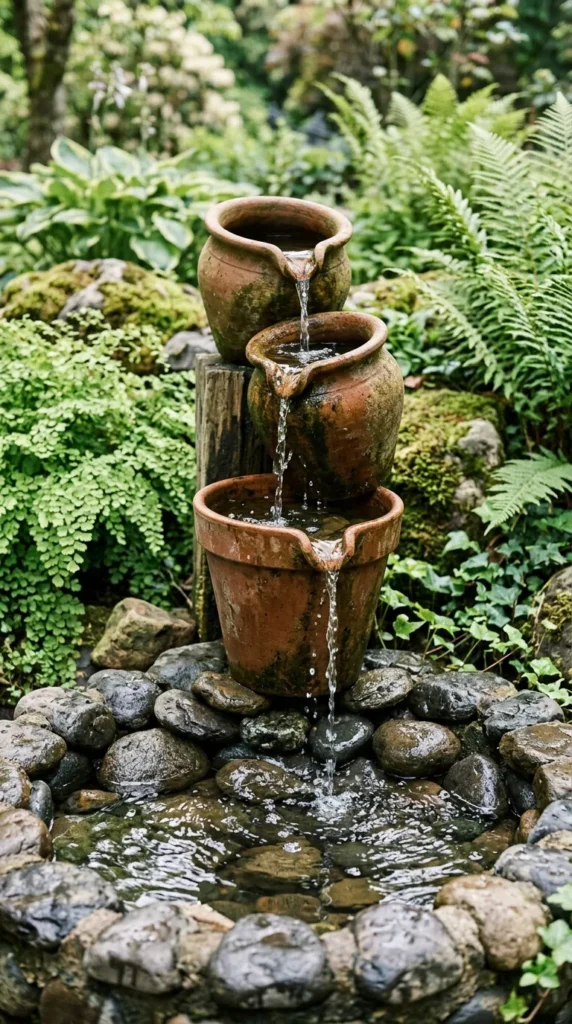
20. Clay Pot Fountain & Water Cascade
Introduction
The rhythmic sound of cascading water masks neighborhood noise and brings immediate tranquility to any patio or garden seating area.
What This Idea Means
Stacking or slanting terra cotta clay pots of varying sizes allows a small recirculating water pump to push water to the top pot, cascading down through each level into a bottom reservoir.
How to Make It
- Seal Clay Pots: Coat the insides of terra cotta pots with clear waterproof masonry sealer to prevent water from seeping through porous clay.
- Setup Reservoir Pot: Use a large, un-drilled ceramic or plastic basin as the bottom base reservoir. Place a small submersible fountain pump inside.
- Connect Water Tubing: Attach flexible plastic tubing to the pump outlet and feed it up through the central drainage holes of the upper tiered pots.
- Tier the Pots: Stack smaller pots inside the basin using upside-down plastic pots or bricks as hidden internal pedestals.
- Fill and Adjust: Fill the reservoir with water, plug in the pump, and adjust flow controls so water cascades smoothly over pot edges without splashing out.
Tips and Variations
- River Rock Bed: Surround the base and fill upper pots with smooth river stones to muffle water splash and hide internal tubing.
- Aquatic Plants: Add floating duckweed or dwarf water lilies in the bottom basin for a natural look.
What You Need to Make It
- 3–4 terra cotta pots in graduating sizes
- Large waterproof basin (base reservoir)
- Small submersible water pump with flow adjustment
- Flexible clear vinyl tubing
- Waterproof masonry sealer and river rocks