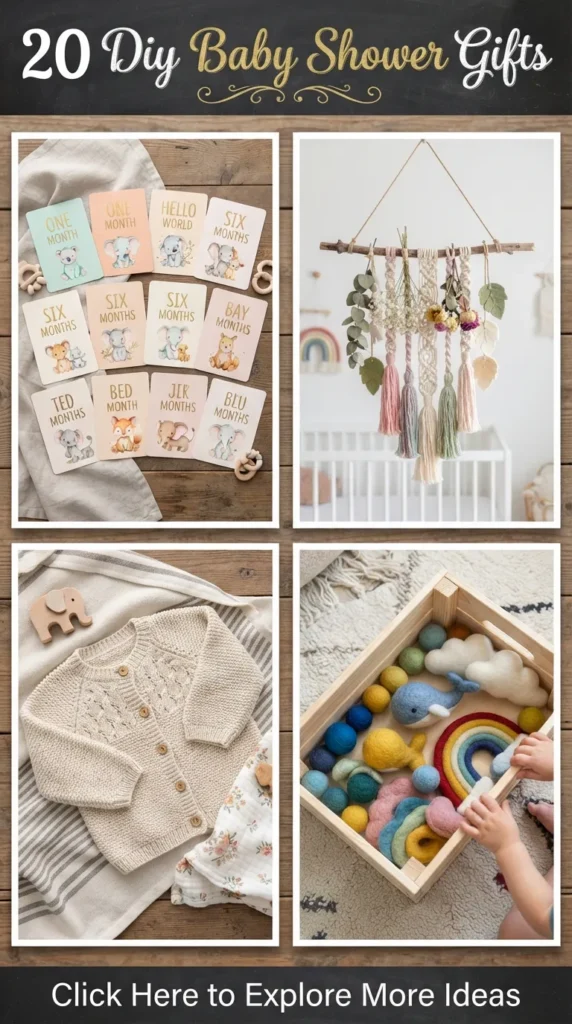
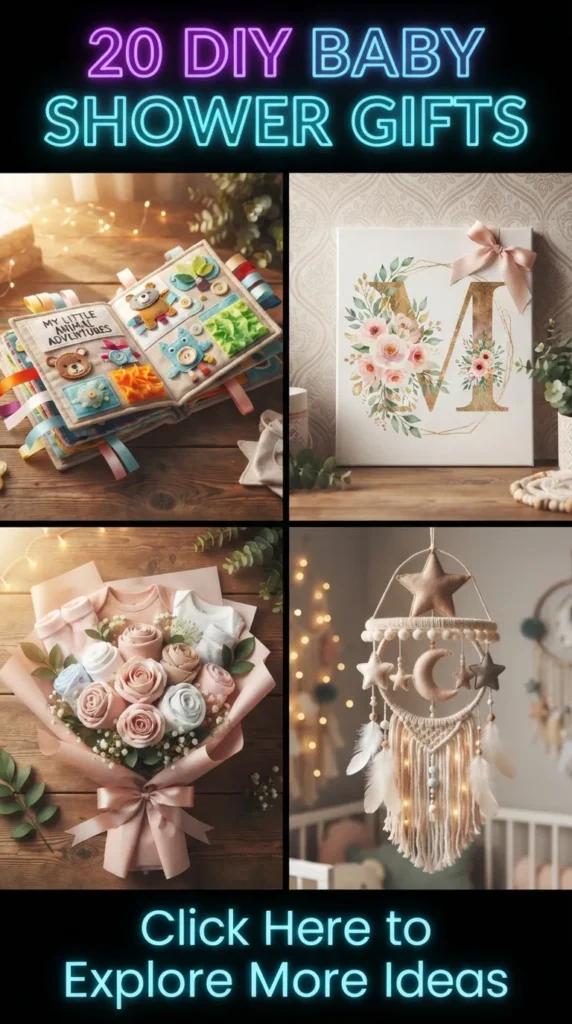
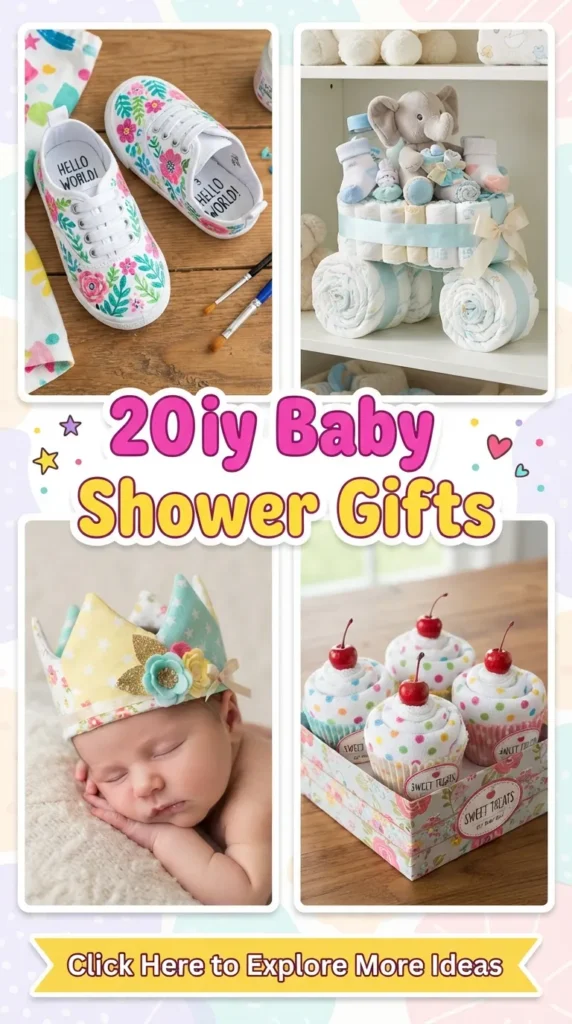
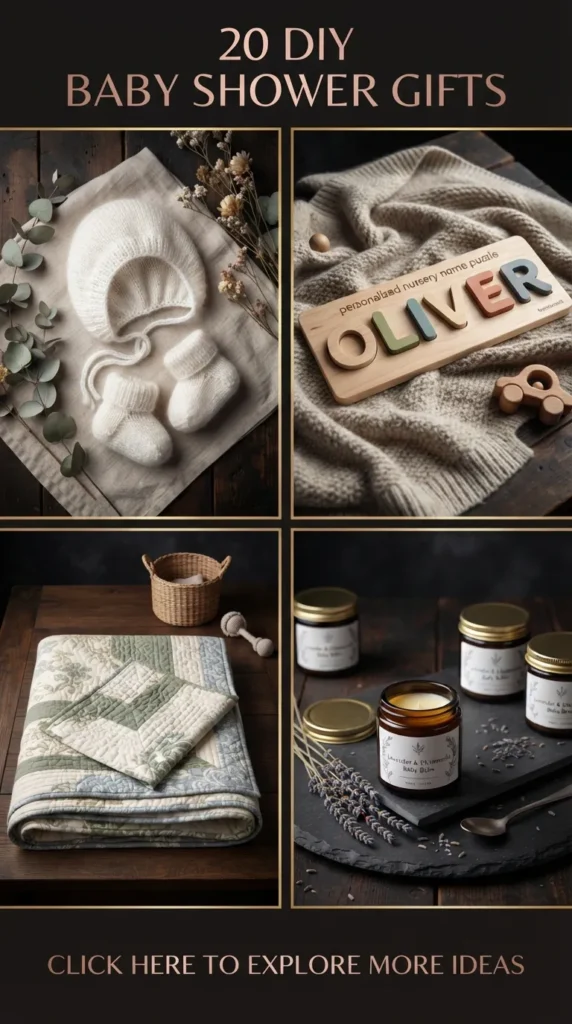
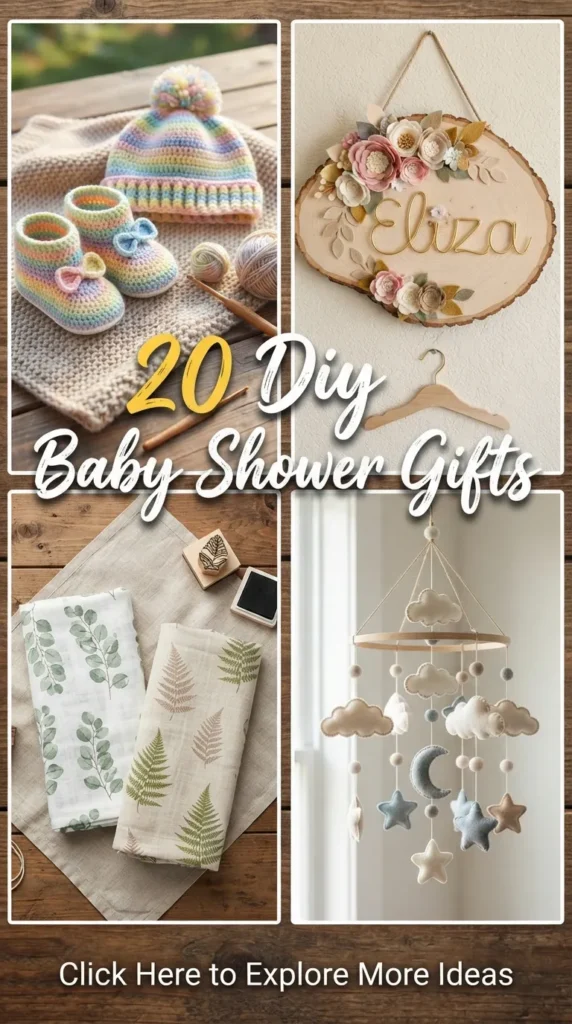
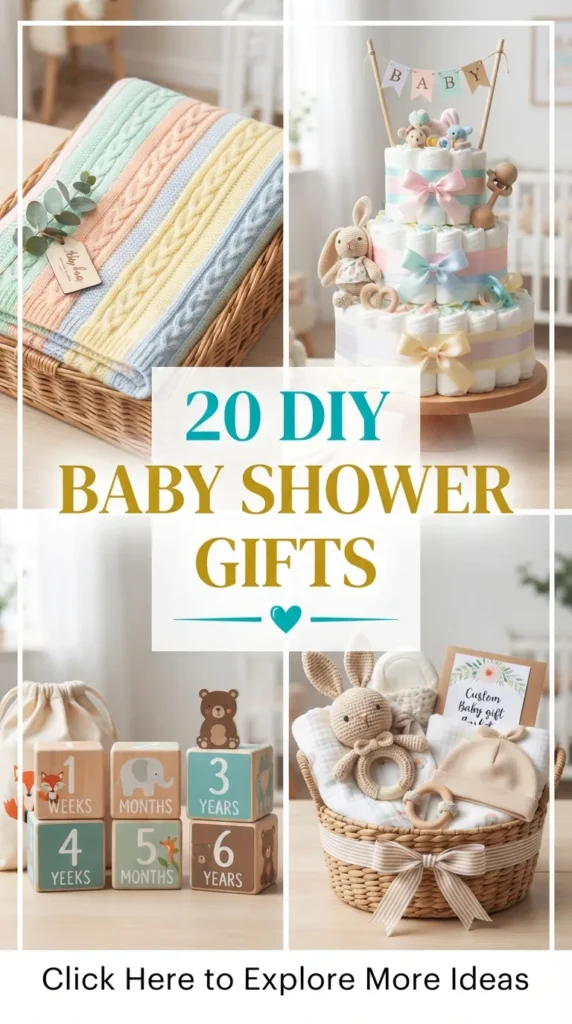
Handmade baby shower gifts possess a warmth and sentimental value that off-the-shelf items simply cannot replicate. Modern nursery aesthetics have shifted away from disposable novelties and neon plastic toward organic textures, muted earth tones, minimalist silhouettes, and timeless craftsmanship.
A well-crafted DIY gift honors the arrival of a new child while seamlessly integrating into a contemporary home. Below is a comprehensive guide featuring 20 sophisticated, practical, and design-forward DIY baby shower gifts, complete with step-by-step creation methods, styling tips, and variations.
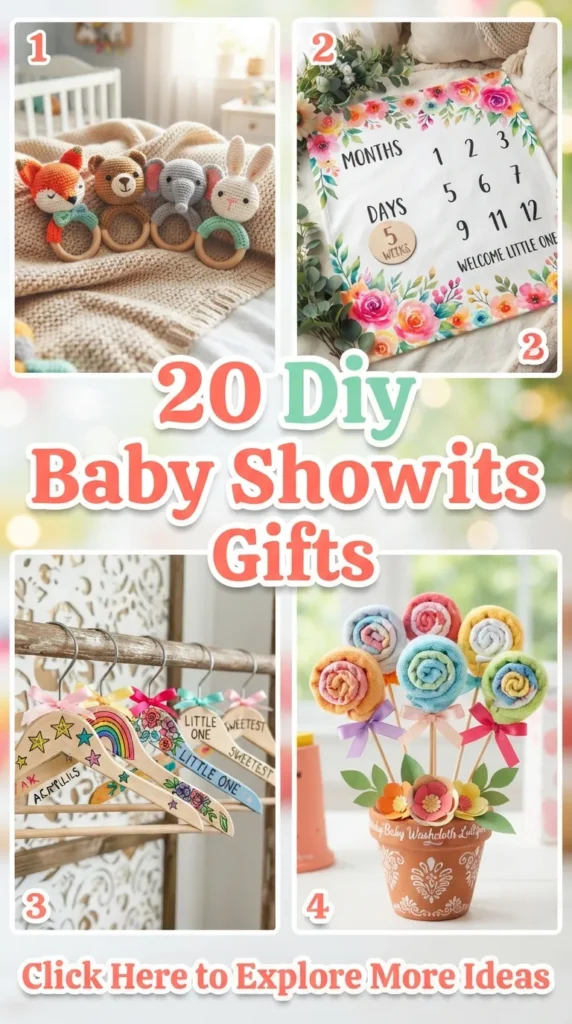
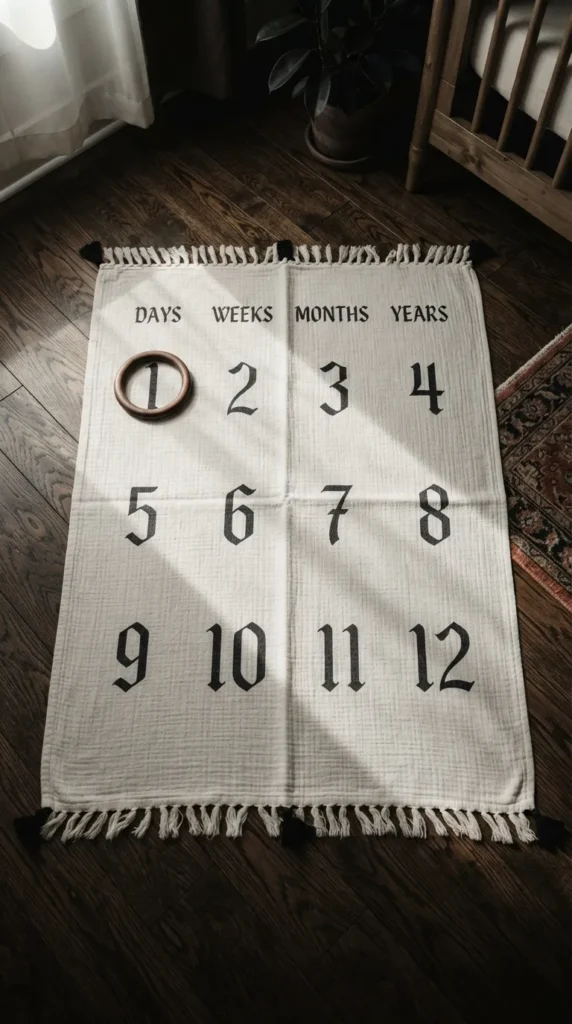
1. Organic Cotton Fringe Milestone Blanket
Introduction A milestone blanket acts as a photo backdrop documenting the baby’s growth across their first twelve months. By combining minimal Scandinavian typography with soft, raw-edge organic cotton and delicate tassel fringe, this piece transitions effortlessly from a photography prop to an everyday nursery throw.
What This Idea Means This project provides parents with a dedicated visual tradition. It emphasizes natural materials and clean, gender-neutral aesthetics, steering away from busy cartoon themes in favor of heirloom-quality textiles.
Materials Needed
- 1.5 yards unbleached, pre-washed organic cotton double gauze or heavyweight linen
- Non-toxic fabric screen printing ink or permanent water-based fabric paint
- Custom vinyl stencil or number stencils (numbers 1 through 12, plus “months” and “days”)
- Fine sponge stippler or foam brush
- Matching natural cotton fringe or handmade macramé tassels
- Sewing machine, neutral thread, iron, and fabric shears
How to Make It
- Step 1: Pre-wash, dry, and iron the fabric to eliminate shrinkage. Cut the fabric into a 40×40-inch square.
- Step 2: Fold the edges over by 0.5 inches twice to create a clean hem. Pin the cotton fringe trim along the outer perimeter between the folds.
- Step 3: Topstitch securely along all four edges, catching the fringe trim neatly in the seam.
- Step 4: Lay the hemmed blanket flat on a protected surface. Position your stencil arrangement—numbers 1–12 in a subtle grid on one side, with space left on the other for the baby.
- Step 5: Lightly dab the non-toxic fabric ink using a sponge stippler. Do not oversaturate to avoid bleeding.
- Step 6: Allow the ink to dry for 24 hours, then heat-set with a dry iron according to the paint manufacturer’s instructions.
Tips & Variations
- Pro Tip: Pair the blanket with a minimalist natural beechwood teething ring or a braided wool loop for parents to circle each milestone month.
- Variation: Swap painted numbers for hand-embroidered botanical numerals using warm beige and sage green embroidery floss.
2. Personalized Botanical Wooden Name Sign
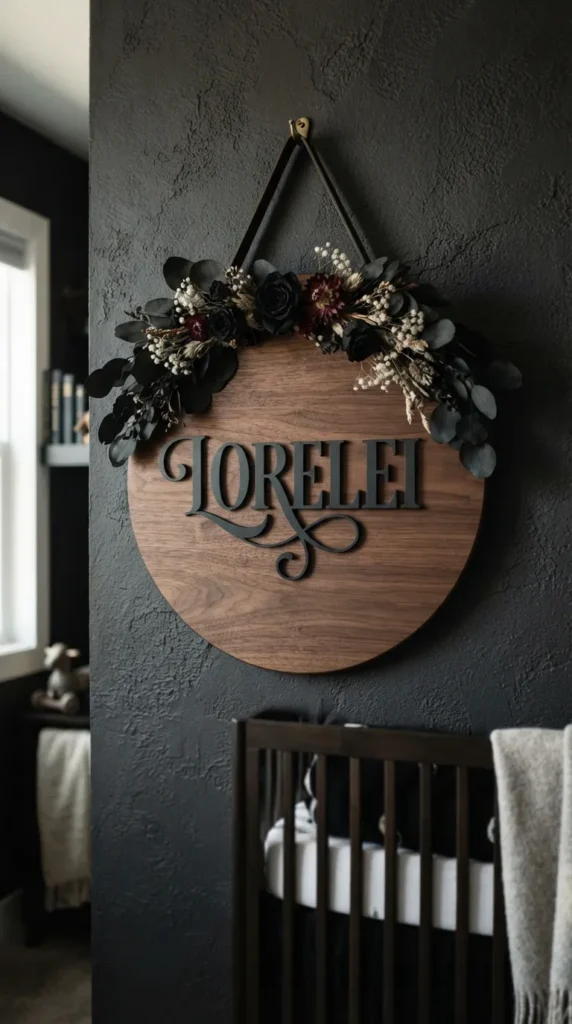
Introduction Handcrafted nursery signage provides a refined focal point above a crib or changing station. Combining raw wood grain with minimalist 3D lettering and preserved dried greenery yields a timeless, elevated aesthetic.
What This Idea Means A personalized name sign represents individuality and permanence. It serves as both a warm welcome to the child and a sophisticated piece of nursery wall art that endures through toddlerhood.
Materials Needed
- 12-inch to 16-inch round birch wood plaque (1/2-inch thickness)
- Laser-cut wooden script name or wooden block letters
- Preserved eucalyptus, baby’s breath, and dried bunny tails
- Matte acrylic craft paint (warm terracotta, dusty slate, or muted olive)
- Wood glue, clear floral craft wire, hot glue gun
- Sawtooth picture hanger and screws
How to Make It
- Step 1: Sand the birch round with fine-grit sandpaper until smooth, wiping away all dust. Apply a matte, non-toxic wood stain or natural wax to enrich the grain.
- Step 2: Paint the wooden lettering in your chosen accent tone. Apply two thin coats, allowing full drying between layers.
- Step 3: Dry-fit the lettering slightly below the vertical center of the round plaque to leave balanced space for botanical accents.
- Step 4: Affix the dried letters using wood glue. Weigh them down lightly with books while curing for 2 hours.
- Step 5: Arrange a delicate crescent of dried botanicals along the top or bottom curve of the hoop. Secure the stems with floral wire, tacking the base cleanly with hot glue.
- Step 6: Fasten a sawtooth hanger to the top-back edge, ensuring exact balance.
Tips & Variations
- Pro Tip: Keep botanical arrangements asymmetrical to create a modern visual flow.
- Variation: Replace the wooden backer with an acrylic disc, applying frosted paint to the back and crisp white lettering to the front.
3. Linen Keepsake Memory Box
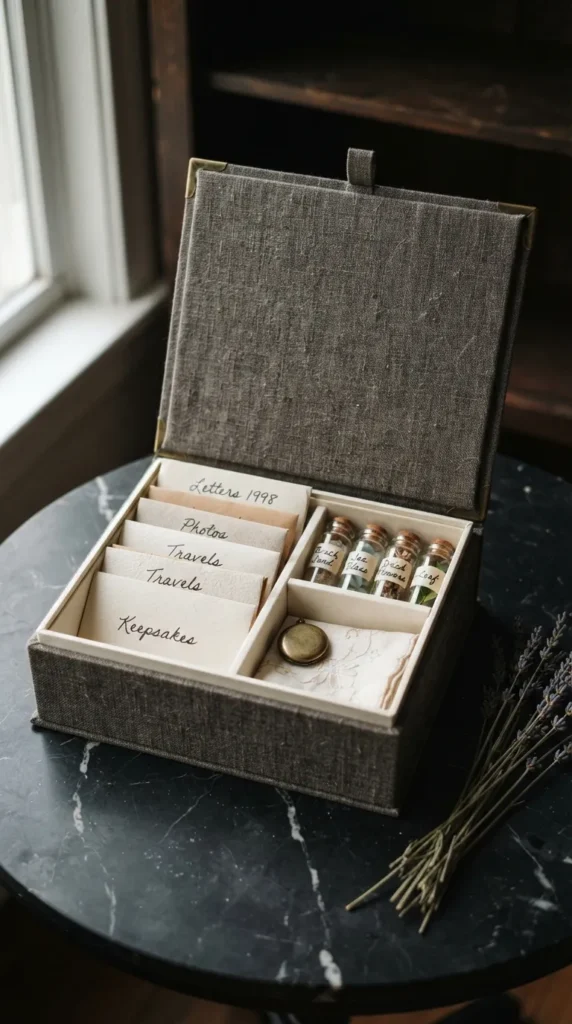
Introduction Hospital bracelets, birth announcements, first locks of hair, and sonogram prints frequently get lost in clutter. A custom linen-wrapped memory box offers a structured, elegant repository for physical mementos.
What This Idea Means This gift emphasizes mindfulness and legacy, offering new parents an intentional, beautiful space to archive milestones without needing complicated scrapbooks.
Materials Needed
- Heavy-duty bookbinding board or an unfinished wooden latching box
- 100% natural bookcloth or Belgian linen fabric
- Acid-free PVA bookbinding glue and flat glue brush
- Acid-free cardstock for interior lining
- Brass book corners, ribbon closures, and metal label holder
How to Make It
- Step 1: Measure the exterior dimensions of your box. Cut the linen fabric, allowing a 1-inch overlap on all sides.
- Step 2: Brush an even layer of acid-free PVA glue across the outer lid. Lay the linen flat, smoothing outwards with a bone folder to prevent air bubbles.
- Step 3: Wrap the fabric tightly around the corners using mitered folds for crisp edges.
- Step 4: Line the interior compartments with archival-quality textured cardstock to safeguard photographs from acidic degradation.
- Step 5: Install a petite brass nameplate holder on the spine or front lid for personal labeling.
- Step 6: Insert acid-free interior divider envelopes labeled “Hospital Keepsakes,” “First Outfits,” and “Letters to You.”
Tips & Variations
- Pro Tip: Include small glass vials with cork stoppers for first curls or tiny cord clamps.
- Variation: Foil-stamp the baby’s initials onto the front linen cover using heat-transfer gold foil.
4. Chunky Merino Wool Cable-Knit Booties
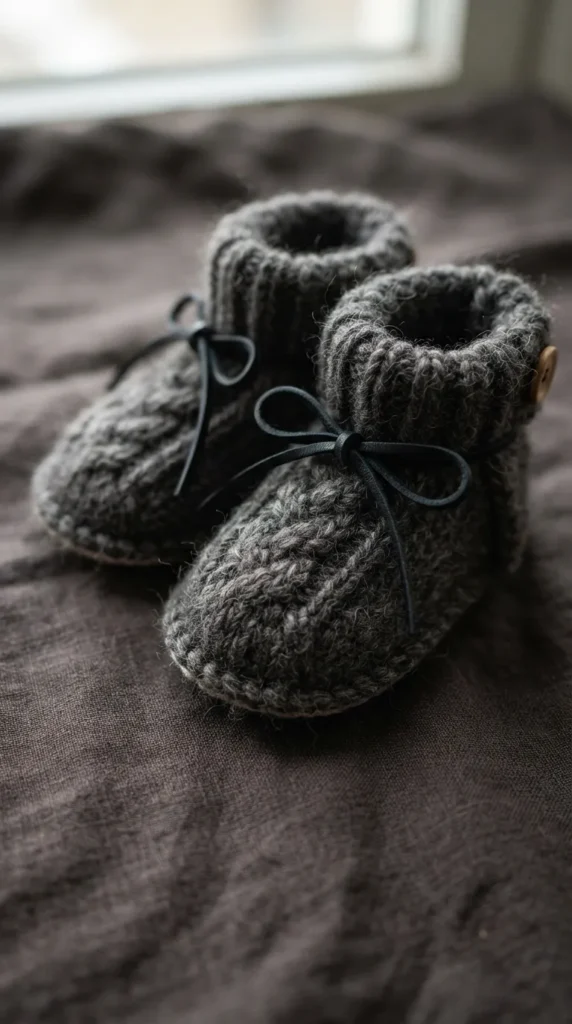
Introduction Tiny footwear is a baby shower staple, but mass-produced synthetic booties often slip off easily. Hand-knitted booties crafted from ultra-soft, breathable merino wool provide thermal regulation and enduring beauty.
What This Idea Means Knitted booties represent tactile care and comfort. Hand-crafted wool garments adapt naturally to growing feet while maintaining an artisan aesthetic.
Materials Needed
- 50g 100% extra-fine merino wool yarn (DK or Aran weight)
- Set of 4 double-pointed needles (size US 4 / 3.5mm)
- Tapestry needle and stitch markers
- Soft natural leather cords or velvet ribbons for functional ties
How to Make It
- Step 1: Cast on stitches to form the ribbed ankle cuff, working in a 1×1 rib pattern for 15 rounds to create a snug hold.
- Step 2: Divide stitches to isolate the central instep. Work a delicate mini-cable pattern over the top instep stitches for 12 rows.
- Step 3: Pick up stitches along the side edges of the instep to transition into the foot bed.
- Step 4: Knit in garter stitch across all active stitches for 10 rounds to form the foot height.
- Step 5: Shape the sole by grafting bottom stitches together using the Kitchener stitch for a seamless, smooth interior finish that won’t irritate tiny toes.
- Step 6: Thread a thin leather cord or ribbon through the eyelets at the base of the cuff to ensure the booties stay firmly in place.
Tips & Variations
- Pro Tip: Choose un-dyed, mulesing-free merino wool to keep the material as gentle as possible for sensitive newborn skin.
- Variation: Add soft suede non-slip soles hand-stitched to the bottom for older infants transitioning to walking.
5. Minimalist Beechwood & Macramé Mobile
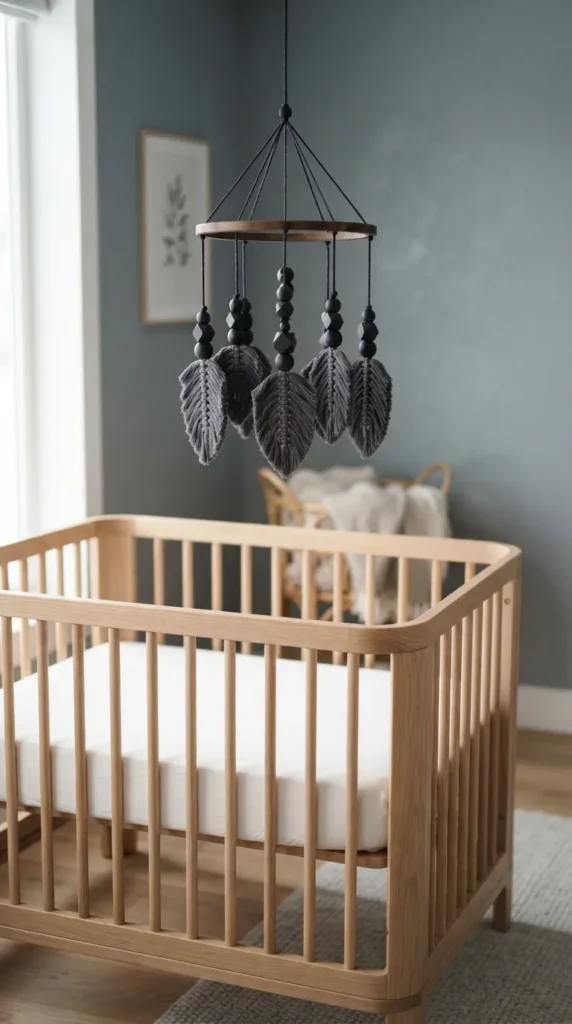
Introduction Ditching loud, motorized plastic mobiles, the minimalist wooden and macramé mobile uses subtle, ambient air movement and calming geometric shapes to soothe infants.
What This Idea Means This decor piece represents organic visual stimulation. It complements serene, neutral nurseries while remaining completely free from synthetic electronics.
Materials Needed
- 8-inch natural beechwood embroidery hoop or bentwood ring
- 3mm single-strand recycled cotton macramé cord in oatmeal, cream, and almond
- Untreated natural wooden geometric beads (hexagons, spheres, rings)
- Heavyweight cotton hanging twine
- Ceiling hook
How to Make It
- Step 1: Wrap the beechwood hoop tightly with cotton cord, securing ends with a flush drop of craft glue.
- Step 2: Cut four equal strands of 4-foot hanging cord. Knot them systematically at four equidistant points around the hoop, gathering them together at the top with a gathering knot.
- Step 3: Create five hanging drop lines (four around the perimeter, one central drop).
- Step 4: Knot lightweight macramé feathers, small rainbows, or simple wrapped loops along each drop line.
- Step 5: Interlock smooth, untreated wooden beads along the cords between macramé elements to add subtle weight and balanced geometric structure.
- Step 6: Check balance by hanging from a single point; adjust knot placements until the mobile rests completely level.
Tips & Variations
- Pro Tip: Keep visual contrasts gentle. Babies develop high-contrast vision first, but soft geometric movement provides soothing, low-stress tracking.
- Variation: Add felted wool pom-poms in muted terracotta, sage, and pale amber instead of macramé feathers.
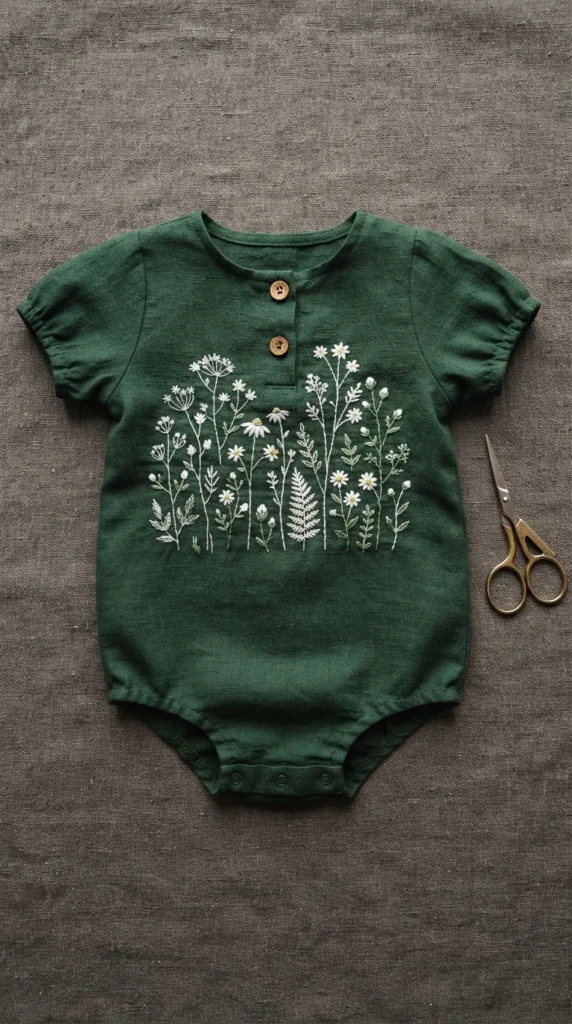
6. Hand-Embroidered Personalized Linen Romper
Introduction A customized linen romper elevates simple infant apparel into a cherished keepsake. Embroidered with delicate wild botanicals or the baby’s moniker, this item balances comfort with bespoke elegance.
What This Idea Means This gift merges everyday utility with artisanal craft. A well-constructed linen garment lasts through many washes and can be preserved as a family heirloom.
Materials Needed
- High-quality, pre-washed plain linen or linen-cotton blend romper
- 4-inch wooden embroidery hoop
- DMC cotton embroidery floss (earthy, botanical color palette)
- Water-soluble embroidery transfer stabilizer
- Size 7 embroidery needle and fine embroidery scissors
How to Make It
- Step 1: Trace or sketch your custom design (e.g., cursive name surrounded by miniature sprigs) onto water-soluble stabilizer.
- Step 2: Adhere the stabilizer to the front chest, collar, or cuff of the romper.
- Step 3: Secure the fabric tightly within the wooden embroidery hoop, ensuring not to stretch the linen out of shape.
- Step 4: Stitch the lettering using a delicate stem stitch or backstitch with 2 strands of floss for a crisp, refined line.
- Step 5: Add botanical leaves using satin stitches and tiny French knots for floral buds.
- Step 6: Rinse the garment under warm water to completely dissolve the stabilizer, then press flat with a steam iron over a soft towel.
Tips & Variations
- Pro Tip: Place embroidery accents along the neckline or ankle cuff so the raised stitching does not sit directly against high-friction chest areas.
- Variation: Embroider only the initials alongside a tiny, minimalist birth-flower sprig for subtle personalization.
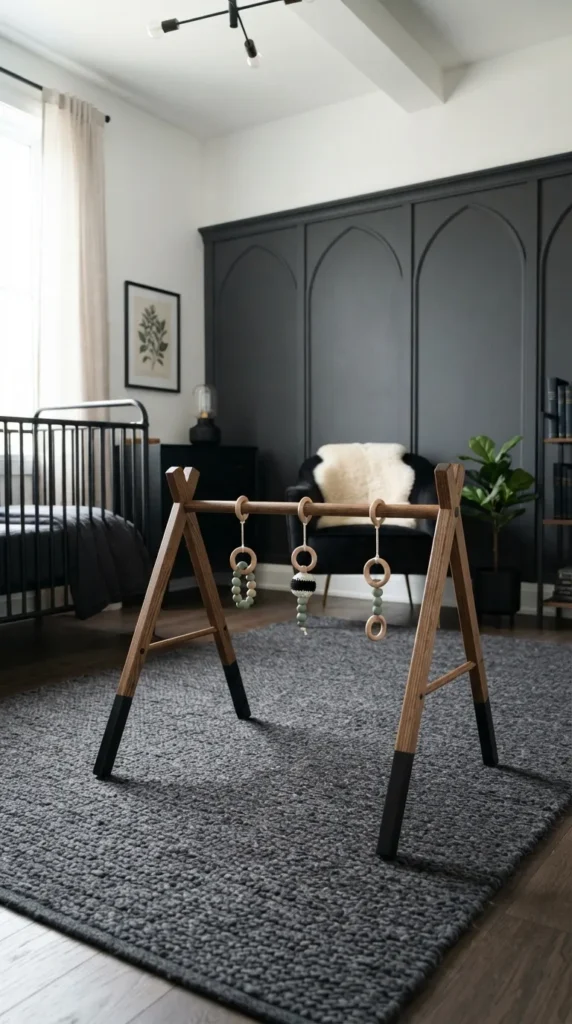
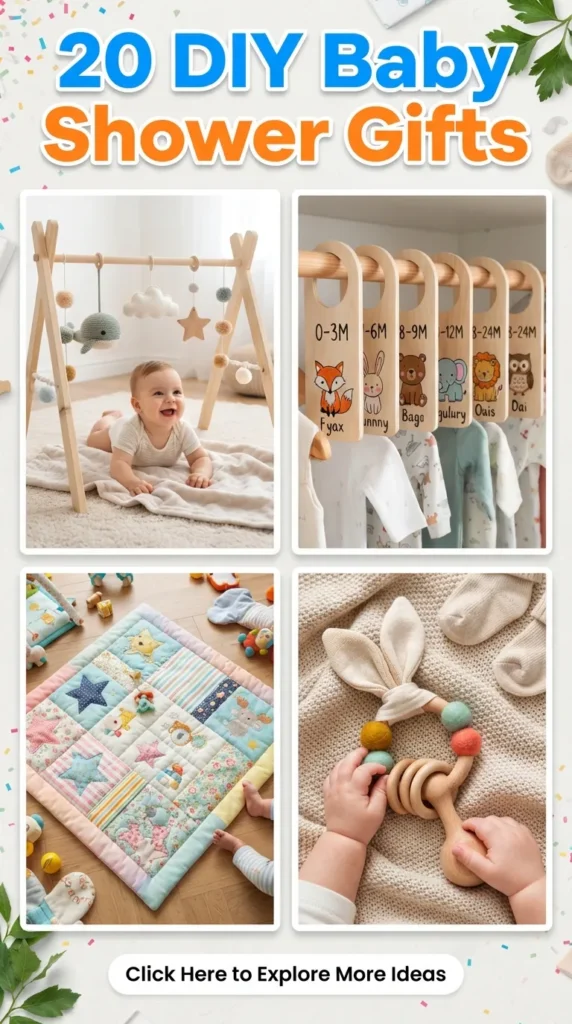
7. Modern Wooden Activity Gym with Sensory Toys
Introduction A modern wooden play gym is an indispensable developmental tool for tummy time and overhead sensory tracking. It folds flat, looks beautiful in any room, and uses tactile, natural play elements.
What This Idea Means This item offers active sensory development free from overstimulating flashing lights. It supports self-directed motor skills while maintaining a high-end minimalist design.
Materials Needed
- Four 1×2-inch sanded pine or hardwood dowels (approx. 30 inches long)
- One 3/4-inch round smooth wooden crossbar dowel (approx. 36 inches long)
- 100% cotton rope (for side stability stops)
- Sandpaper (120 and 220 grit)
- Food-safe mineral oil or natural beeswax finish
- Drill with 3/4-inch spade bit and 1/4-inch standard bit
- 3 hanging sensory toys (wooden rings, silicone beads, crochet rattles)
How to Make It
- Step 1: Sand all wooden dowels thoroughly, rounding the edges to remove sharp corners.
- Step 2: Measure 3 inches down from the top of each leg dowel. Drill a 3/4-inch hole through all four legs to fit the main crossbar.
- Step 3: Measure 12 inches up from the bottom of each leg; drill a 1/4-inch hole through the sides for the stop rope.
- Step 4: Thread the main crossbar through the paired legs, creating an “A-frame” profile on each side.
- Step 5: Pass the cotton rope through the lower holes on each A-frame pair, knotting tightly at both sides to prevent the gym legs from sliding outward.
- Step 6: Seal the wood with food-safe beeswax. Slide three custom hanging sensory rings onto the center crossbar before securing the final side joints.
Tips & Variations
- Pro Tip: Ensure hanging toys dangle roughly 8–10 inches above the floor so an infant can bat at them without strain.
- Variation: Dip-paint the bottom four inches of each gym leg in white or soft pastel non-toxic milk paint.
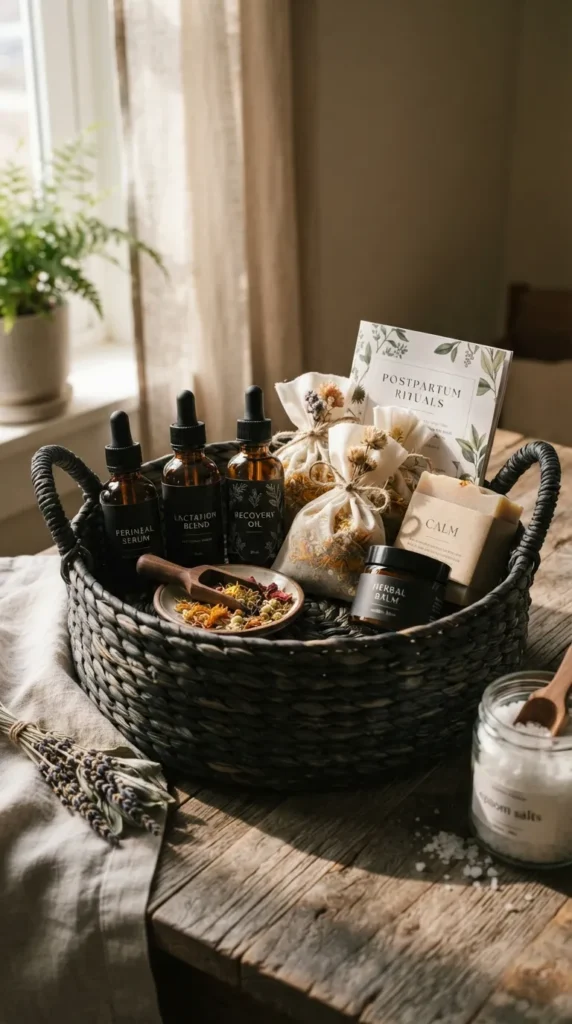
8. Custom Herbal & Organic Postpartum Care Kit
Introduction While most baby shower gifts focus solely on the infant, a bespoke postpartum recovery kit celebrates and cares for the mother. Formulated with pure, organic botanicals, it provides holistic comfort during the fourth trimester.
What This Idea Means This gift recognizes that caring for the parent is an essential part of caring for the baby. It provides intentional, restorative wellness items during a demanding recovery period.
Materials Needed
- Dried organic herbs: calendula flowers, chamomile, lavender, comfrey leaf, epsom salts
- Amber glass dropper bottles, spray bottles, and airtight mason jars
- Natural unbleached cotton muslin drawstring bags
- Witch hazel (alcohol-free)
- Custom printed labels on kraft paper
- Woven seagrass basket or linen tote bag
How to Make It
- Step 1: Mix equal parts dried calendula, chamomile, lavender, and comfrey with pure Epsom salt to create a soothing Postpartum Herbal Sitz Bath Blend. Package in a large glass jar with a wooden scoop.
- Step 2: Pre-fill three unbleached cotton muslin tea bags with the sitz blend for easy, mess-free brewing.
- Step 3: Formulate a Calming Facial & Room Mist using 70% pure floral hydrosol (rosewater or lavender water) and 30% alcohol-free witch hazel in an amber spray bottle.
- Step 4: Prepare an organic nipple & skin balm using melted shea butter, calendula-infused olive oil, and organic beeswax; pour into a low-profile cosmetic tin.
- Step 5: Design clean, minimalist kraft paper labels detailing ingredients and simple instructions for use.
- Step 6: Arrange all items artfully inside a woven seagrass basket lined with a soft linen tea towel.
Tips & Variations
- Pro Tip: Avoid strong essential oils; prioritize gentle, whole-flower herbal infusions that are safe for breastfeeding.
- Variation: Add a handmade lactation tea blend featuring dried fennel, nettle leaf, and oat straw.
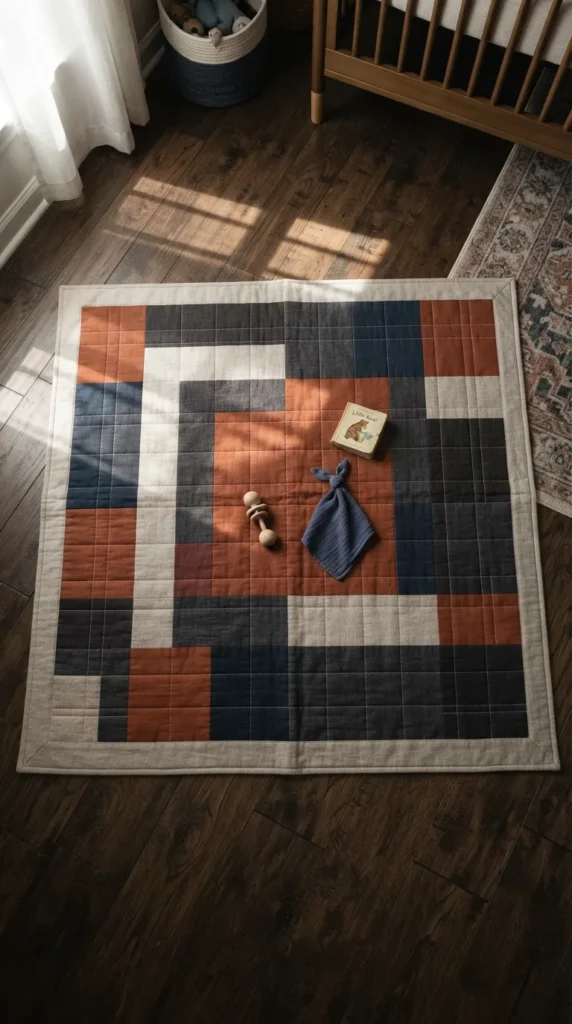
9. Quilted Patchwork Play Mat in Earth Tones
Introduction A quilted play mat provides a clean, cushioned surface for daily floor play, roll practice, and tummy time. By using modern geometric quilting and earth-toned fabrics, it doubles as an attractive rug accent.
What This Idea Means This project represents functional textile artistry. It provides an everyday developmental surface that fits right in with modern living spaces.
Materials Needed
- 100% pre-washed cotton or linen fabric yardage in coordinating shades (linen, flax, rust, olive, clay)
- 100% natural organic cotton batting (approx. 45×45 inches)
- Quilting thread, walking foot for sewing machine, rotary cutter, cutting mat
- Curved quilting safety pins, iron, and fabric ruler
How to Make It
- Step 1: Cut fabrics into 6-inch squares or large modern geometric triangles.
- Step 2: Lay out your design on a flat surface, establishing a balanced composition of warm neutrals and muted contrast tones.
- Step 3: Piece the fabric patches together row by row using a standard 1/4-inch seam allowance. Press all seams open flat.
- Step 4: Layer your “quilt sandwich”: backing fabric (wrong side up), cotton batting, and your pieced quilt top (right side up).
- Step 5: Pin layers securely with curved safety pins every 5 inches. Quilt clean, straight grid lines across the mat using a walking foot.
- Step 6: Trim raw edges flush and apply a double-fold binding around the entire edge, hand-stitching the back for an invisible, polished finish.
Tips & Variations
- Pro Tip: Use two layers of cotton batting or a thick layer of bamboo fleece to provide extra cushioning on hard floors.
- Variation: Quilt concentric circles instead of straight lines to create a dynamic, modern ripple effect.
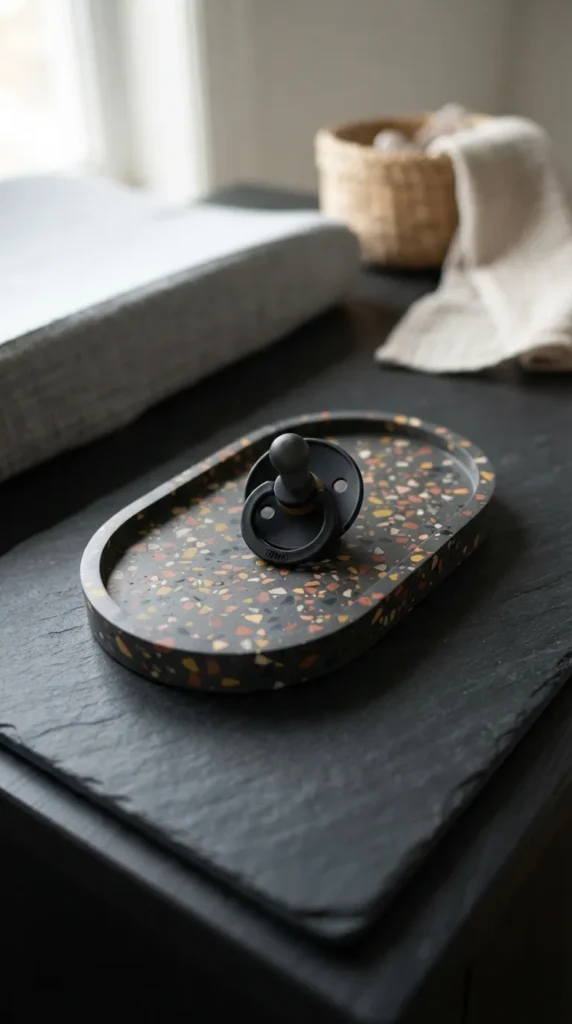
10. Hand-Cast Terrazzo Style Nursery Keepsake Dish
Introduction A modern eco-resin trinket dish offers parents a designated spot for small nursery essentials like safety pins, pacifiers, hair clips, and rings by the changing table.
What This Idea Means This item merges contemporary industrial design with handmade charm. It serves as a subtle decor accent that remains functional long after the baby grows up.
Materials Needed
- Jesmonite or non-toxic eco-casting composite (liquid and base powder)
- Liquid resin pigments (terracotta, charcoal, mustard yellow)
- Silicone oval or round coaster molds
- Plastic mixing cups, stir sticks, and baking sheet
- Waterproof silicon carbide sandpaper (120, 240, 400, and 600 grits)
- Natural stone sealing wax
How to Make It
- Step 1: Mix small batches of eco-resin with your chosen pigments. Pour thin layers onto a flat, flexible plastic sheet and let cure for 1 hour.
- Step 2: Crack and break the dried colored sheets into small, irregular terrazzo flakes (chips).
- Step 3: Mix a fresh batch of neutral (white or cream) eco-resin base. Stir the colorful flakes into the liquid mixture.
- Step 4: Pour the mixture immediately into the silicone dish mold. Tap the mold sides firmly to release trapped air bubbles.
- Step 5: Allow the dish to cure undisturbed for 2 to 3 hours, then de-mold carefully.
- Step 6: Wet-sand the surface under a light stream of water with graduated grits to expose the colorful terrazzo flakes. Dry and seal with natural food-safe wax.
Tips & Variations
- Pro Tip: Keep the background base off-white or light sand to ensure the colorful aggregate flecks stand out crisply.
- Variation: Add gold leaf flakes into the terrazzo chip blend for a subtle shimmer.
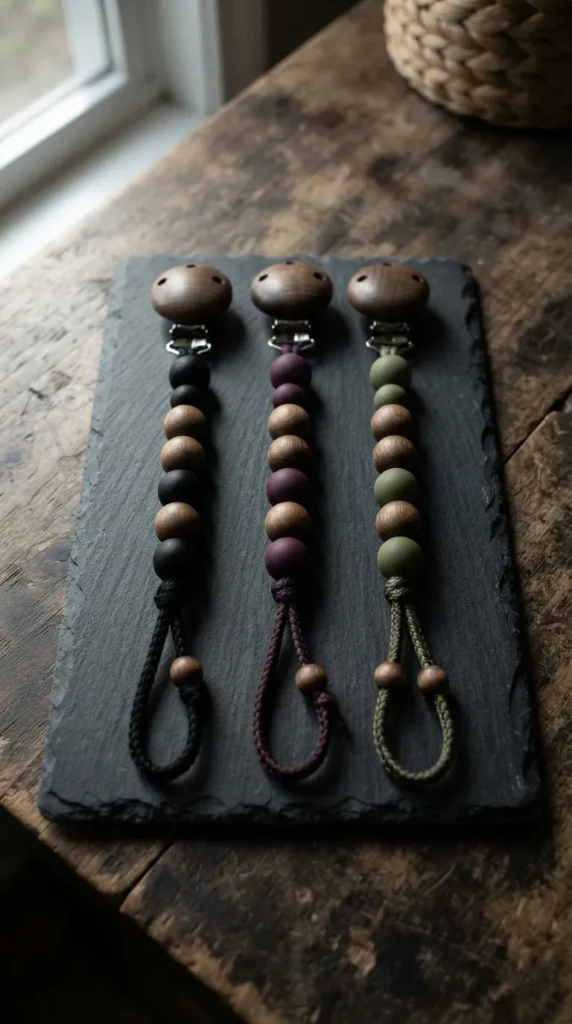
11. Sculptural Silicone & Beechwood Pacifier Clips
Introduction Pacifier clips are an everyday lifesaver for parents on the go. By combining soft, BPA-free matte food-grade silicone with unfinished beechwood, these clips become stylish, architectural accessories.
What This Idea Means This gift takes a purely functional item and elevates it with clean, tactile design. It protects essentials from dirty floors while complementing modern baby clothing.
Materials Needed
- Certified BPA-free, food-grade matte silicone beads (hexagons, lentils, rounds)
- Lead-free, nickel-free natural beechwood metal clasp clips
- Braided nylon cord (1.5mm strength tested)
- Craft threading needle and sharp scissors
- Lighter (for heat-sealing cord ends)
How to Make It
- Step 1: Cut an 18-inch length of braided nylon cord. Fold it in half and loop it securely through the base ring of the beechwood clip using a lark’s head knot.
- Step 2: Lightly singe the raw ends of the cord with a lighter to prevent fraying and fuse them together for easier threading.
- Step 3: Thread your selected beads onto the double strand of cord, alternating shapes, sizes, and colors for visual interest.
- Step 4: Ensure the total length of the beaded strap does not exceed 7 to 8 inches (meeting infant safety length standards to eliminate entanglement hazards).
- Step 5: Loop the final end of the cord securely through the last bead, tying a triple knot.
- Step 6: Pull the knot firmly inside the last silicone bead cavity using needle-nose pliers, trimming and heat-sealing any excess cord.
Tips & Variations
- Pro Tip: Always pull-test your finished clip firmly with significant force to verify all knots are secure before gifting.
- Variation: Laser-engrave or hand-burn a tiny monogram or icon (sun, star, leaf) onto the beechwood clip surface.
12. Artisan Cold-Process Baby Soap & Botanical Bath Salts
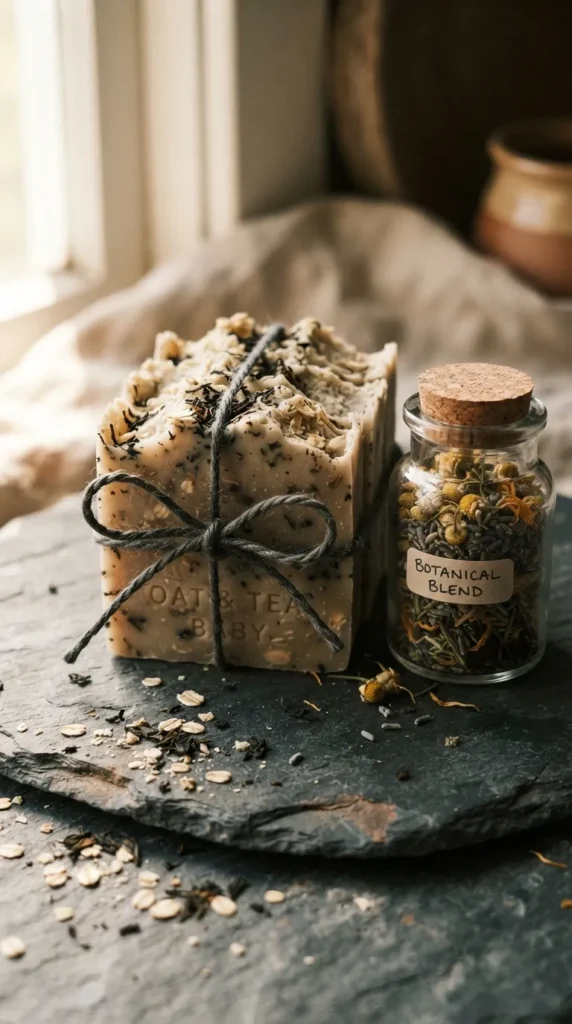
Introduction Newborn and postpartum skin requires pure, fragrance-free formulations. Handcrafted cold-process soap made from skin-loving plant oils offers a gentle, nourishing alternative to commercial cleansers.
What This Idea Means This gift provides clean skincare without synthetic foaming agents, artificial perfumes, or harsh preservatives. It turns daily bathtime into a restorative, aromatic ritual for both parent and child.
Materials Needed
- Organic extra virgin olive oil, coconut oil, and unrefined shea butter
- Sodium hydroxide (lye) and distilled water (or pure oat milk)
- Colloidal oatmeal and dried calendula petals
- Silicone soap loaf mold and soap cutter
- Digital kitchen scale, immersion blender, and protective gear (gloves, goggles)
How to Make It
- Step 1: Put on protective goggles and gloves. Precisely weigh distilled water and lye in heat-safe containers; slowly stir the lye into the water until fully dissolved. Let cool to 100°F (38°C).
- Step 2: Melt the shea butter, coconut oil, and olive oil together in a large pot, bringing the temperature to roughly 100°F.
- Step 3: Pour the lye water into the warm oils. Blend with an immersion blender in short pulses until reaching a light “trace.”
- Step 4: Fold in 2 tablespoons of colloidal oatmeal and a handful of calendula petals for extra nourishment. Keep the recipe fragrance-free for newborn safety.
- Step 5: Pour the soap mixture into the silicone loaf mold. Insulate with a towel for 24 hours while saponification occurs.
- Step 6: Unmold the block, cut into 1-inch bars, and let the soap cure on an open drying rack for 4 to 6 weeks. Package bars in simple parchment and kraft paper bands.
Tips & Variations
- Pro Tip: Substitute 100% distilled water with frozen pure goat milk or oat milk to yield an even creamier, hyper-moisturizing lather.
- Variation: Create a coordinating jar of soothing bath soaks using dead sea salt, colloidal oatmeal, and whole lavender buds for the parent.
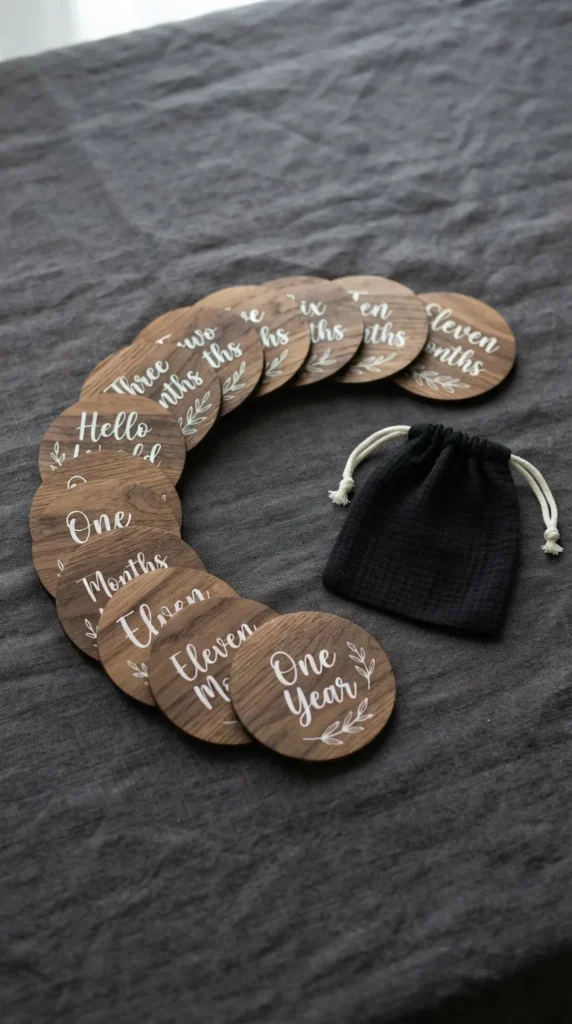
13. Minimalist Hand-Lettered Milestone Wooden Discs
Introduction A set of monthly wooden milestone discs offers a photo prop for recording growth across the first year. Flat, double-sided natural wood rounds with crisp typography fit right into today’s photo albums and digital updates.
What This Idea Means This gift gives parents a reliable, aesthetic way to track their child’s physical journey from birth to twelve months.
Materials Needed
- Thirteen 4-inch raw birch or basswood round craft blanks (1/8-inch thickness)
- Fine-tip acrylic paint pens (crisp white, matte black, or warm gold)
- Laser-printed typography templates and graphite transfer paper
- Ultra-fine 320-grit sandpaper
- Clear non-toxic matte aerosol sealant
- Cotton canvas drawstring pouch
How to Make It
- Step 1: Sand both sides of all wooden discs until silky smooth; wipe away any dust.
- Step 2: Use graphite paper to trace your numbers and text onto the center of each disc (“One Month”, “Two Months”, through “One Year”, plus “Hello World”).
- Step 3: Carefully hand-letter along the traced lines using an ultra-fine acrylic paint pen. Maintain steady hand pressure for clean, even edges.
- Step 4: Add delicate minimalist botanical borders, stars, or simple arched lines framing the text.
- Step 5: Allow the paint markers to cure completely for 12 hours.
- Step 6: Spray a light coat of matte acrylic sealant across the discs to prevent smudging, and place the finished set inside a stamped drawstring storage bag.
Tips & Variations
- Pro Tip: Make the discs double-sided (e.g., “One Month” on front, developmental milestone like “First Smile” on back) to double their versatility.
- Variation: Use a fine-point wood burning pyrography tool to burn the typography into the wood for a permanent rustic finish.
14. Personalized Canvas Growth Chart Ruler
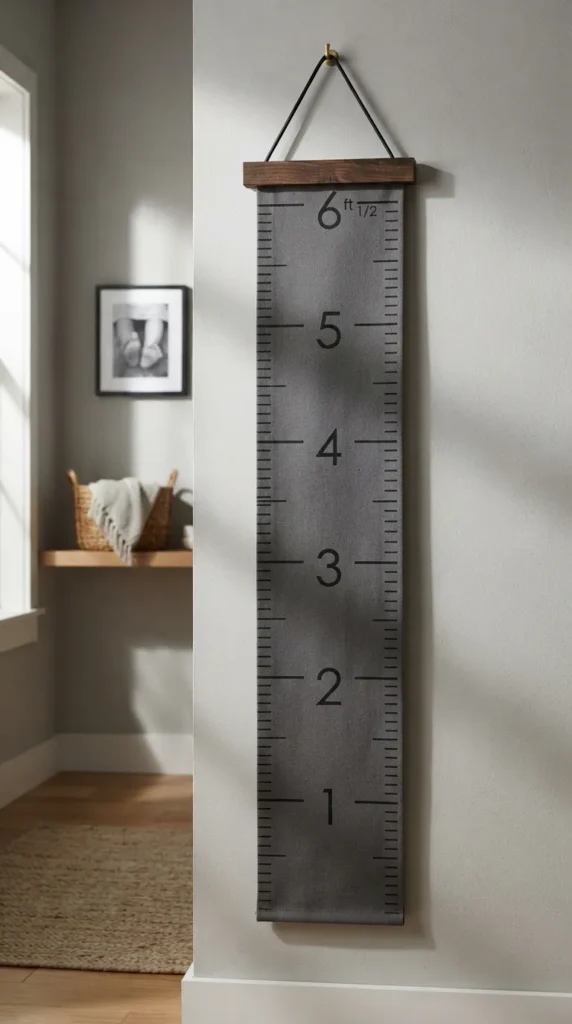
Introduction Traditional doorframe pencil marks get left behind during home renovations or moves. A portable, modern canvas hanging growth chart provides a portable keepsake that tracks height through adolescence.
What This Idea Means This item represents lasting continuity. It functions as clean, architectural wall decor while archiving childhood growth metrics across every home move.
Materials Needed
- 100% heavyweight unbleached cotton duck canvas (approx. 10 inches wide by 60 inches long)
- Two half-round wooden molding strips (oak or walnut, 10 inches wide)
- Heavy black fabric marker or permanent screen print ink
- Measurement ruler, carpenter square, and pencil
- Leather hanging thong or cotton cord
- Wood glue and staple gun
How to Make It
- Step 1: Hem the left and right sides of your long canvas strip for clean edges, keeping the finished width at exactly 8 inches.
- Step 2: Lay the canvas flat on a long table. Using a carpenter’s square, measure from 1 foot (12 inches) up to 6 feet (72 inches).
- Step 3: Draw precise tick marks at every 1-inch, 1/2-inch, and 1/4-inch interval along one side with a pencil. Mark larger 2-inch wide lines for every full foot.
- Step 4: Go over the pencil marks with your permanent waterproof fabric marker, adding clean, modern numbers next to each foot line.
- Step 5: Hand-paint the baby’s family name or initials at the very top in clean, minimalist lettering.
- Step 6: Sandwich the canvas top and bottom between the wooden molding strips, securing with wood glue and small staples, and affix the leather hanging strap.
Tips & Variations
- Pro Tip: Remind parents to hang the chart exactly 12 inches above floor level so that all height measurements remain accurate over time.
- Variation: Use natural hanging leather straps with brass screw rivets instead of wooden framing strips.
15. Hand-Stitched Heirloom Felt Animal Rattle
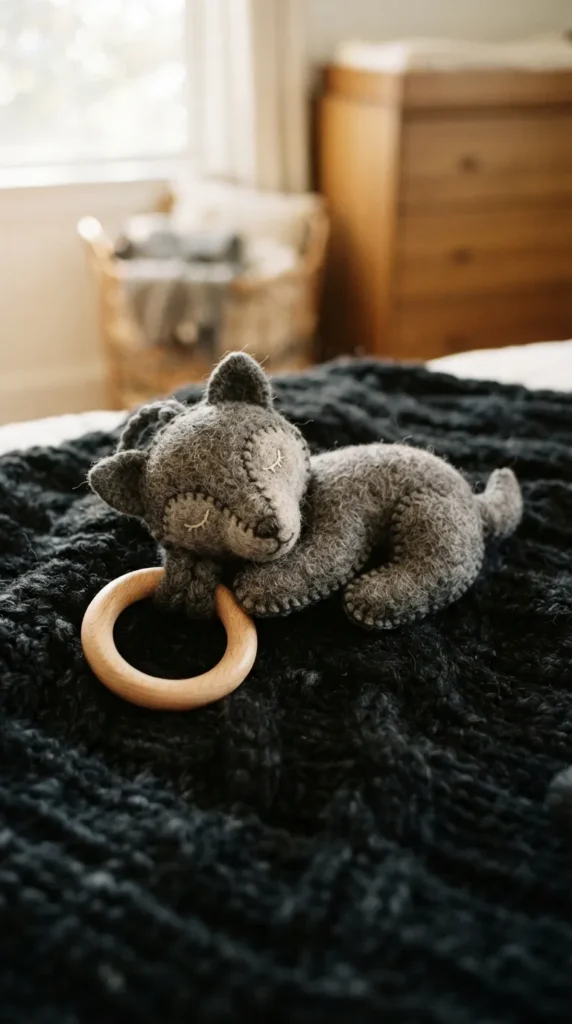
Introduction Ditching synthetic plush toys, hand-sewn wool felt rattles bring a tactile, artisan feel to playtime. Made from pure wool felt and organic stuffing, these rattles are safe, soft, and easy for tiny hands to grasp.
What This Idea Means This toy offers gentle, low-stimulation playtime. It introduces little ones to natural textures while serving as sweet, vintage-inspired nursery decor when resting on a shelf.
Materials Needed
- 100% pure wool felt sheets in heathered natural tones (dove grey, fawn, cream)
- High-grade organic uncarded wool batting or raw cotton stuffing
- 1 enclosed plastic or wooden rattle ball insert
- DMC cotton embroidery floss matching the felt
- Embroidery needle, pattern paper, and fabric shears
How to Make It
- Step 1: Trace and cut two mirrored animal silhouettes (such as a fawn, bunny, or bear) out of pure wool felt.
- Step 2: Embroider facial details—such as sleeping eyes, a tiny nose, and inner ear accents—onto the front piece using tiny backstitches and French knots.
- Step 3: Pin the front and back pieces together with right sides facing out.
- Step 4: Blanket-stitch or fine-whipstitch around the outer edges using 2 strands of embroidery floss, leaving a 1.5-inch opening along the bottom.
- Step 5: Stuff the animal firmly with organic wool batting, placing the rattle insert right in the center surrounded by stuffing.
- Step 6: Stitch the remaining opening closed with matching thread, tying off knots invisibly inside the seams.
Tips & Variations
- Pro Tip: Always use 100% natural wool felt rather than synthetic craft felt; wool naturally repels water, resists pilling, and contains zero plastics.
- Variation: Attach the felt animal head securely to a 3-inch smooth, untreated natural beechwood teething ring.
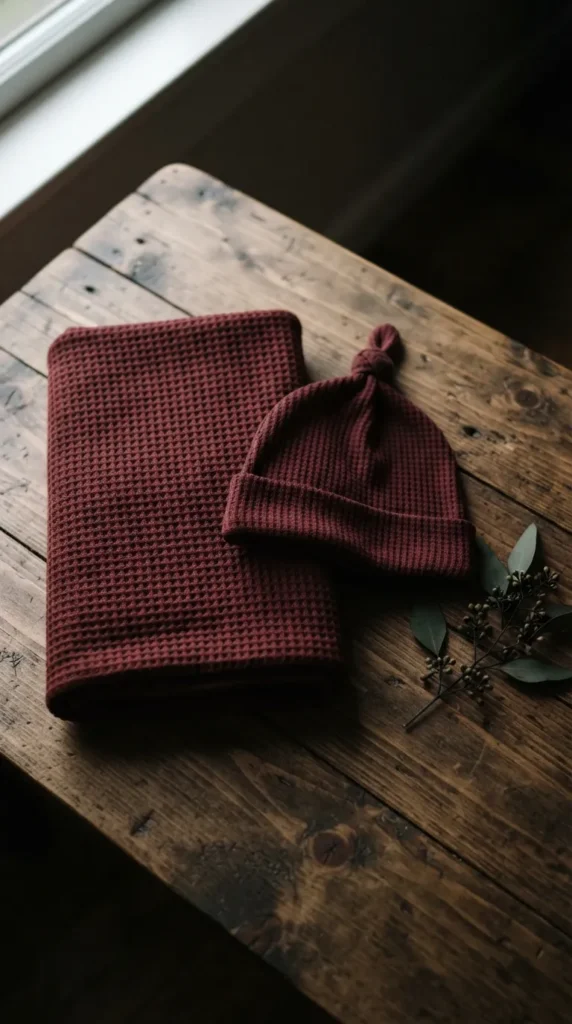
16. Waffle Knit Organic Swaddle & Knotted Beanie Set
Introduction A stretchy, breathable waffle knit swaddle wraps infants comfortably while regulating temperature. Paired with an adjustable knotted beanie, this duo makes a go-to coming-home outfit for newborn photography.
What This Idea Means This set focuses on newborn warmth and simplicity. It provides practical, everyday clothing made from soft, organic textiles.
Materials Needed
- 1.5 yards of 100% organic cotton waffle knit fabric (in ochre, sage, dusty blue, or cream)
- Matching stretch ballpoint sewing machine needles
- High-quality polyester or cotton thread
- Rotary cutter, cutting mat, and clear sewing grid ruler
- Overlock serger or sewing machine with a stretch/zigzag stitch
How to Make It
- Step 1: Pre-wash and dry the waffle knit fabric to account for shrinkage. Lay out flat and cut a perfect 42×42-inch square for the swaddle blanket.
- Step 2: Use your leftover fabric scraps to cut out two beanie pieces using a newborn hat pattern template with an extended top tie tail.
- Step 3: Finish the perimeter of the swaddle blanket with a clean rolled hem using a serger, or fold over 1/4-inch twice and sew using an elastic zigzag stitch.
- Step 4: Pin the two beanie pieces right sides together. Sew the outer perimeter with a 3/8-inch stretch stitch, leaving the bottom opening unstitched.
- Step 5: Fold the bottom edge up by 1 inch to create the beanie brim, topstitching with a flexible twin needle.
- Step 6: Turn the beanie right side out and tie the long top tail into an adjustable knot.
Tips & Variations
- Pro Tip: Use a walking foot and lower presser foot pressure to keep the open waffle knit from stretching out or waving as you sew.
- Variation: Sew an identical matching fabric headband with a neat bow tie for a different look.
17. Handcrafted Clay Hanging Nursery Wall Pennant
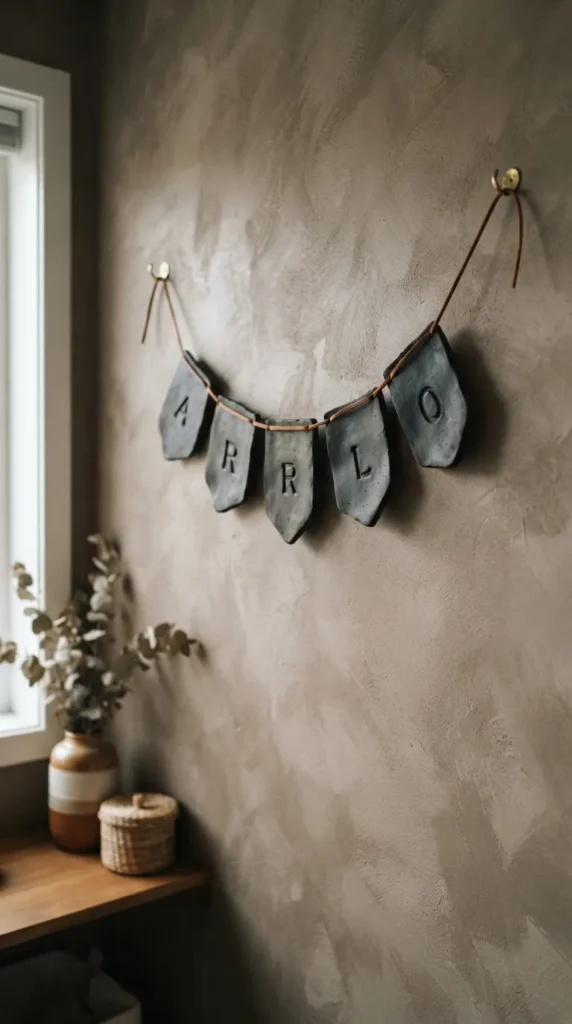
Introduction Clay pennants bring a fresh, ceramic look to nursery walls. Stamped with the child’s name or birth details, these textured clay plaques offer a lasting alternative to paper prints or fabric banners.
What This Idea Means This gift serves as personalized ceramic wall art. Its earthy textures and clean lines make it an understated focal point in any room.
Materials Needed
- High-grade air-dry modeling clay or bakeable polymer clay (terracotta, sandstone, or white)
- Acrylic rolling pin and guide rings (1/4-inch thickness)
- Pennant/flag template cut from cardstock
- Miniature alphabet letter stamp set
- Wooden skewer, fine-grit sandpaper, and matte sealer
- Natural jute twine or leather cord for hanging
How to Make It
- Step 1: Knead the clay to eliminate air pockets. Roll out evenly onto parchment paper to a 1/4-inch thickness.
- Step 2: Place your pennant template over the clay and cut crisp edges with a precision craft knife.
- Step 3: Punch two holes at the top corners using a wooden skewer or drinking straw for the hanging cord.
- Step 4: Gently press your alphabet stamps into the clay, centering the baby’s name, birthdate, or a short phrase like “Stay Wild” or “Dream Big.”
- Step 5: Allow the pennant to air dry completely for 48 to 72 hours (or bake according to polymer clay guidelines), flipping occasionally to prevent curling.
- Step 6: Sand the dry edges smooth, apply a clear matte protective sealer, and thread a leather cord through the top holes.
Tips & Variations
- Pro Tip: Lightly press a sprig of fresh lavender or eucalyptus into the damp clay before stamping to imprint a subtle botanical relief.
- Variation: Paint the stamped lettering with a touch of metallic bronze paint for subtle contrast against the matte ceramic base.
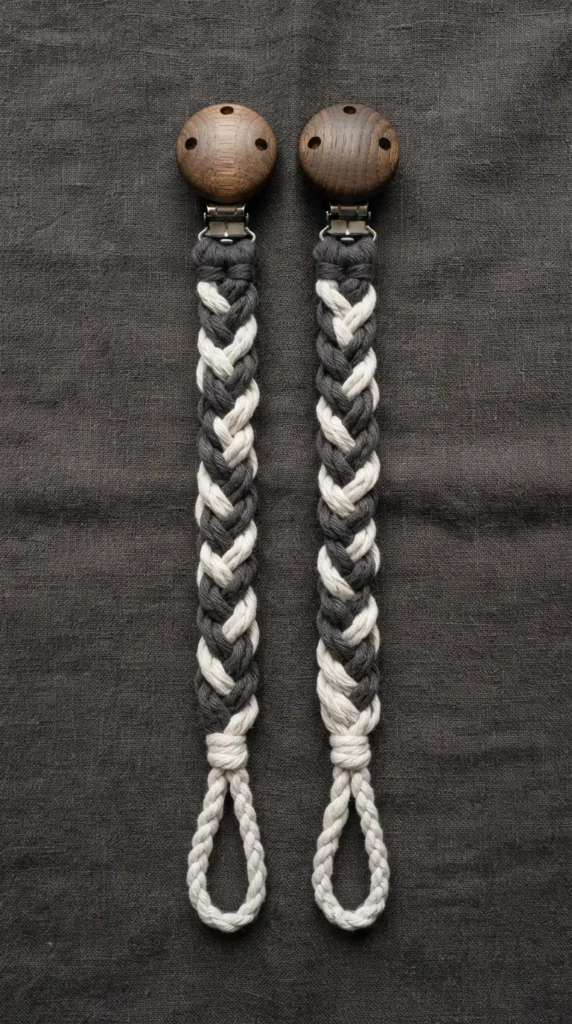
18. Braided Organic Cotton Pacifier & Teether Leash
Introduction Simple, flexible braided cotton leashes keep pacifiers and teething rings cleanly within baby’s reach. Made entirely of flat-braided, un-dyed cotton cord, these lightweight accessories are easy to wash and carry.
What This Idea Means This item is all about clean, minimal utility. It provides a simple, natural solution for keeping dropped teethers off the floor without heavy hardware.
Materials Needed
- 100% natural unbleached 5mm braided cotton rope or 3-ply macramé yarn
- Lead-free natural maple wood pacifier clasp
- Sharp fabric scissors
- Large-eye tapestry needle
- Measuring tape
How to Make It
- Step 1: Cut four strands of cotton cord, each measuring 30 inches long.
- Step 2: Thread the cords halfway through the base loop of the maple wood clip, resulting in eight working strands of 15 inches each.
- Step 3: Secure the clip to a work surface with masking tape. Form a tight, flat 4-strand or 8-strand round braid down for 7 inches.
- Step 4: Leave the final 3 inches of cord unbraided. Fold the ends back upward onto the braid to create a 2-inch loop for attaching pacifiers.
- Step 5: Wrap another piece of cotton cord around the base of the loop using a neat “gathering knot” (macramé cinch knot) to secure all strands firmly.
- Step 6: Trim any excess cord tails flush beneath the gathering knot, tucking the ends cleanly underneath.
Tips & Variations
- Pro Tip: Keep the braid tight and even so it holds up to repeated machine washings in a mesh laundry bag.
- Variation: Dip-dye the bottom half of the finished braided leash in natural plant dyes like turmeric (for soft yellow) or avocado pits (for dusty blush).
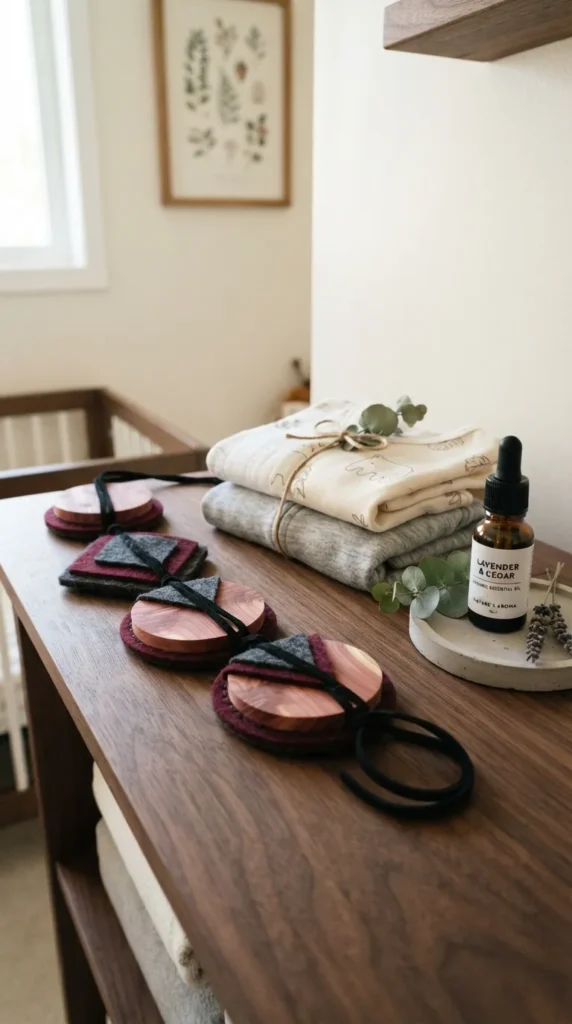
19. Natural Cedarwood & Wool Nursery Closet Fresheners
Introduction Nursery closets easily develop stale odors from stored fabrics, humidifiers, and diaper stations. Handcrafted raw cedar disks paired with pure wool felt provide a natural, non-toxic aromatic solution that protects fabrics without synthetic perfumes.
What This Idea Means This gift supports a clean, chemical-free home environment. It offers an effective, natural way to keep baby clothes and blankets smelling fresh.
Materials Needed
- Pre-drilled natural aromatic red cedar wood slices (approx. 2 to 3 inches in diameter)
- 100% pure wool craft felt sheets (earthy neutral colors)
- 100% pure organic lavender or roman chamomile essential oil (for parents to refresh later)
- Natural suede lace or unbleached linen cord
- Hole punch and alphabet stamping tools
How to Make It
- Step 1: Sand the cedar discs lightly with medium-grit sandpaper to release the natural aromatic oils in the wood.
- Step 2: Cut wool felt sheets into matching geometric shapes (circles, leaves, or arches) sized slightly smaller than the cedar discs.
- Step 3: Punch a hole at the top of each wool felt shape corresponding to the hole in the cedar slice.
- Step 4: Layer one wool felt piece over each cedar disc. Thread a 10-inch length of suede lace through both pieces, tying off with a secure overhand knot.
- Step 5: Add 2 to 3 drops of pure lavender essential oil directly onto the felt (leaving the cedar raw to naturally regulate moisture).
- Step 6: Package a set of four fresheners in an airtight glass jar with a small dropper vial of essential oil and instructions for refreshing the scent.
Tips & Variations
- Pro Tip: Cedar naturally repels pests and absorbs excess moisture, making these discs ideal for storing heirloom blankets.
- Variation: Use a wood burning pen to write clothing sizes (“0-3m”, “3-6m”, “6-12m”) directly on the cedar discs to make functional closet organizers.
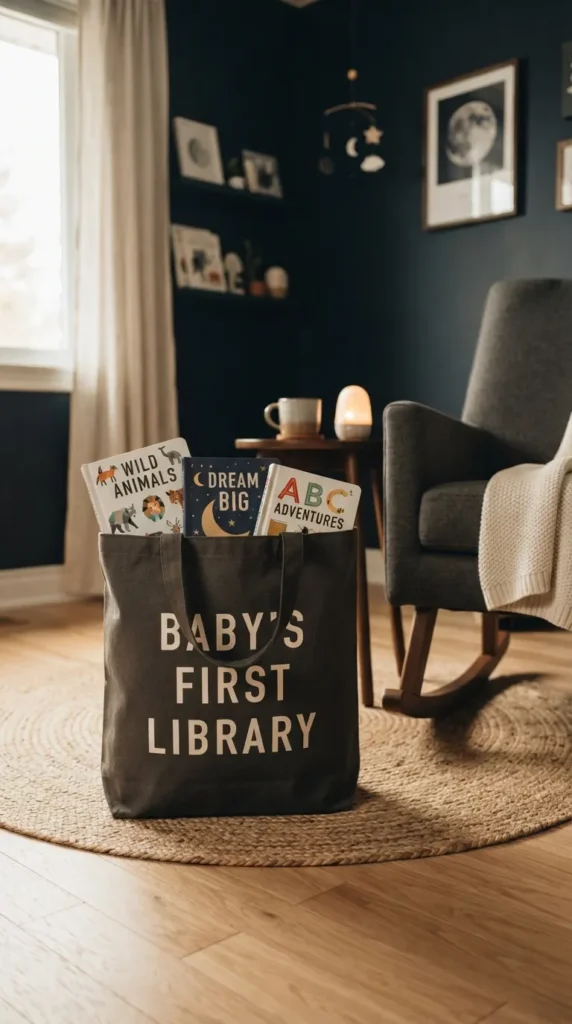
20. Curated Modern “First Library” Book Tote
Introduction Reading together early on builds strong language skills and family routines. A heavy-duty personalized canvas tote filled with a starter set of modern, beautifully illustrated board books makes a practical gift that grows with the child.
What This Idea Means This gift is an investment in early learning and family connection. It encourages a daily reading routine with books that parents will enjoy reading as much as kids love hearing.
Materials Needed
- Heavy-duty 16oz natural cotton canvas tote bag with wide flat base
- Heat transfer vinyl (HTV) or black water-based fabric screen print ink
- Craft cutting machine or alphabet stencils
- Iron or heat press
- 3 to 4 curated, design-forward board books
How to Make It
- Step 1: Iron the canvas tote bag to eliminate wrinkles, moisture, and dust.
- Step 2: Cut your custom lettering design (“Baby’s First Library” or “[Baby’s Name]’s Book Club”) from matte heat transfer vinyl.
- Step 3: Center the vinyl cutout horizontally on the front face of the canvas tote bag.
- Step 4: Press with a dry iron at 315°F (155°C) using firm, even downward pressure for 15 seconds.
- Step 5: Let the carrier sheet cool completely before peeling it off to ensure clean, crisp lettering.
- Step 6: Fill the completed tote with your selected modern board books, adding a hand-written note inside the front cover of each book.
Tips & Variations
- Pro Tip: Pick books that feature high-contrast illustrations or compelling, artistic visual design to keep little ones engaged.
- Variation: Sew small open slip pockets onto the exterior sides of the tote to hold a matching plush animal or a pair of reading socks.