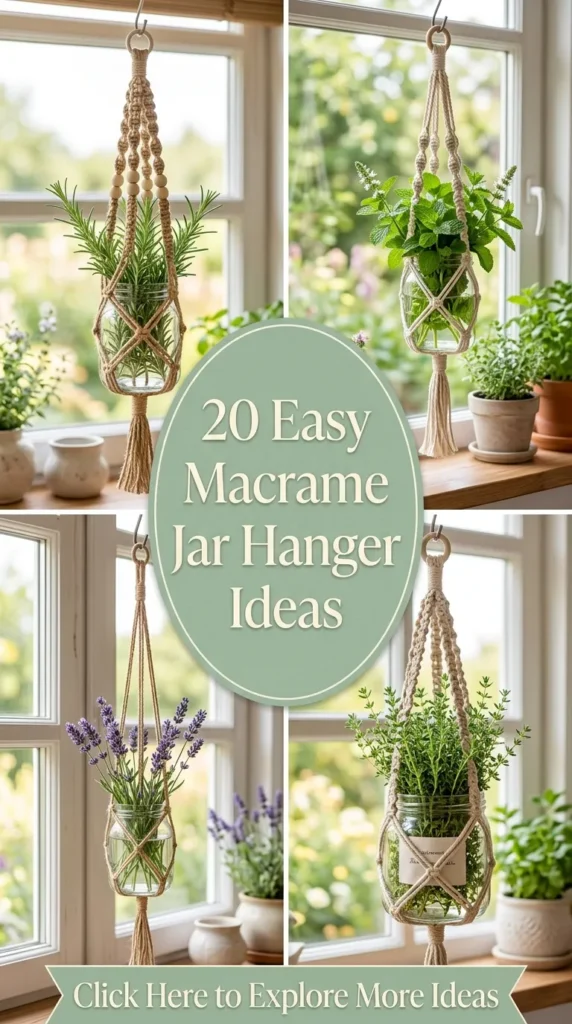
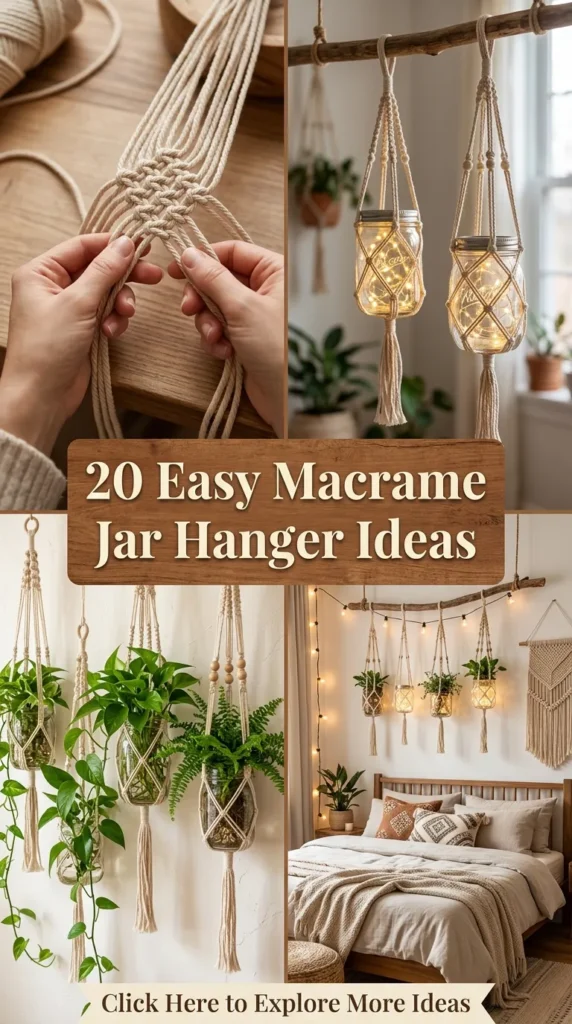
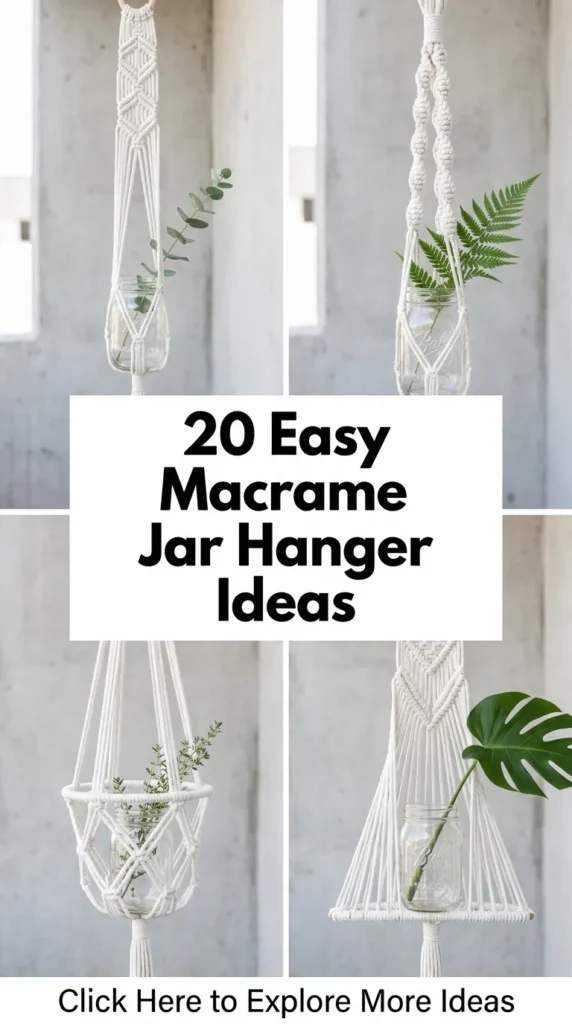
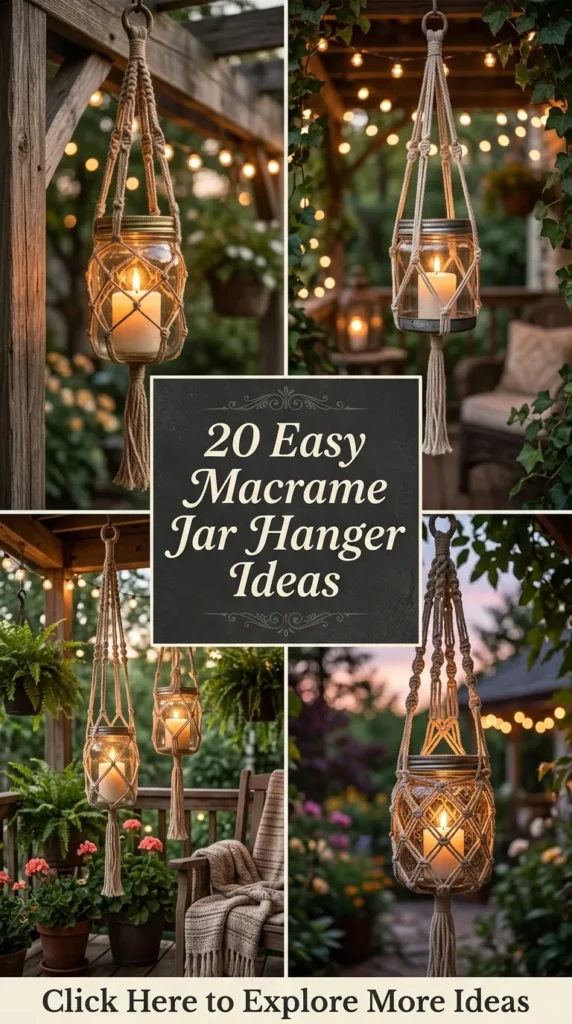
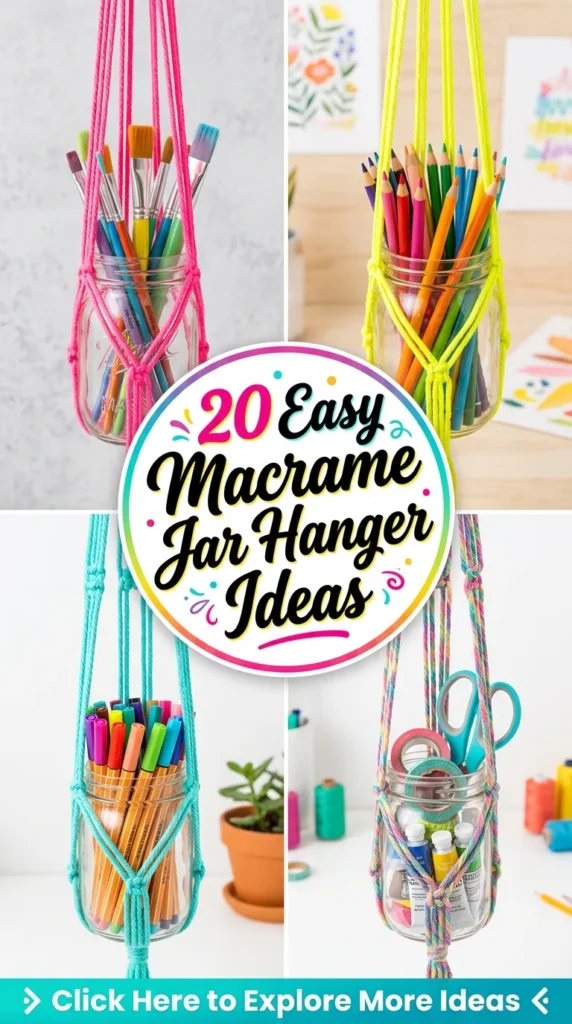
Upcycling everyday glass jars into stunning, functional decor is one of the most rewarding home crafting projects you can undertake. Combining glass jars—whether old mason jars, pickle containers, or repurposed sauce bottles—with the traditional art of macrame allows you to create serene, bohemian, and modern accents for any room or garden. Hanging macrame jar holders work beautifully as suspended plant propagators, gentle fairy light lanterns, bathroom storage pods, spice containers, or hanging votive candle holders.
This comprehensive guide takes you step-by-step through 20 unique, realistic, and aesthetic macrame jar hanger ideas. Each project includes a deep dive into the design philosophy, exact supplies required, clear step-by-step knotting instructions, and practical tips to adapt the design to your home decor style.
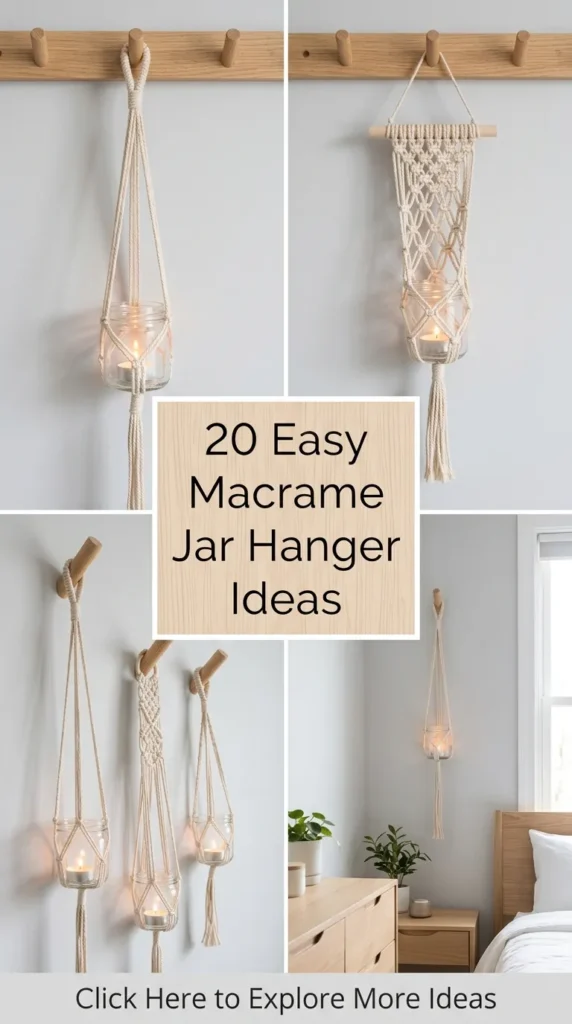
1. Minimalist Single-Twist Jar Hanger
What This Idea Means
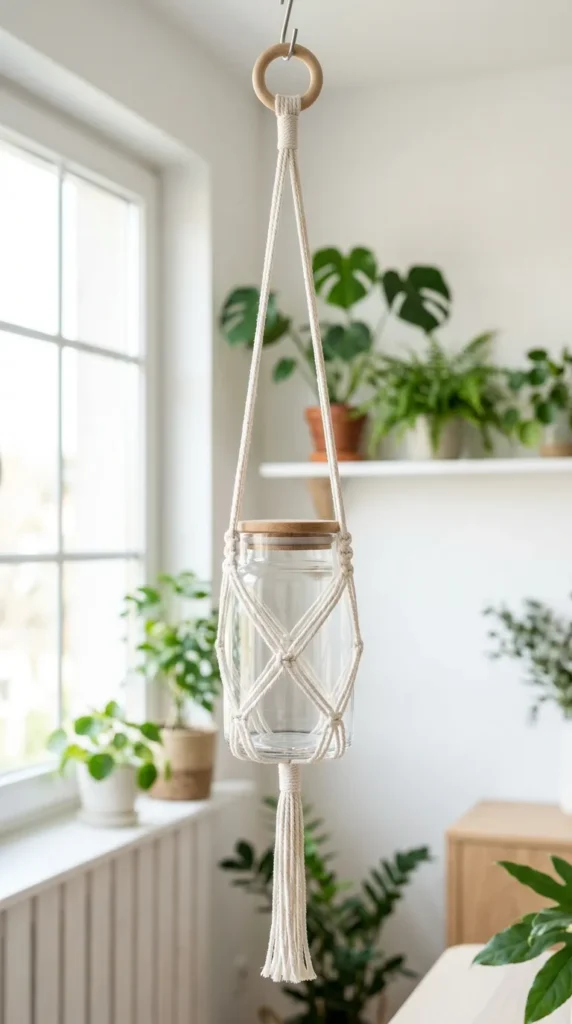
The Minimalist Single-Twist Jar Hanger relies on sleek lines, airy spacing, and functional simplicity. Instead of heavy, dense knotting patterns, this design highlights the natural beauty of the glass container and its contents. It features a streamlined four-strand or eight-strand base tied together with simple alternating square knots, creating a airy netting that allows maximum light transmission through the glass.
Supplies Needed
- Cord: 3mm single-strand natural unbleached cotton cord (approx. 12 meters total, cut into 4 pieces of 3 meters each)
- Hardware: 1 small wooden ring (2-inch outer diameter) or a metal S-hook
- Container: 16 oz standard smooth glass mason jar or recycled glass food jar
- Tools: Sharp fabric scissors, measuring tape, masking tape, comb for fringe finishing
How to Make It
- Prep and Mount: Fold all four 3-meter cords in half and secure them to your wooden ring using Lark’s Head knots. You will now have 8 working cords hanging down.
- Form the Neck Wrap: Position your jar inside a temporary setup (or hang the ring from a door handle) to work directly around the form. Measure down about 2 inches from the ring and create a Gathering Knot around all 8 cords using a spare 20-inch piece of cord.
- Build the Diamond Net: Divide the 8 cords into 4 pairs of 2 cords each. Tie a simple Square Knot in each pair approximately 2 inches below the gathering knot.
- Alternate Cords: Measure down another 1.5 inches. Take one cord from adjacent pairs and tie a Square Knot. Repeat around all cords to form an alternating diamond lattice netting.
- Form the Base: Repeat the alternating square knot step one more time around the base curve of the jar.
- Secure the Bottom: Gather all 8 cords tightly at the exact center bottom of the jar and tie a firm Gathering Knot with a 24-inch filler cord. Trim the tail cords neatly to leave a sleek 2-inch tassel.
Tips and Variations
- Tip: Use masking tape on cord ends to keep single-strand cotton from unraveling while knotting.
- Variation: Swap unbleached white cotton for dark charcoal or beige cord to complement industrial or rustic Scandinavian interiors.
2. Boho Fringe & Wooden Bead Lantern Hanger
What This Idea Means
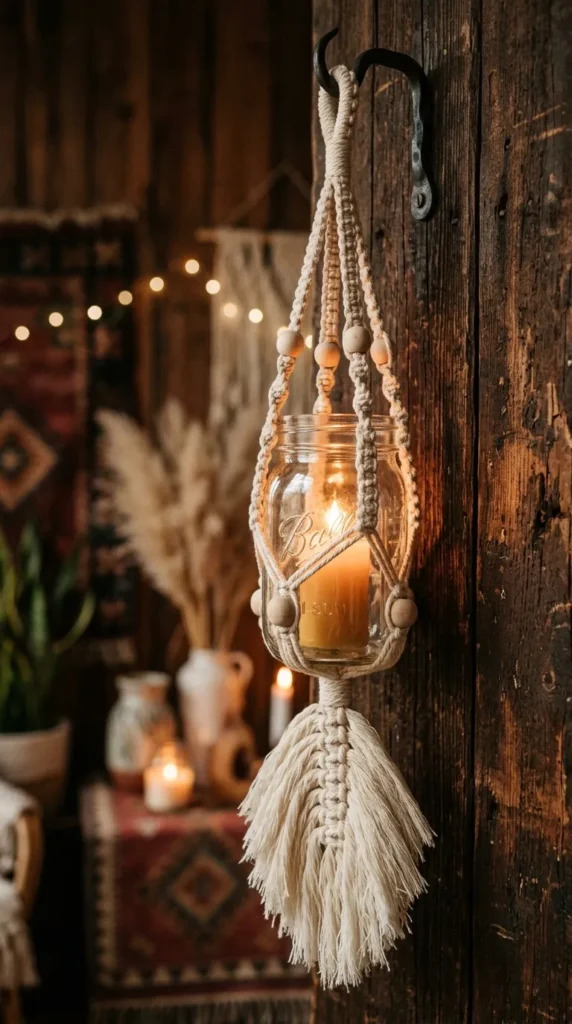
This design infuses rich tactile warmth into your space by blending natural wooden accents with thick brushed cotton fringe. The Boho Fringe & Wooden Bead Lantern Hanger uses decorative wooden beads along the main hanging cords and finishes with an exaggerated, voluminous tassel that drapes dramatically beneath the hanging glass jar.
Supplies Needed
- Cord: 4mm 3-ply twisted cotton rope (approx. 16 meters total, cut into 8 pieces of 2 meters each)
- Hardware: 1 wooden ring (3-inch diameter)
- Beads: 8 to 12 raw pine or beech wood beads (15mm–20mm diameter with wide center holes)
- Container: Wide-mouth pint mason jar
- Tools: Tape measure, scissors, pet slicker brush or fine-tooth comb, bead threader or tape
How to Make It
- Mounting: Attach the 8 strands of 4mm cord to the wooden ring using Lark’s Head knots, giving you 16 working strands.
- Add Upper Beads: Thread a wooden bead onto the two central cords of each 4-strand group using tape wrapped around the tips to ease threading. Secure each bead in place with a Square Knot directly underneath it.
- Knot the Collar: Measure 3 inches below the beads and create a band of 4 continuous Square Knots around the neck of the jar.
- Construct the Basket Net: Separate adjacent cord pairs and create Alternating Square Knots 2 inches below the collar band. Repeat this step around the circumference to hug the jar belly.
- Bottom Finish & Fringe: Draw all 16 cords firmly underneath the base of the jar. Tie a thick 3-inch Gathering Knot using a separate piece of rope. Cut the remaining cord tails to a uniform length of 6 inches.
- Comb out Tassels: Unravel the 3-ply rope strands and brush them out thoroughly with a comb to create a fluffy, dense bohemian tassel.
Tips and Variations
- Tip: Lightly mist the fringe with water or stiffening spray while combing, then trim horizontally once dry for a razor-sharp finish.
- Variation: Paint the wooden beads with metallic gold or soft terracotta acrylic paint prior to threading.
3. Spiral Knot Mason Jar Plant Terrarium
What This Idea Means
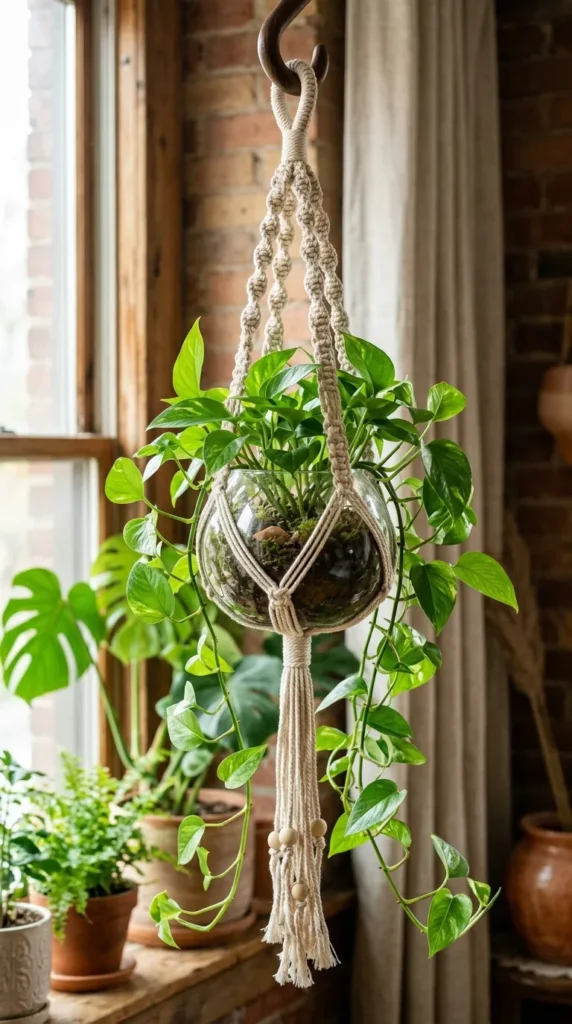
Visual rhythm is the key feature of the Spiral Knot Mason Jar Hanger. By utilizing continuous Half Square Knots (also known as Spiral or DNA knots), the cords naturally twist in a tight, helical pattern as you work down. This gives the plant hanger an organic, kinetic energy ideal for showing off indoor trailing foliage like pothos, philodendron, or string of pearls.
Supplies Needed
- Cord: 3mm 3-ply cotton cord (18 meters total, cut into 4 long working cords of 3.5m and 4 short filler cords of 1m)
- Hardware: 2.5-inch wooden or brass ring
- Container: 32 oz tall glass mason jar or clear wide-neck vase
- Tools: Scissors, measuring tape, binder clips
How to Make It
- Mounting Cords: Fold all cords in half and secure them to the ring with Lark’s Head knots, placing one short filler cord on the inner side and one long working cord on the outer side of each 4-cord group.
- Work Spiral Columns: Using the two outer long cords, tie continuous Half Square Knots over the two inner filler cords. As you keep tying the same half-knot, the braid will naturally rotate. Allow it to twist freely for 6 to 8 inches down all 4 legs.
- Transition to Jar Basket: Stop spiraling at the neck rim of the jar. Divide the 4 legs into 8 individual cords.
- Lattice Netting: Connect adjacent cords using simple Overhand Knots or Square Knots spaced 1.5 inches apart down the jar body.
- Base Closure: Gather all cords at the bottom center of the jar and seal with a neat Gathering Knot. Trim tails to a 4-inch tassel.
Tips and Variations
- Tip: If the spiral starts to feel stiff or uneven, make sure you are always starting the half-knot with the exact same side cord (e.g., always left cord over front).
- Variation: Insert small sprigs of dried lavender or eucalyptus into the twists of the spiral cords for an aromatic touch.
4. Double-Tiered Hanging Glass Trio
What This Idea Means
Maximize vertical space and create high visual impact with a multi-jar vertical display. The Double-Tiered Hanging Glass Trio anchors two or three small glass jars along a single vertical macrame structure. It is ideal for propagation stations, herb displays, or holding tealights at alternating heights along a window frame or outdoor porch wall.
Supplies Needed
- Cord: 4mm braided cotton cord (24 meters total, cut into 4 pieces of 6 meters each)
- Hardware: 1 heavy-duty metal ring (3-inch diameter)
- Containers: 2 matching small jar bodies (e.g., 8 oz jam jars or wide baby food jars)
- Tools: Scissors, tape measure, S-hook for hanging work
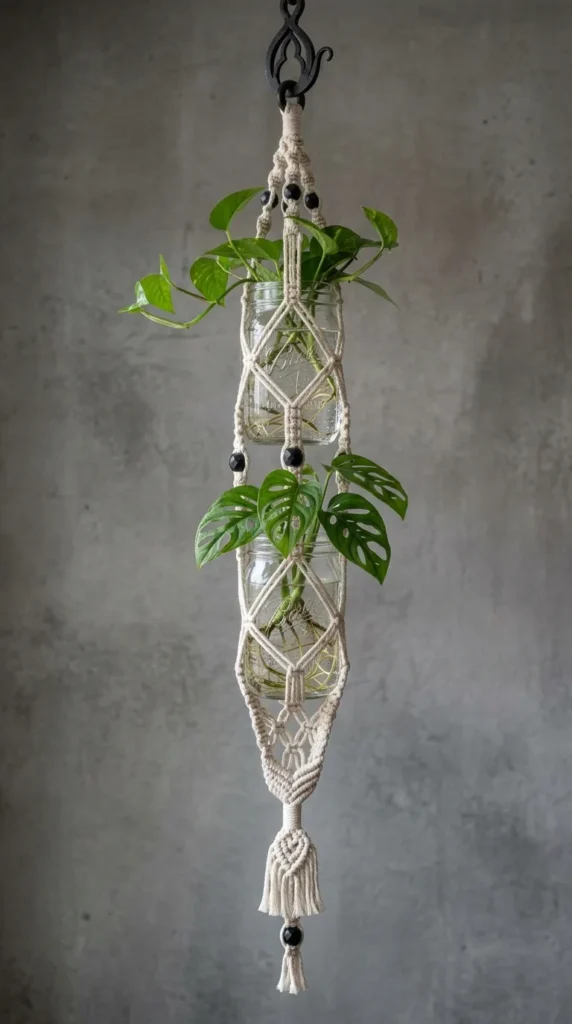
How to Make It
- Upper Mounting: Fold the four 6-meter cords in half and mount them onto the metal ring with Lark’s Head knots (8 working strands total).
- Upper Jar Harness: Work 4 inches of Square Knots from the ring. Then expand the strands to surround the neck of your first jar. Tie alternating Square Knots to form a snug net around the first jar.
- Mid-Section Bridge: Underneath the first jar, gather all strands and execute a tight 2-inch Gathering Knot. Continue down with 8 to 10 inches of plain vertical cord or simple 4-strand sinnets to create separation between the jars.
- Lower Jar Harness: Repeat the net pattern around the second jar using alternating square knots spaced to fit its specific dimensions.
- Final Anchor: Secure the bottom of the second jar with a double-wrapped Gathering Knot. Leave a clean 5-inch tail tassel at the base.
Tips and Variations
- Tip: Always place glass jars in the upper sections first when testing fit so weight distribution remains balanced during construction.
- Variation: Use colored glass jars—such as amber, cobalt blue, or emerald green—to add a vibrant stained-glass glow when illuminated from behind.
5. Wrapped Netting Votive Candle Holder
What This Idea Means
Designed specifically for soft atmospheric lighting, the Wrapped Netting Votive Candle Holder creates intricate geometric shadow patterns when lit from within. This project utilizes a delicate fishtail or micro-netting technique that hugs the contour of a glass votive jar tightly, preventing slipping while maintaining complete thermal safety.
Supplies Needed
- Cord: 2mm thin macrame twine or waxed cord (16 meters total, cut into 8 strands of 2 meters)
- Hardware: 1 small 1-inch metal key ring or binder ring
- Container: Smooth cylindrical clear glass votive jar or recycled jelly glass
- Lighting: Battery-operated LED tealight or real soy votive candle
- Tools: Fine scissors, ruler, painter’s tape
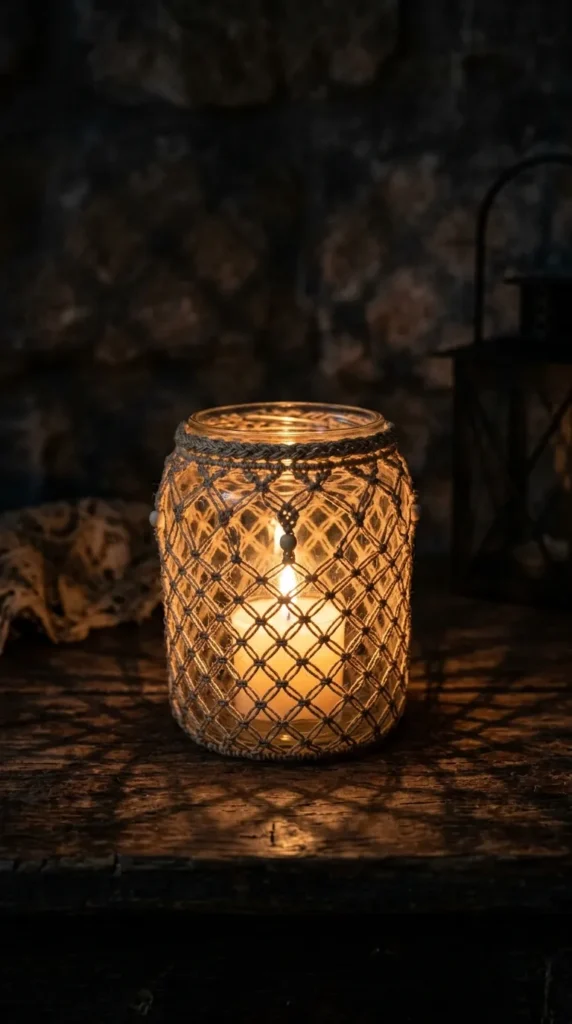
How to Make It
- Ring Mount: Attach the 8 cords to the small ring using Lark’s Head knots, giving 16 fine working strands.
- Fine Mesh Netting: Divide the strands into 8 pairs. Tie simple Overhand Knots around the perimeter just 1/2 inch below the ring.
- Tight Diamond Pattern: Shift pairs (taking one strand from adjacent knots) and tie another row of Overhand Knots 1/2 inch down. Repeat this fine mesh knotting for 4 to 5 rows until the net completely wraps the sides of the votive jar.
- Rim Collar: Create a tight horizontal Wrap Knot directly around the lip of the jar rim to lock the netting in place so it cannot slide downward.
- Base Gathering: Fold the remaining mesh strands neatly under the center of the bottom and bind tightly with a flat square knot cluster. Cut tails flush for a seamless flat-bottom finish that stands straight on surfaces or hangs evenly.
Tips and Variations
- Tip: Keep knot spacing tiny and uniform by using a piece of cardstock cut to 1/2-inch width as a spacing guide between rows.
- Variation: Use metallic or silver-threaded macrame twine to reflect candle flickers.
6. Square Knot Lattice Hanging Vase
What This Idea Means
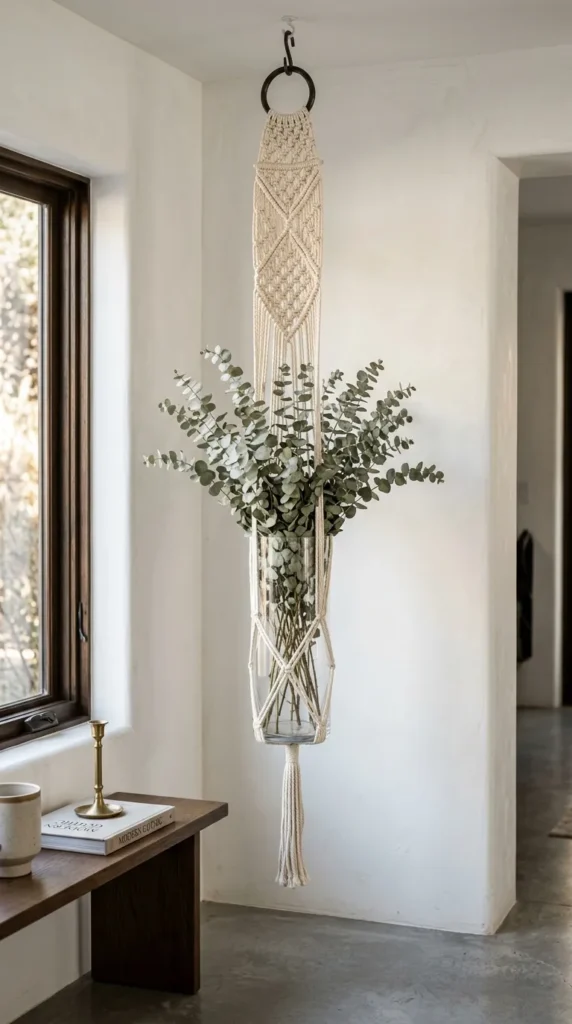
The Square Knot Lattice design utilizes clean geometric symmetry to create a mesh basket pattern around the glass jar. This technique provides exceptional stability for tall, slender jars used as floral vases or propagation vessels. The repetitive lattice pattern creates a striking, modern look that fits seamlessly into contemporary, farmhouse, or Scandinavian interiors.
Supplies Needed
- Cord: 3mm 3-ply natural cotton cord (16 meters total, cut into 8 strands of 2 meters)
- Hardware: 1 wooden mounting ring (2-inch diameter)
- Container: Tall cylindrical glass vase or repurposed milk bottle
- Tools: Scissors, tape measure, masking tape
How to Make It
- Setup: Mount all 8 strands onto the wooden ring using Lark’s Head knots (16 working cords total).
- Group into Fours: Divide the cords into 4 groups of 4 cords each.
- Top Lattice Row: Measure 4 inches down from the ring. Tie 1 Square Knot in each of the 4 groups.
- Alternating Rows: Measure 1.5 inches down from the first row. Re-group the cords by taking 2 cords from adjacent knots and tie a new row of Square Knots. Continue this alternating pattern for 4 to 6 full diamond rows down the length of the jar body.
- Bottom Closure: Pull all 16 cords tightly under the flat base of the glass jar. Secure with a 2-inch Gathering Knot using a separate 30-inch length of cord.
- Finish Tassel: Trim the bottom cords evenly and brush out the ends into a soft fringe.
Tips and Variations
- Tip: Maintain even tension on the outer working cords across every square knot row to keep the vertical lattice lines straight.
- Variation: Add small dried flower stems into the lattice diamonds for an ethereal wall accent.
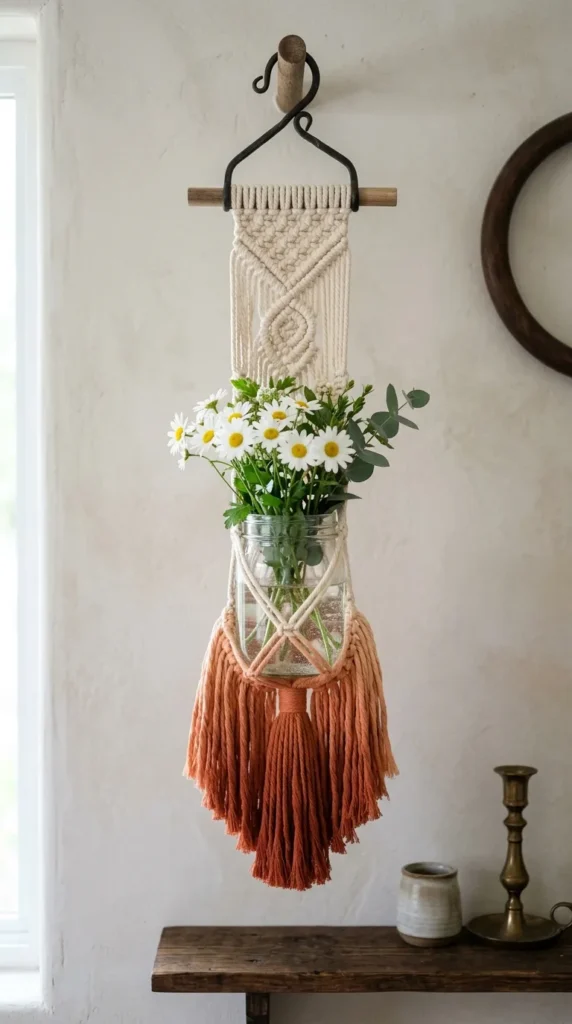
7. Dip-Dyed Ombre Cotton Jar Pocket
What This Idea Means
Combine fiber arts and textile dyeing by creating a dip-dyed macrame jar holder. Starting with natural white cotton cord, the completed hanger is partially immersed into fabric dye, creating a gentle color gradient from deep hue at the bottom tassel to pure white at the top ring. This technique turns a simple jar hanger into a painterly art piece.
Supplies Needed
- Cord: 4mm 100% natural unbleached cotton cord (must be natural fiber to absorb dye, approx. 14 meters)
- Hardware: 1 wooden ring (2.5-inch diameter)
- Container: Medium glass canning jar
- Dye Supplies: Fabric dye (terracotta, indigo, or sage green), salt, warm water, plastic bucket, rubber gloves
- Tools: Scissors, measuring tape
How to Make It
- Construct the Hanger: Follow the basic Square Knot Lattice structure (Idea #6) to construct the complete macrame hanger around your glass jar.
- Remove Glass Jar: Carefully remove the glass jar from the woven harness before starting the dyeing process.
- Prepare Dye Bath: Mix fabric dye with warm water and salt in a bucket according to dye package instructions.
- Dip-Dye Process: Submerge the bottom half of the macrame hanger (tassel and base section) into the dye bath for 10 minutes. Slowly lift the hanger out inch-by-inch over 5 minutes to create a soft, blended gradient transition.
- Rinse and Dry: Rinse the hanger in cold water until the water runs clear. Hang it to dry completely in a well-ventilated area.
- Re-insert Jar: Once fully dry, slip your glass jar back into the dip-dyed pocket.
Tips and Variations
- Tip: Synthetic cords (polypropylene or nylon) will not accept standard fabric dyes—always verify you are using 100% natural cotton or jute.
- Variation: Try a double-dip technique using two harmonious colors (e.g., yellow at the middle transitioning to forest green at the bottom).
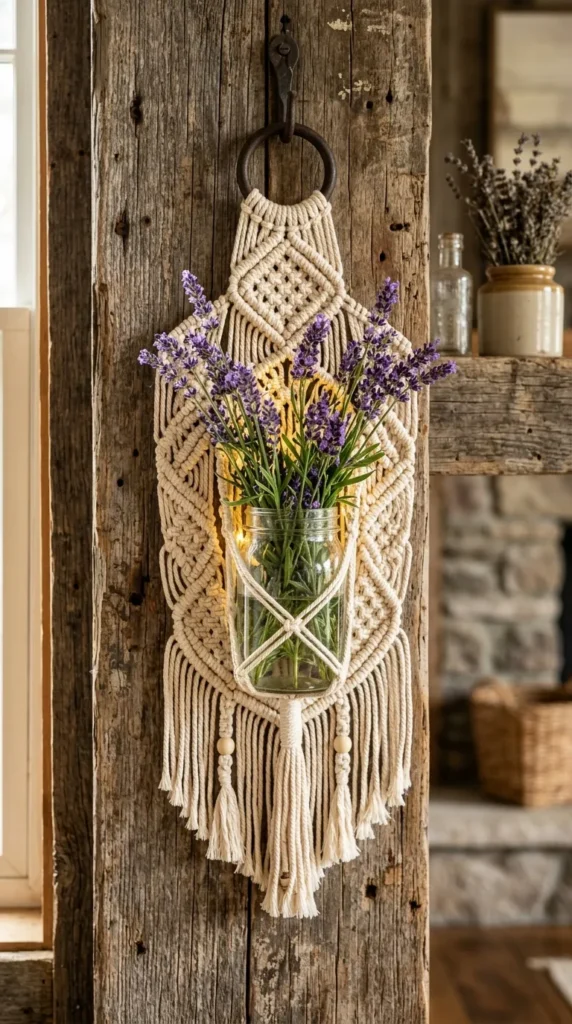
8. Geometric Diamond Knot Wall Sconce
What This Idea Means
Designed to hang flat against a wall or wooden board, the Geometric Diamond Knot Wall Sconce acts as a wall-mounted glass vase or candle holder. It features a decorative diamond-shaped macrame back panel crafted from diagonal Double Half-Hitch knots that frames the glass jar, transforming simple glass into a wall art feature.
Supplies Needed
- Cord: 4mm 3-ply cotton rope (20 meters total, cut into 10 pieces of 2 meters)
- Hardware: 1 wooden dowel or branch (8 inches long, 0.75-inch thickness)
- Container: Flat-backed or half-round glass wall jar, or standard 16 oz mason jar
- Tools: Scissors, tape measure, wall hook
How to Make It
- Mount to Dowel: Secure all 10 cords to the wooden dowel using Lark’s Head knots (20 working cords total).
- Form Diamond Frame: Using the outer cords as filler strands, work diagonal Double Half-Hitch knots inward from both sides to form the top half of a large diamond shape.
- Center Mesh Netting: Inside the diamond frame, create a small diamond net using 4 Square Knots to hold the center front of the glass jar body.
- Close the Diamond: Complete the bottom half of the outer diamond frame by working diagonal Double Half-Hitch knots back toward the center point.
- Secure the Base: Bind all cords together underneath the jar with a wide, flat wrap knot. Trim the bottom cords into a clean V-shaped fringe.
Tips and Variations
- Tip: Keep your filler cord pulled taut and at a steady 45-degree angle while tying Double Half-Hitch knots to achieve clean, crisp diamond lines.
- Variation: Mount the wooden dowel onto a reclaimed barnwood board for a rustic farmhouse look.
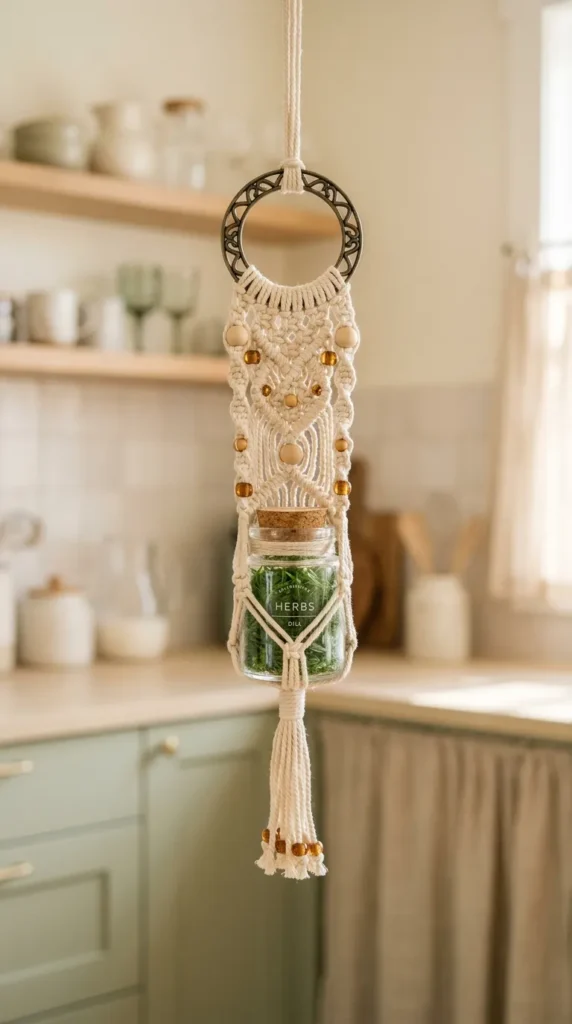
9. Beaded Chandelier Spice Jar Hanger
What This Idea Means
Designed for small glass containers like spice jars, small jam pots, or tiny essential oil bottles, this compact hanger incorporates decorative wooden or glass beads throughout the design. The result resembles a delicate mini chandelier that can be suspended under kitchen cabinets, in sunny breakfast nooks, or along curtain rods.
Supplies Needed
- Cord: 2mm cotton baker’s twine or fine macrame cord (10 meters total)
- Hardware: 1 small brass ring (1.5-inch diameter)
- Beads: 12 to 16 small colorful glass or painted wooden beads (8mm diameter)
- Container: 4 oz clear glass spice jar or mini mason jar
- Tools: Fine needle or bead threader, scissors, ruler
How to Make It
- Mounting: Attach 6 cords (each 1.5 meters long) to the brass ring with Lark’s Head knots (12 working strands).
- Upper Bead Ring: Thread 1 bead onto every pair of cords, securing each bead with an Overhand Knot directly below it.
- Chandelier Netting: Divide adjacent cord pairs and space out small Alternating Square Knots 1 inch below the beads to form a snug net around the small spice jar.
- Lower Bead Accent: Thread a final accent bead onto each individual cord tail directly beneath the jar base knot.
- Trim: Secure all cords at the base with a tight Gathering Knot and cut the tassel short (1.5 inches long) for a compact silhouette.
Tips and Variations
- Tip: Dip the ends of thin cotton cords into clear nail polish or craft glue and let them dry to form stiff tips that easily pass through small bead holes.
- Variation: Use this design in the kitchen to hold fresh cut herbs like rosemary, thyme, or mint within arm’s reach of your cooking space.
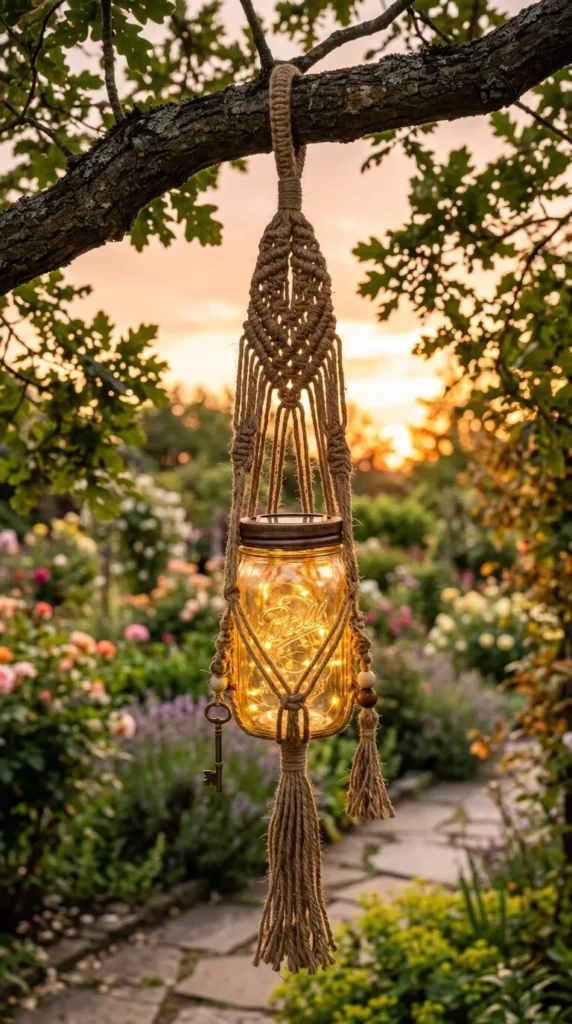
10. Rustic Jute Twin-Strand Outdoor Lantern
What This Idea Means
Built for outdoor durability, weather resistance, and earthy texture, the Rustic Jute Twin-Strand Lantern utilizes natural jute twine or hemp cord. The rough texture of jute grips the smooth surface of glass jars exceptionally well, preventing slippage in windy outdoor conditions such as patios, pergolas, or garden branches.
Supplies Needed
- Cord: 3.5mm natural jute twine or hemp cord (14 meters total, cut into 4 double strands of 3.5 meters)
- Hardware: 1 galvanized steel ring or thick outdoor S-hook
- Container: Heavy-duty 32 oz wide-mouth canning jar
- Lighting: Waterproof LED pillar candle or solar lid insert
- Tools: Heavy-duty scissors, work gloves (jute can be abrasive on hands)
How to Make It
- Mounting Cords: Fold the four double strands of jute in half and secure them to the steel ring using Lark’s Head knots (8 double-strand working cords).
- Heavy-Duty Neck Wrap: Measure down 6 inches from the ring and create a wide Gathering Knot using a 30-inch piece of jute twine to form a strong upper hanging loop.
- Simple Diamond Harness: Divide cords into 4 groups of 2 double-strands. Tie simple, firm Overhand Knots spaced 2 inches apart down the body of the jar.
- Base Cross: Cross the double cords tightly across the bottom base of the heavy jar in an ‘X’ pattern.
- Final Secure Knot: Tie a tight double-wrap knot at the base center. Leave a rough, natural 3-inch frayed jute tassel at the bottom.
Tips and Variations
- Tip: Wear thin garden gloves while working with jute twine to protect your hands from rough fibers during repetitive knotting.
- Variation: Add a solar-powered mason jar lid insert so the outdoor lantern automatically illuminates at dusk.
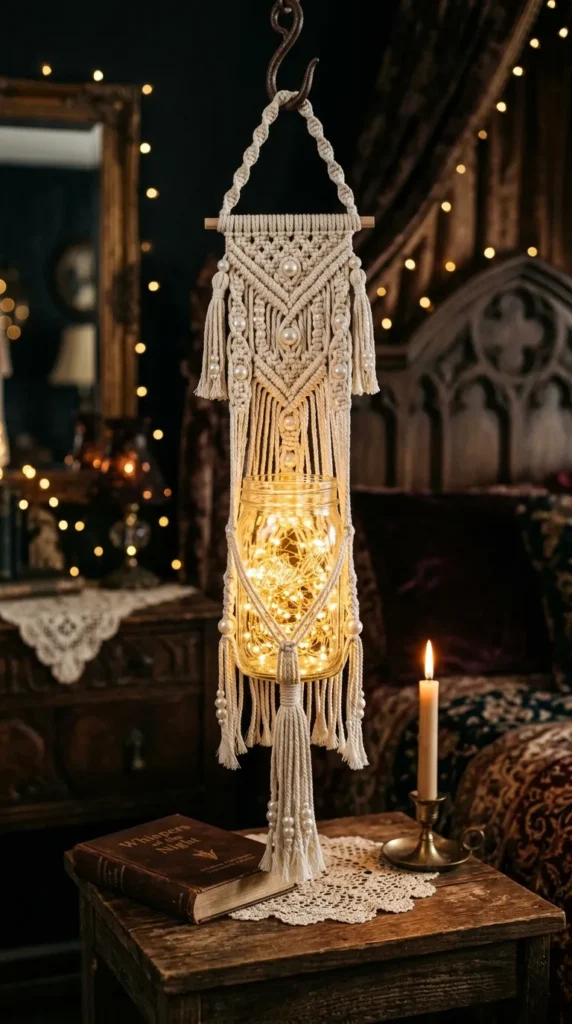
11. Vintage Pearl & Cord Fairy Light Jar
What This Idea Means
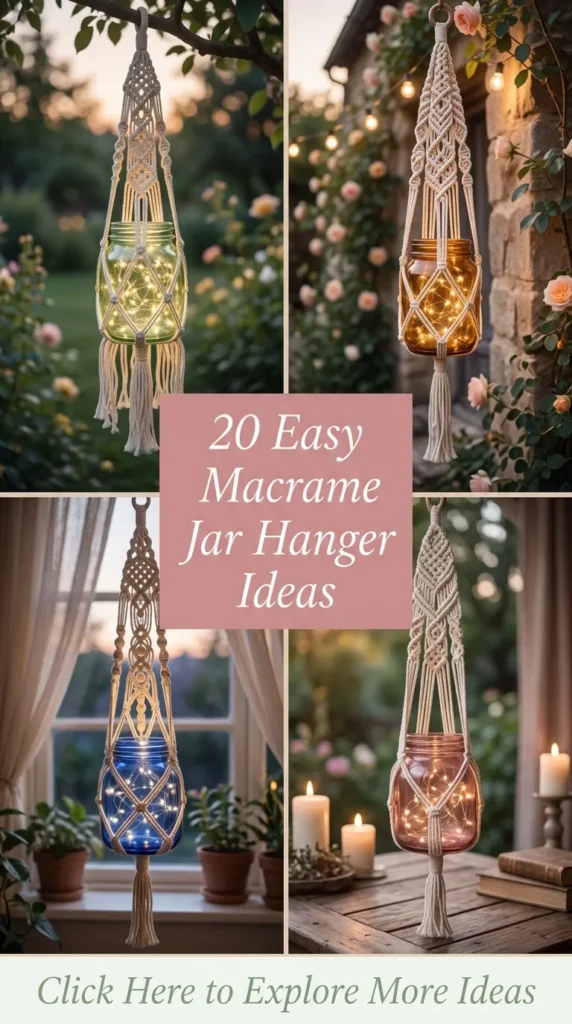
This romantic, vintage-inspired design combines soft cream-colored macrame cord with faux pearls or iridescent beads. When a string of micro copper-wire fairy lights is placed inside the glass jar, the light refracts through the glass and catches the pearls, creating a soft, magical ambiance ideal for bedroom nightstands, wedding decor, or cozy reading nooks.
Supplies Needed
- Cord: 3mm soft cream cotton cord (14 meters total, cut into 8 strands of 1.75 meters)
- Hardware: 1 brass or antique gold metal ring (2-inch diameter)
- Beads: 8 to 12 faux pearl beads (10mm diameter with wide holes)
- Container: Vintage-style clear or pink tinted glass jar
- Lighting: 10-foot warm-white LED copper wire fairy lights (battery operated)
- Tools: Scissors, tape, fine comb
How to Make It
- Ring Mount: Attach the 8 strands to the brass ring using Lark’s Head knots (16 working cords).
- Knot & Pearl Pattern: Tie a 2-inch band of Alternating Square Knots. Slide a pearl bead onto the center filler cords of every second square knot group.
- Wrap Netting: Continue down the jar body with open Alternating Square Knots spaced 1.5 inches apart, allowing plenty of open glass space for light projection.
- Base Wrap: Secure the base with a refined Gathering Knot using cream cord.
- Style Tassel: Comb out the bottom tassel smooth and trim straight across.
- Illuminate: Coil the battery-powered fairy lights loosely inside the jar, tucking the small battery box discreetly under the top lid or behind the macrame netting.
Tips and Variations
- Tip: Choose warm white LED fairy lights rather than cool white to match the warm tones of cream cotton and brass accents.
- Variation: Replace clear glass with a vintage amber jar for a warm, autumnal golden glow.
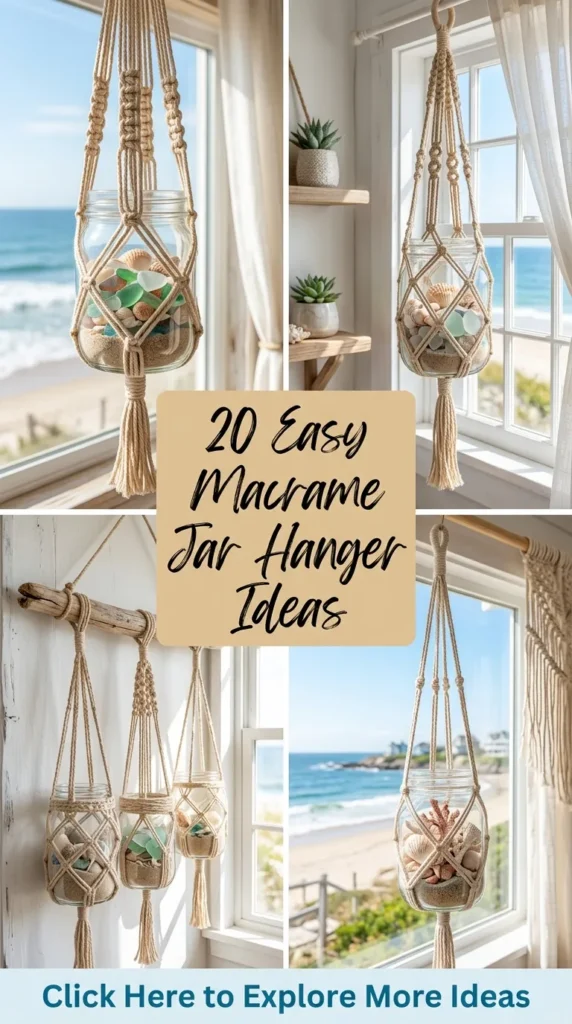
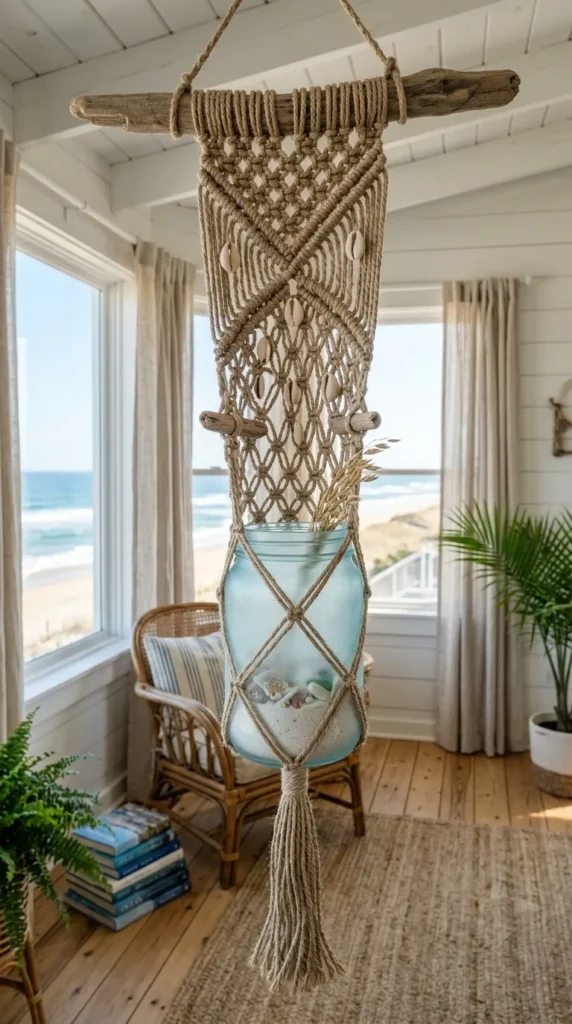
12. Shell & Sea-Glass Coastal Jar Hanger
What This Idea Means
Bring coastal beach vibes indoors with a macrame jar hanger that incorporates natural sea shells, sea glass, or driftwood accents. The design uses light sand-colored cord tied in open netting that mirrors traditional fisherman nets, making it a perfect accent piece for beach houses, sunrooms, or nautical bathroom decor.
Supplies Needed
- Cord: 3mm natural flax or linen cord in sand/beige tone (15 meters total)
- Hardware: 1 piece of smooth beach driftwood (5–6 inches long) or raw wooden ring
- Accents: Drilled cowrie shells, sea glass charms, or small starfish
- Container: Clear or turquoise-tinted glass jar
- Tools: Craft wire/thread for attaching shells, scissors, measuring tape
How to Make It
- Dowel/Driftwood Attachment: Attach 8 lengths of flax cord to your driftwood piece using Lark’s Head knots.
- Fisherman Net Knotting: Tie open Overhand Knots in an alternating diamond pattern spaced 2 inches apart to replicate authentic fishing nets.
- Incorporate Shells: Thread a drilled cowrie shell onto outer accent cords at key intersections of the net diamond pattern.
- Jar Insertion: Slide the turquoise glass jar into the open fisherman net harness.
- Base Closure: Gather cords tightly beneath the jar base and secure with a wrapped knot. Accent the tassel ends by tying small sea glass charms onto individual cords.
Tips and Variations
- Tip: Fill the bottom inch of the glass jar with beach sand and small seashells before adding a candle or plant stem.
- Variation: Use aqua or soft blue cord instead of sand-colored linen to emphasize ocean tones.
13. Half-Hitch Wrapped Neck Herb Pot
What This Idea Means
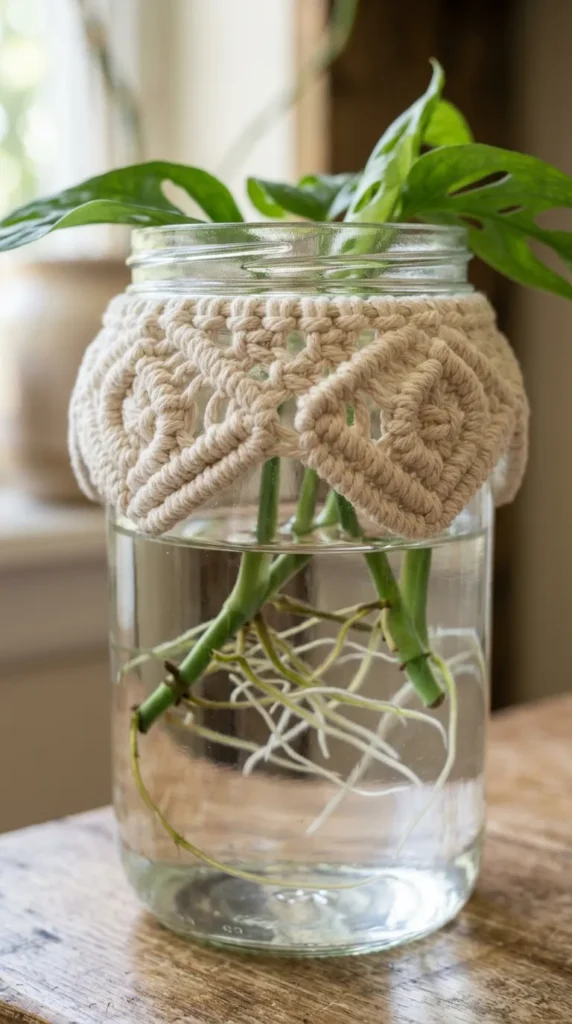
Unlike hangers that encase the entire glass body in netting, the Half-Hitch Wrapped Neck design focuses decorative knotting exclusively around the collar and rim of the jar. Beautiful horizontal and diagonal Half-Hitch bands form a decorative collar, while simple drop-cords hold the jar safely from underneath. This leaves the main glass body completely clear for viewing soil layers, root growth, or water in propagation jars.
Supplies Needed
- Cord: 3mm 3-ply cotton cord (12 meters total)
- Hardware: 1 metal ring or S-hook
- Container: Clear glass jar with a defined shoulder/lip (like a canning jar)
- Tools: Scissors, measuring tape
How to Make It
- Top Ring Setup: Attach 8 cords to your hanging ring using Lark’s Head knots.
- Long Drop Strands: Run straight vertical cords down to the jar neck (approx. 6–8 inches depending on desired drop height).
- Dense Neck Collar: At the lip of the jar, tie a continuous series of horizontal Double Half-Hitch knots around a horizontal filler cord, wrapping tightly around the jar rim.
- Diagonal Hitch Accent: Work a second row of diagonal half-hitches directly below the rim to create a woven cuff.
- Simple Base Cradle: Drop 4 pairs of cords straight down the sides of the jar and cross them underneath the base, securing with a small flat knot at the bottom center.
Tips and Variations
- Tip: Ensure the half-hitch collar band is tied tightly under the glass rim lip so the jar cannot slide upward or out of the harness.
- Variation: Use this layout for plant propagation so you can monitor water clarity and root development without removing the macrame harness.
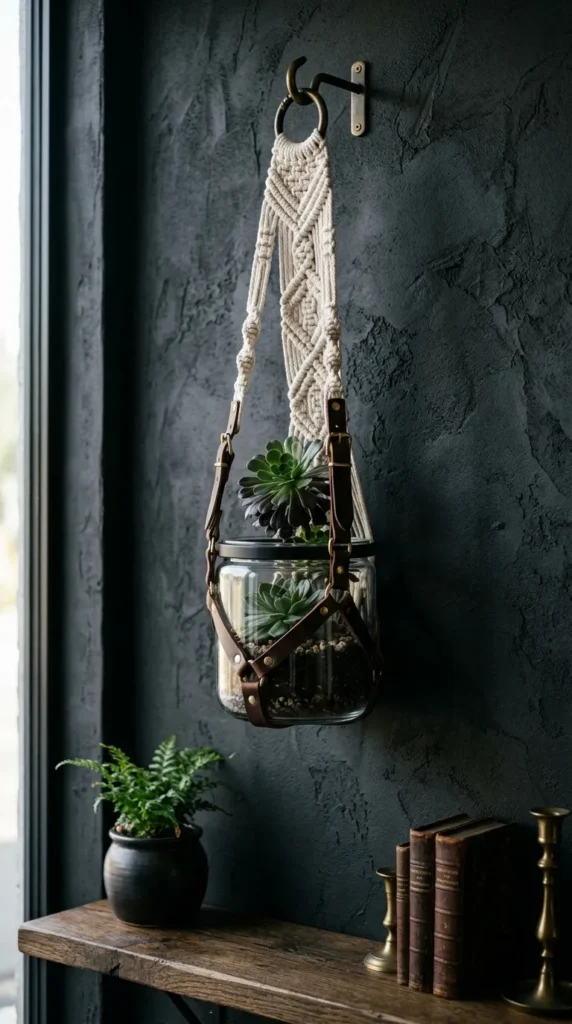
14. Leather Cord & Cotton Hybrid Hanger
What This Idea Means
This modern rustic design blends soft unbleached cotton cord with genuine or faux leather cordage. The contrast between matte fiber cotton and sleek leather accents creates an elevated, boutique aesthetic. It works wonderfully in modern mid-century, industrial, or minimalist urban apartments.
Supplies Needed
- Cord: 3mm natural cotton cord (10 meters) + 2mm flat leather or suede lace (6 meters)
- Hardware: 1 matte black metal ring (2-inch diameter)
- Container: 16 oz or 32 oz straight-sided glass jar
- Tools: Leather punch or sharp scissors, tape measure
How to Make It
- Hybrid Mount: Mount 4 cotton cords and 4 leather cords alternately onto the black metal ring using Lark’s Head knots.
- Alternating Knot Pattern: Tie Square Knots where cotton cords act as the outer working cords over leather inner filler cords. This creates a subtle hint of leather peeking through the cotton knots.
- Leather Accent Bands: Swap cord roles halfway down the jar body: use leather cord to wrap around cotton filler cords.
- Base Wrap: Secure the bottom of the jar with a sleek leather cord Wrap Knot.
- Tail Styling: Leave the leather and cotton cord ends unbrushed for a crisp, mixed-material fringe.
Tips and Variations
- Tip: Condition leather cord lightly with beeswax before knotting to make it supple and prevent cracking while pulling knots tight.
- Variation: Pair dark brown leather with natural white cotton, or black leather cord with mustard yellow cotton.
15. Tasseled Fairy Garden Terrarium Pod
What This Idea Means
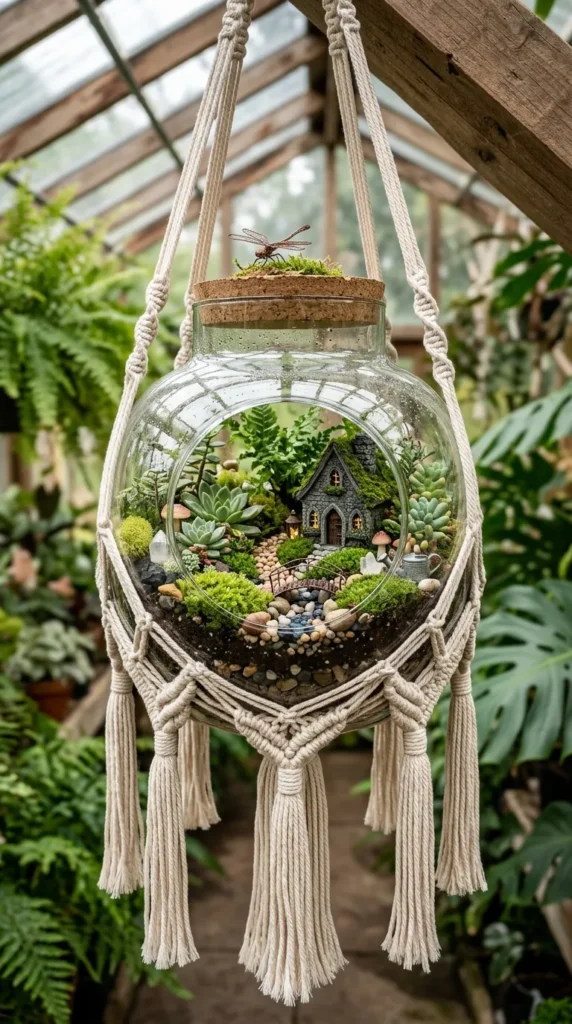
Transform a large glass jar into a whimsical suspended fairy garden or moss terrarium. This hanger design features a wide-opening basket structure topped with a decorative crown and finished with multi-layered, thick tassels around the base, creating a fairy-tale garden pod aesthetic.
Supplies Needed
- Cord: 4mm single-strand cotton cord (20 meters total)
- Hardware: 1 wooden ring (3-inch diameter)
- Container: Large 64 oz wide-mouth gallon jar or glass fishbowl jar
- Terrarium Materials: Small pebbles, activated charcoal, potting soil, moss, mini succulents/ferns
- Tools: Comb, scissors, tape measure
How to Make It
- Upper Crown: Mount 8 long cords onto the wooden ring. Work 3 inches of tight Crown Knots to create a thick decorative rope hanger section.
- Wide Basket Expansion: Expand cords outward around the top curve of the large jar. Tie wide Alternating Square Knots spaced 2 inches apart to accommodate the jar width.
- Jar Netting: Continue the open square knot mesh down the body of the large terrarium jar.
- Heavy Base Closure: Gather all strands underneath the center base and bind with a wide 3-inch Gathering Knot.
- Multi-Layer Tassel: Cut extra 8-inch pieces of cotton cord and tie them into the base gathering knot to create a double-layered, ultra-thick decorative tassel. Brush out with a comb.
- Plant Terrarium: Build your mini living terrarium inside the glass jar with drainage pebbles, soil, moss, and small shade-loving plants.
Tips and Variations
- Tip: Add a layer of activated charcoal between pebbles and soil inside the glass jar to keep terrarium soil fresh and odor-free.
- Variation: Place mini miniature figurines or crystals inside the moss garden for an enchanted forest feel.
16. Color-Blocked Pastel String Pot
What This Idea Means
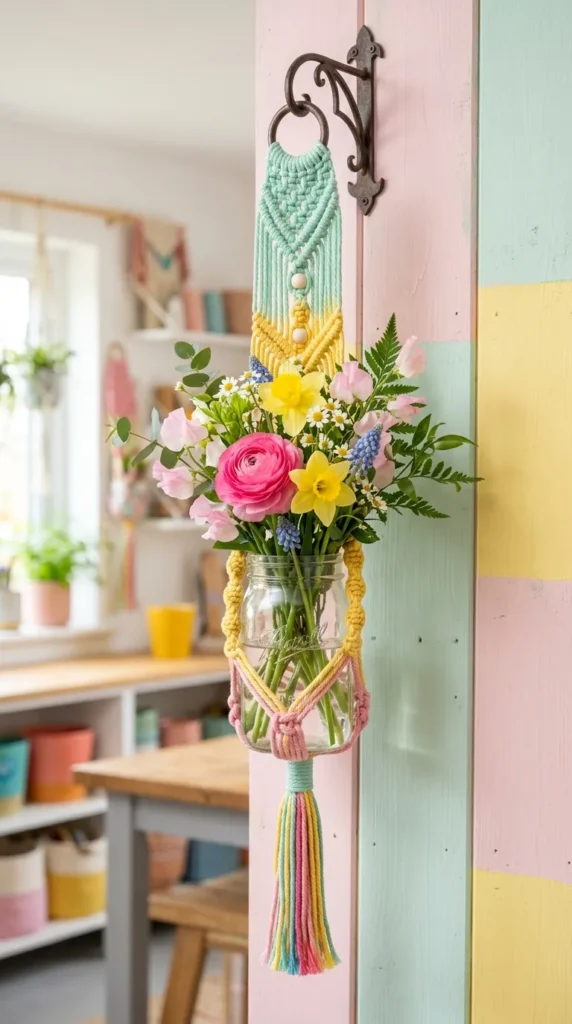
Infuse playfulness and color into your interior spaces with a color-blocked macrame hanger. Using two or three coordinating pastel shades of macrame cord (such as blush pink, mint green, and soft lemon yellow), this design divides the hanger into distinct horizontal color sections for a contemporary aesthetic.
Supplies Needed
- Cord: 3mm cotton cord in 3 complementary pastel colors (6 meters of each color)
- Hardware: 1 white acrylic or painted wooden ring
- Container: Smooth white or clear glass jar
- Tools: Scissors, measuring tape, craft glue
How to Make It
- Top Section (Color A): Mount Color A cords onto the top ring. Work 4 inches of Square Knots.
- Middle Section Transition (Color B): Attach Color B cords to Color A using precise Wrapping Knots or Square Knot splicing techniques. Work 4 inches of Alternating Square Knots down the top half of the jar.
- Lower Section Transition (Color C): Splice in Color C cords and wrap around the bottom curvature of the glass jar.
- Base Wrap: Secure the base with a clean Gathering Knot in Color C.
- Fringe: Trim the tassel ends to reveal a multi-colored layered fringe effect.
Tips and Variations
- Tip: Secure cord splice joints on the inner side of knots with a tiny dab of clear craft glue for invisible, durable transitions.
- Variation: Swap soft pastels for bold neon colors or deep jewel tones (emerald, navy, and plum) depending on your room color palette.
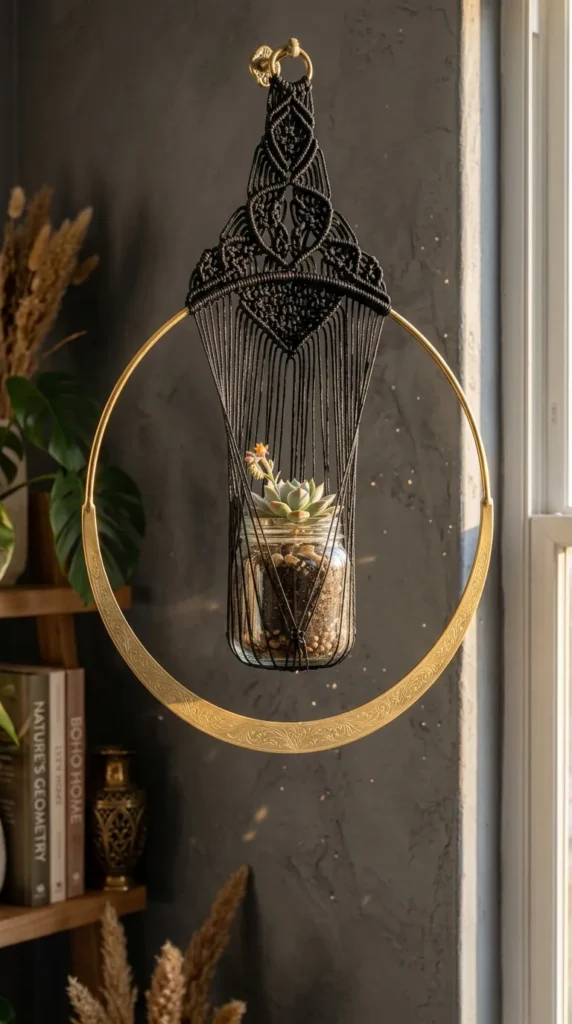
17. Metallic Hoop Suspended Glass Globe
What This Idea Means
This sleek, modern decor design suspends a glass jar inside a large metal embroidery hoop or floral hoop ring using macrame cords. The metallic outer hoop frames the hanging glass jar like an astronomical orb or floating suncatcher, blending geometric metalwork with soft fiber art.
Supplies Needed
- Cord: 3mm single-strand cotton or metallic cord (12 meters total)
- Hardware: 1 large metal hoop (8-inch or 10-inch diameter, gold or brass finish)
- Container: Medium spherical glass globe jar or wide-mouth rounded jar
- Tools: Scissors, tape measure, pliers if needed
How to Make It
- Top Hoop Mount: Attach 4 central cords to the top inner rim of the metal hoop using Lark’s Head knots.
- Central Strand Drop: Work simple Square Knots dropping straight down through the center diameter of the hoop.
- Jar Cradle Netting: At the vertical center point of the hoop, expand cords to form a small 4-strand net harness holding the glass jar suspended right in the middle of the hoop frame.
- Bottom Hoop Anchor: Secure the cords at the bottom rim of the metal hoop with tight Double Half-Hitch knots, anchoring the jar stability.
- Bottom Tassel: Allow remaining cord ends to drop below the outer metal hoop in a sleek 6-inch hanging tassel.
Tips and Variations
- Tip: Ensure the glass jar diameter is at least 3 inches smaller than the hoop diameter so it floats centered inside the hoop ring.
- Variation: Wrap green artificial eucalyptus garland around half of the metal hoop rim for a botanical frame.
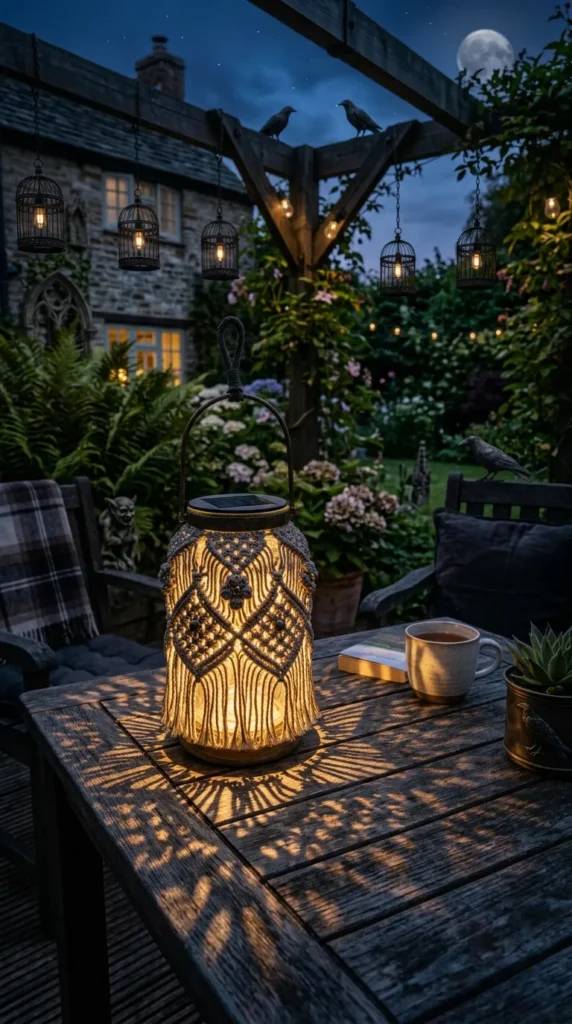
18. Berry Knot & Wooden Ring Solar Lantern
What This Idea Means
Berry Knots (also called Button Knots or Bobble Knots) add rich 3D texture to macrame projects. This solar lantern design features raised berry knots woven throughout the harness. Paired with a solar LED jar lid insert, it charges during the day under sunlight and projects textured geometric shadows across your porch or patio at night.
Supplies Needed
- Cord: 4mm 3-ply twisted cotton cord (18 meters total)
- Hardware: 1 wooden ring (2.5-inch diameter)
- Container: 16 oz or 32 oz mason jar with solar lid attachment
- Tools: Scissors, tape measure, crochet hook (helpful for pulling berry knots)
How to Make It
- Mounting: Attach 8 cords to the wooden ring with Lark’s Head knots (16 working cords).
- Tie Berry Knots: Work 1 Square Knot, then pass the two center filler cords up over the top of the knot and pull them through to roll the knot into a raised 3D ball (Berry Knot). Secure with a square knot underneath.
- Repeat Pattern: Space Berry Knots 2 inches apart in an alternating pattern down the jar body.
- Base Harness: Gather cords at the bottom of the glass jar and bind with a 2-inch Gathering Knot.
- Solar Attachment: Screw on the solar light lid and hang the jar in a sunny spot to charge.
Tips and Variations
- Tip: Pull filler strands tightly when rolling the Berry Knot to ensure the raised bobble stays firm and does not sag over time.
- Variation: Use bright amber or warm white solar LEDs for optimum nighttime shadow projection.
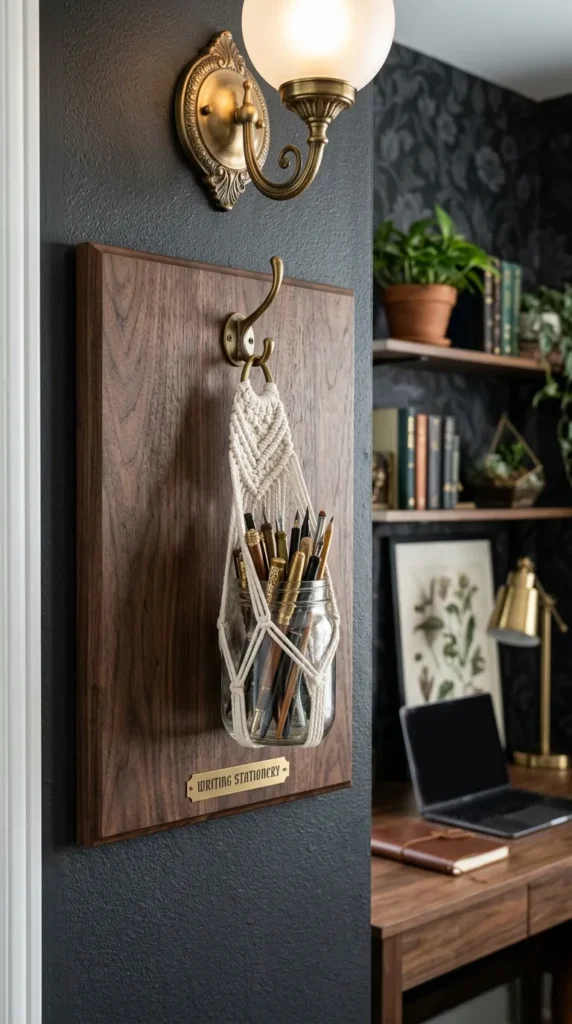
19. Wall-Mounted Wooden Slat Jar Hanger
What This Idea Means
Combine woodworking with macrame by mounting a short macrame jar hanger onto a finished wooden slat board. The wooden backing mounts flat to your wall while the macrame harness cradles a glass jar holding fresh flowers, stationery, or makeup brushes. It serves as an elegant space-saving organizer and decorative sconce.
Supplies Needed
- Cord: 3mm natural cotton cord (8 meters)
- Hardware: 1 small brass cup hook, 1 finished rectangular wooden board (e.g., 4×12 inches) with wall hanging hardware attached
- Container: 12 oz or 16 oz smooth glass jar
- Tools: Drill or screwdriver (for mounting hook to wood), scissors, measuring tape
How to Make It
- Prep Board: Screw the brass cup hook into the upper center face of the wooden board.
- Knot Hanger: Create a compact 10-inch macrame jar harness using alternating square knots attached to a 1-inch brass ring.
- Mount Hanger: Hang the macrame ring onto the brass cup hook on the wooden board.
- Insert Glass Jar: Nest your glass jar securely into the macrame net.
- Wall Mount: Secure the wooden board onto your wall using standard picture hanging hardware.
Tips and Variations
- Tip: Stain the wooden board with dark walnut or honey oak wood finish to make white cotton macrame cords pop with contrast.
- Variation: Mount three wooden slats side-by-side on your wall to create a floating three-jar propagation wall or spice rack.
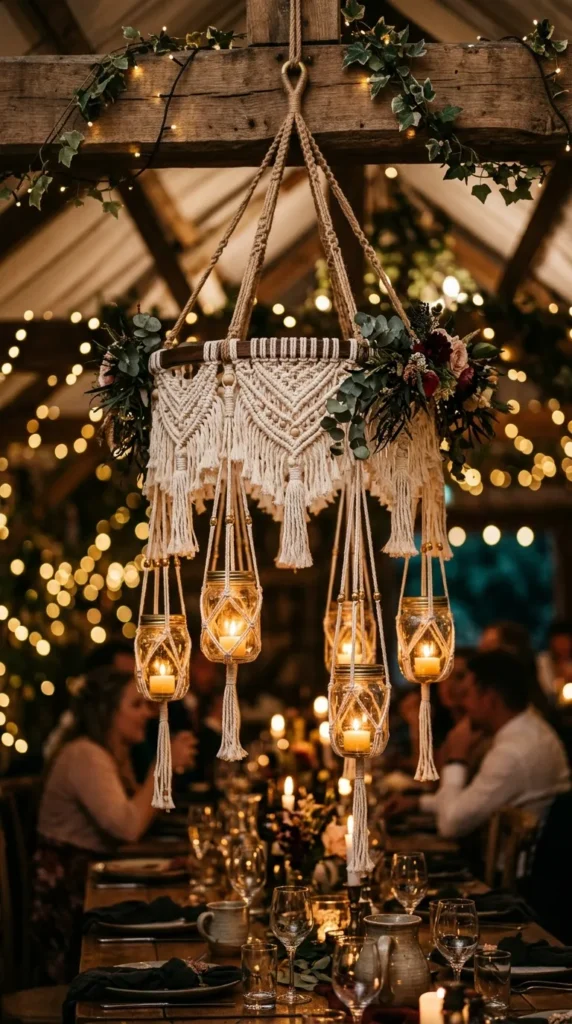
20. Macrame Ring Chandelier with Hanging Jars
What This Idea Means
The ultimate showstopper project: a multi-jar macrame ring chandelier. Suspended from a large central metal or wooden hoop, four to six small glass jars hang at cascading staggered heights. Illuminated with tealights or filled with trailing plants, this statement piece serves as an extraordinary centerpiece above dining tables, outdoor patios, or wedding altars.
Supplies Needed
- Cord: 4mm cotton rope (35 meters total)
- Hardware: 1 large central metal ring (12-inch diameter) + 1 top hanging ring (3-inch diameter)
- Containers: 4 to 6 matching small glass jars (8 oz jelly jars or mini mason jars)
- Lighting/Plants: LED votive candles or trailing indoor plants
- Tools: Scissors, tape measure, ceiling hook
How to Make It
- Upper Suspension: Attach 4 long main support ropes to the small top ring. Drop down 18 inches and attach them securely to 4 equidistant points around the 12-inch chandelier hoop using Double Half-Hitch knots.
- Jar Harnesses: Craft 4 to 6 separate mini macrame jar hangers of varying lengths (ranging from 8 inches to 16 inches long).
- Attach Jars to Hoop: Mount the individual mini jar hangers around the perimeter of the 12-inch chandelier hoop at staggered drop heights.
- Balance Check: Hang the chandelier from a ceiling hook and adjust cord placements on the hoop ring until it hangs perfectly level.
- Fill Jars: Place LED tealight candles or trailing green plants inside each suspended glass jar.
Tips and Variations
- Tip: Always use LED battery candles instead of real wax candles when creating multi-tiered hanging structures for safety and cleanliness.
- Variation: Weave faux ivy or dried floral garlands around the main 12-inch chandelier ring to complement the hanging jars.